


W2000 Rebel
®
– 11
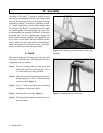
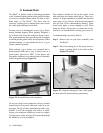
A. Router Table Insert
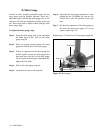
Located in the four corners of the insert ledge on the
table are four holes. These holes are threaded to accept
the 10-32 x
3
⁄4" setscrews provided. Figure 14. The
setscrews are turned in or out from underneath to
adjust router table insert flush with the table.
III. Adjustments
To adjust the router table insert:
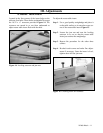
Step 1 - Use a good quality straightedge and place it
on the table surface so it rests above one cor-
ner of the router table insert. Figure 15.
Step 2 - Loosen the jam nut and turn the leveling
setscrew in or out so that the router table
insert just touches the straightedge.
Step 3 - Repeat this procedure for the other three
corners.
Step 4 - Re-check each corner and make fine adjust-
ments if necessary. Once the insert is level,
tighten down all four jam nuts.
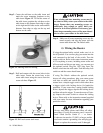
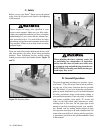
Figure 14. Leveling setscrew and jam nut.
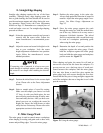
Figure 15. Checking insert for flushness.