


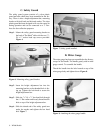
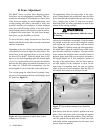

W2000 Rebel
®
– 7
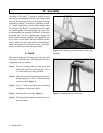
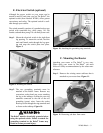
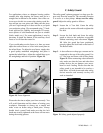
Figure 4. Attaching the fence.
The Rebel
®
has a two-part, split fence designed for
either straight-line or offset shaping. Assembling the
fence is quite simple and straightforward.
Step 1 - Choose one of the fence halves. Select two
fence lock handles and insert the threaded
ends into the
1
/4'' flat washers and two holes
on the bottom of the fence. Select two T-nuts
and loosely thread onto the ends of the lock
knobs. Line up the T-nuts with the slots in the
router table and slide the fence onto the router
table. Figure 4. Roughly lock the fence in
position. Repeat this process for the other
fence half.
B. Fence
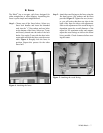
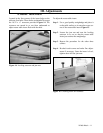
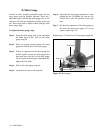
Step 2 - Attach the wood facings to the fence using the
flat head screws, flat washers and hex nuts
provided. Figure 5. Tighten for now; howev-
er, you will notice that there are slots in the
back of the fence for side to side adjustment.
Side to side adjustment of the wood facings is
dependent upon the overall diameter of the
router bit. For maximum safety and support,
adjust the wood facings as close to the router
bit as possible. Check clearance before start-
ing the router.
Figure 5. Attaching the wood facing.