


For Machines Mfg. Since 3/11 Turn-Nado
®
Gearhead Lathes
-83-
SERVICE
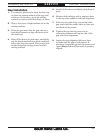
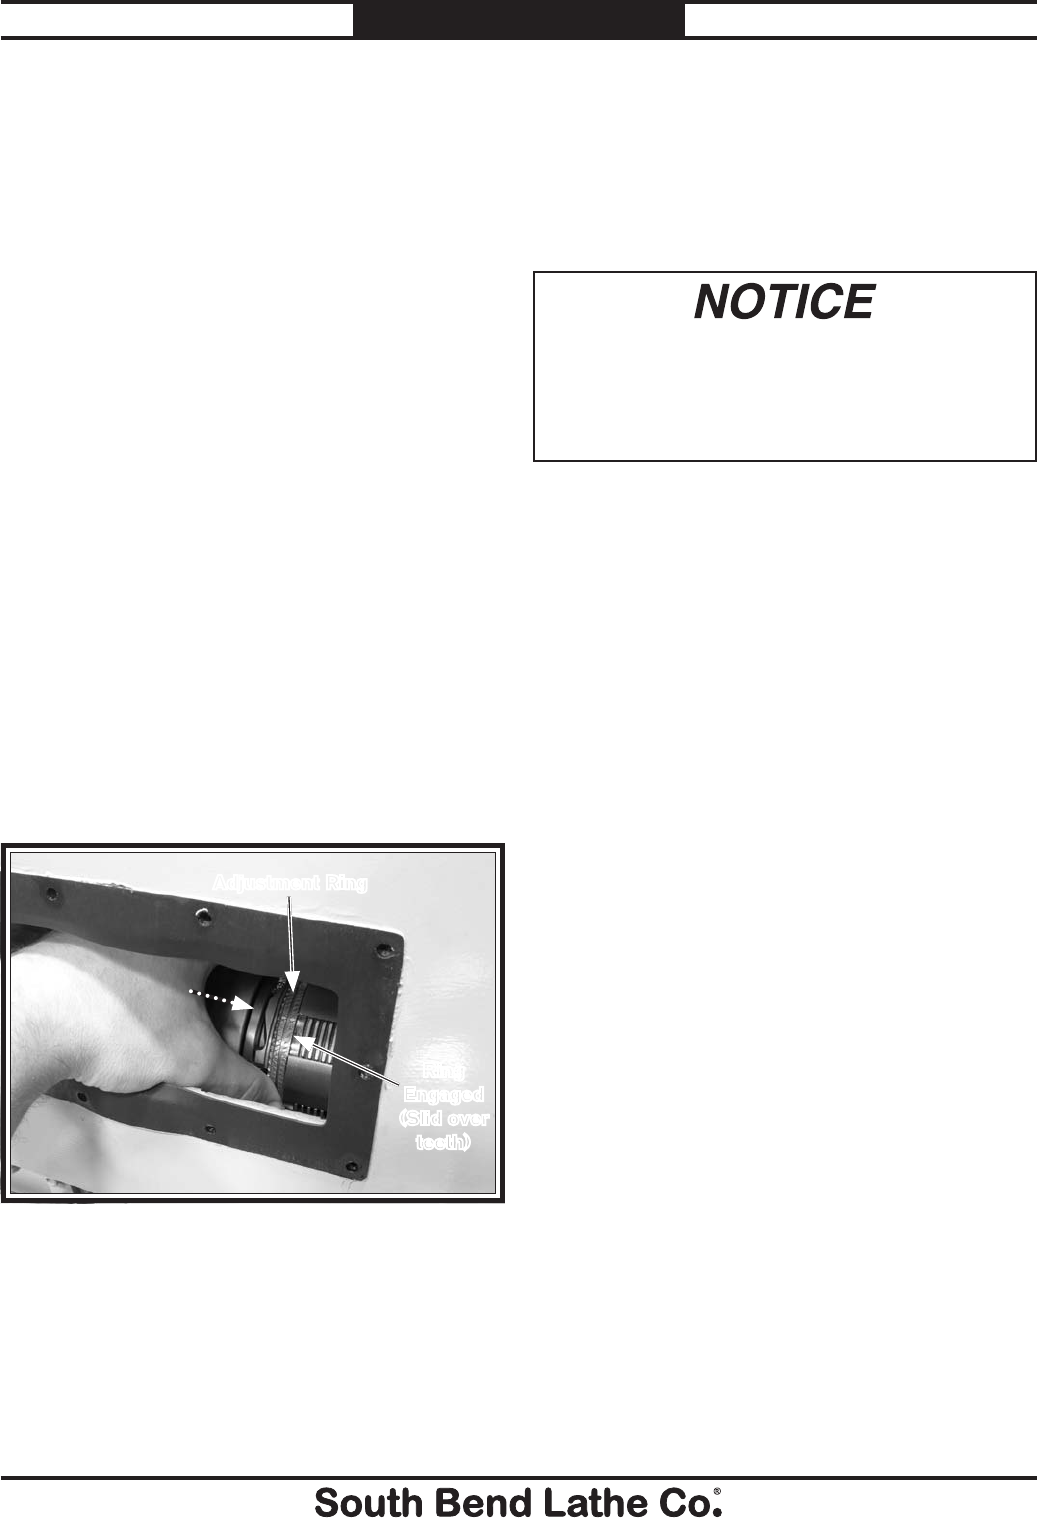
8. Loosen the appropriate adjustment ring one
notch, then remove your hand from inside
the headstock. Have an assistant try to
engage the troublesome lever position while
you manually rotate the input pulley on the
headstock. DO NOT rotate the pulley while
your hands are inside the headstock.
Tip: When rotating the adjustment ring, hold
the adjustment ring stationary and rotate the
input pulley to make the adjustment.
Continue loosening and testing until the
lever engages the troublesome position.
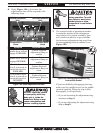
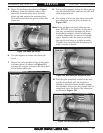
When you are satisfied with the loosened
setting, slide the adjustment ring towards
its clutch assembly to lock it in position (see
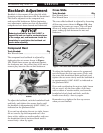
Figure 126). Skip to Step 10.
Figure 126. Engaging adjustment ring (reverse side
shown).
Adjustment Ring
Ring
Engaged
(Slid over
teeth)
10. Replace the clutch access cover, pivot the
electrical cabinet back into position and
secure it with the fasteners removed in Step
3. If you removed the chuck guard safety
switch or work lamp, replace them.
11. Re-connect the lathe to power, then check
the function of the lathe. Test on the highest
speed setting allowed for the chuck being
used. Use a 3-jaw chuck with no workpiece
mounted. The spindle should take no more
than 3–4 seconds to reach full speed. Repeat
the clutch adjustment procedure as needed.
9. Tighten the adjustment ring one notch, then
slide the adjustment ring towards its clutch
assembly to lock it in position.
Tip: When rotating the adjustment ring, hold
the adjustment ring stationary and rotate the
input pulley to make the adjustment.
Do not attempt to over-tighten the clutch
to reduce spin-up time. 3-4 seconds is the
normal time required for the spindle to reach
full speed. Overtightening the clutch may
result in damage and improper lathe function.