


16 ► RD12 User Manual
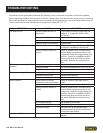
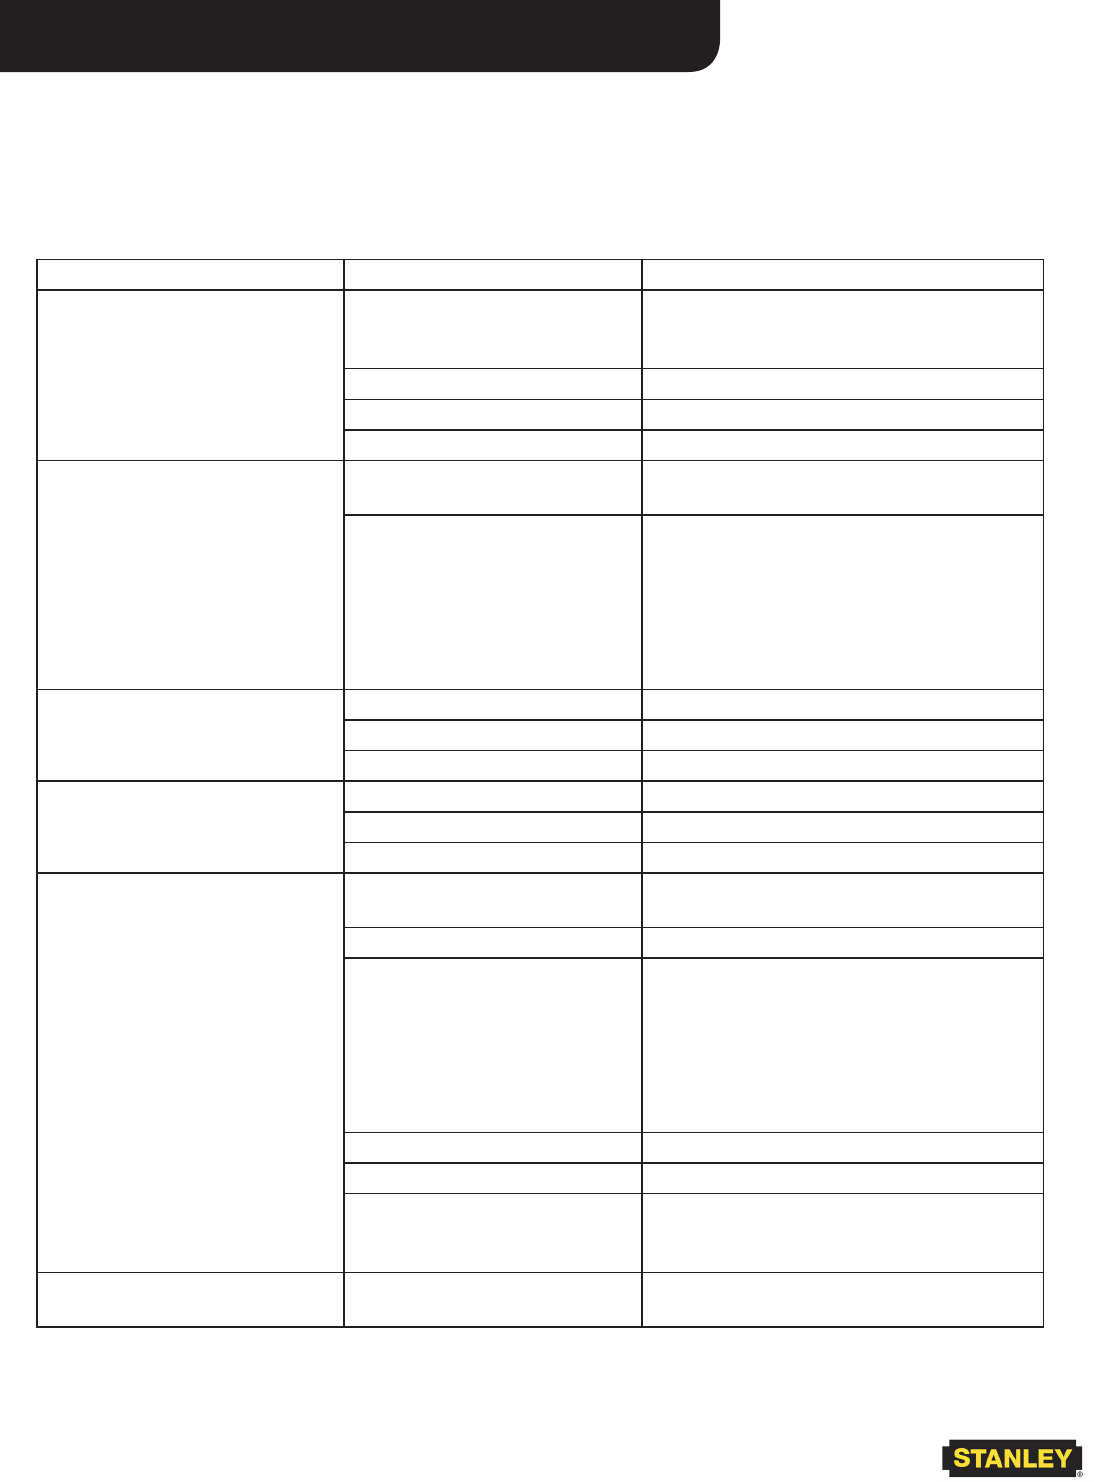
TROUBLESHOOTING
If symptoms of poor performance develop, the following chart can be used as a guide to correct the problem.
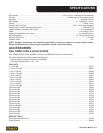
When diagnosing problems with operation of the drill, always check that the hydraulic power source is supplying
the correct hydraulic ow and pressure to the tool as listed in the specications. Use a owmeter known to be ac-
curate. Check the ow with the hydraulic oil temperature at least 80 °F/27 °C.
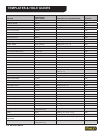
PROBLEM CAUSE SOLUTION
Drill does not run. Hydraulic power source not
functioning.
Check power source for proper ow and
pressure, 8–10 gpm/30–38 lpm, 2000
psi/140 bar.
Couplers or hoses blocked. Locate and remove restriction.
Hydraulic motor failure. Inspect and repair.
Hydraulic lines not connected. Connect lines.
Drill bit dulls quickly. Incorrect oil ow. Check that 8–10 gpm/30–38 lpm at 2000
psi/140 bar is available at the rail drill.
Using insufcient amount of
coolant.
Rotate or replace insert. Increase ow of
coolant. Make sure pressure tank is fully
pumped up. Check for plugged water port
in drill bit. Check for a clogged inlet lter.
Remove pipe plug in end cap and ush
with water. Remove end cap and clean
lter.
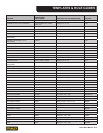
Drill moves on rail during drilling
operation.
Not clamped properly. See clamping instructions.
Wrong templates. Use correct templates and verify t to rail.
Template knob(s) not tight Tighten knobs securely.
Drill vibrates during drilling. Inserts dull or damaged. Rotate or replace inserts.
Template knob(s) loose. Tighten knobs securely.
Not clamped properly. See clamping instructions.
Inserts chipped. Some chipping is normal,
particularly on the inside insert.
Rotate or replace if poor hole nish is
noted.
Incorrect template. Use correct template and verify t.
Using insufcient amount of
coolant.
Rotate or replace insert. Increase ow of
coolant. Make sure pressure tank is fully
pumped up. Check for plugged water port
in drill bit. Check for a clogged inlet lter.
Remove pipe plug in end cap and ush
with water. Remove end cap and clean
lter.
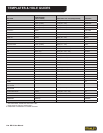
Not clamped properly. See clamping instructions.
Template knob(s) loose Tighten knob(s) securely.
Handling damage. Make sure drill bit is retracted when
installing the drill on the rail. Avoid insert
contact with hard objects.
Insert screw difcult to remove. Not assembled with lubricant. Install screw with anti-seize lubricant on the
threads.