


English
Always spray at minimum pressure with the gun nozzle tip
removed when using mineral spirits or any other solvent
to clean the pump, hose, or gun. Static electricity buildup
may result in a fire or explosion in the presence of
flammable vapors.
Flushing the Unit
Flush the unit with the solvent appropriate to the material
being used after daily use (use solvents at room temperature).
The unit should then be flushed again with mineral spirits.
For long term storage, flush the unit with an appropriate oil
before storing.
1. Follow the pressure relief procedure found earlier in this
manual.
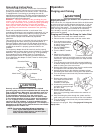
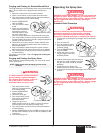
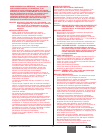
2. Turn the PRIME/SPRAY
valve to SPRAY to bleed
off any pressure
remaining in the pump.
3. Remove the gun tip and
clean with a solution
appropriate to the type of
material being sprayed.
4. Remove the material
container and replace it with a container of solvent
appropriate to the type of material being sprayed.
5. Check to be sure the pressure control knob is turned fully
counterclockwise to its lowest setting.
6. Turn the power switch to ON.
7. Trigger the spray gun into a waste container until solvent
comes out and the pump, hose, and gun are clean.
8. Follow the pressure relief procedure found earlier in this
manual.
9. Make certain that the power switch is turned to OFF.
10. Turn the PRIME/SPRAY valve to SPRAY to bleed off any
remaining solvent.
11. Unplug the unit and store in a clean, dry area.
Maintenance
Daily Maintenance
Perform the following procedures daily.
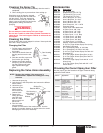
Filling the Packing Nut Reservoirs With Oil
Before you start to spray each day, squirt a
lubricant such as hydraulic oil into the slots in the
upper pump housing. Household oil and cooking
oil also work when hydraulic oil is not available.
This lubricant keeps the piston seals pliant, minimizing paint
bypass and piston wear. If the unit is operated several hours a
day, lubricate approximately every 4 hours.
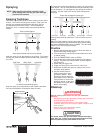
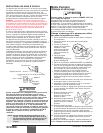
Cleaning the Intake Screen
1. Remove the intake
screen and clean with a
solvent appropriate to
the type of material
being used.
Suction Set
Intake Screen
NOTE: Do not apply so much that it
overflows and drips into the paint.
SPR
AY
PRIME
S
P
R
A
Y
P
R
IM
E
PRIME/SPRAY Valve
WARNING
Maintaining the Fluid Section
Servicing the fluid section includes replacing the T-lip
packings, the piston, and valve parts that show signs of wear.
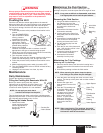
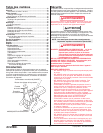
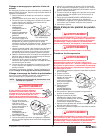
Removing the Fluid Section
1. Using a flat blade screwdriver, pry
the retaining ring out of the
bottom of the inlet valve housing
and remove the suction set
assembly.
2. Unscrew the fluid hose from the
fluid section assembly.
3. Loosen and turn the return line
fitting away from the fluid section
assembly.
4. Unscrew the 6 screws holding the
cover to the front of the pump
housing and remove the cover.
5. Pull the retaining clip from the
yoke and pin.
6. Push the pin out of the piston and
yoke. Use the short end of a hex
wrench if necessary.
7. Loosen the locknut at the top of
the fluid section assembly.
8. Unscrew the fluid section
assembly from the pump.
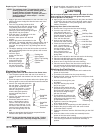
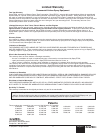
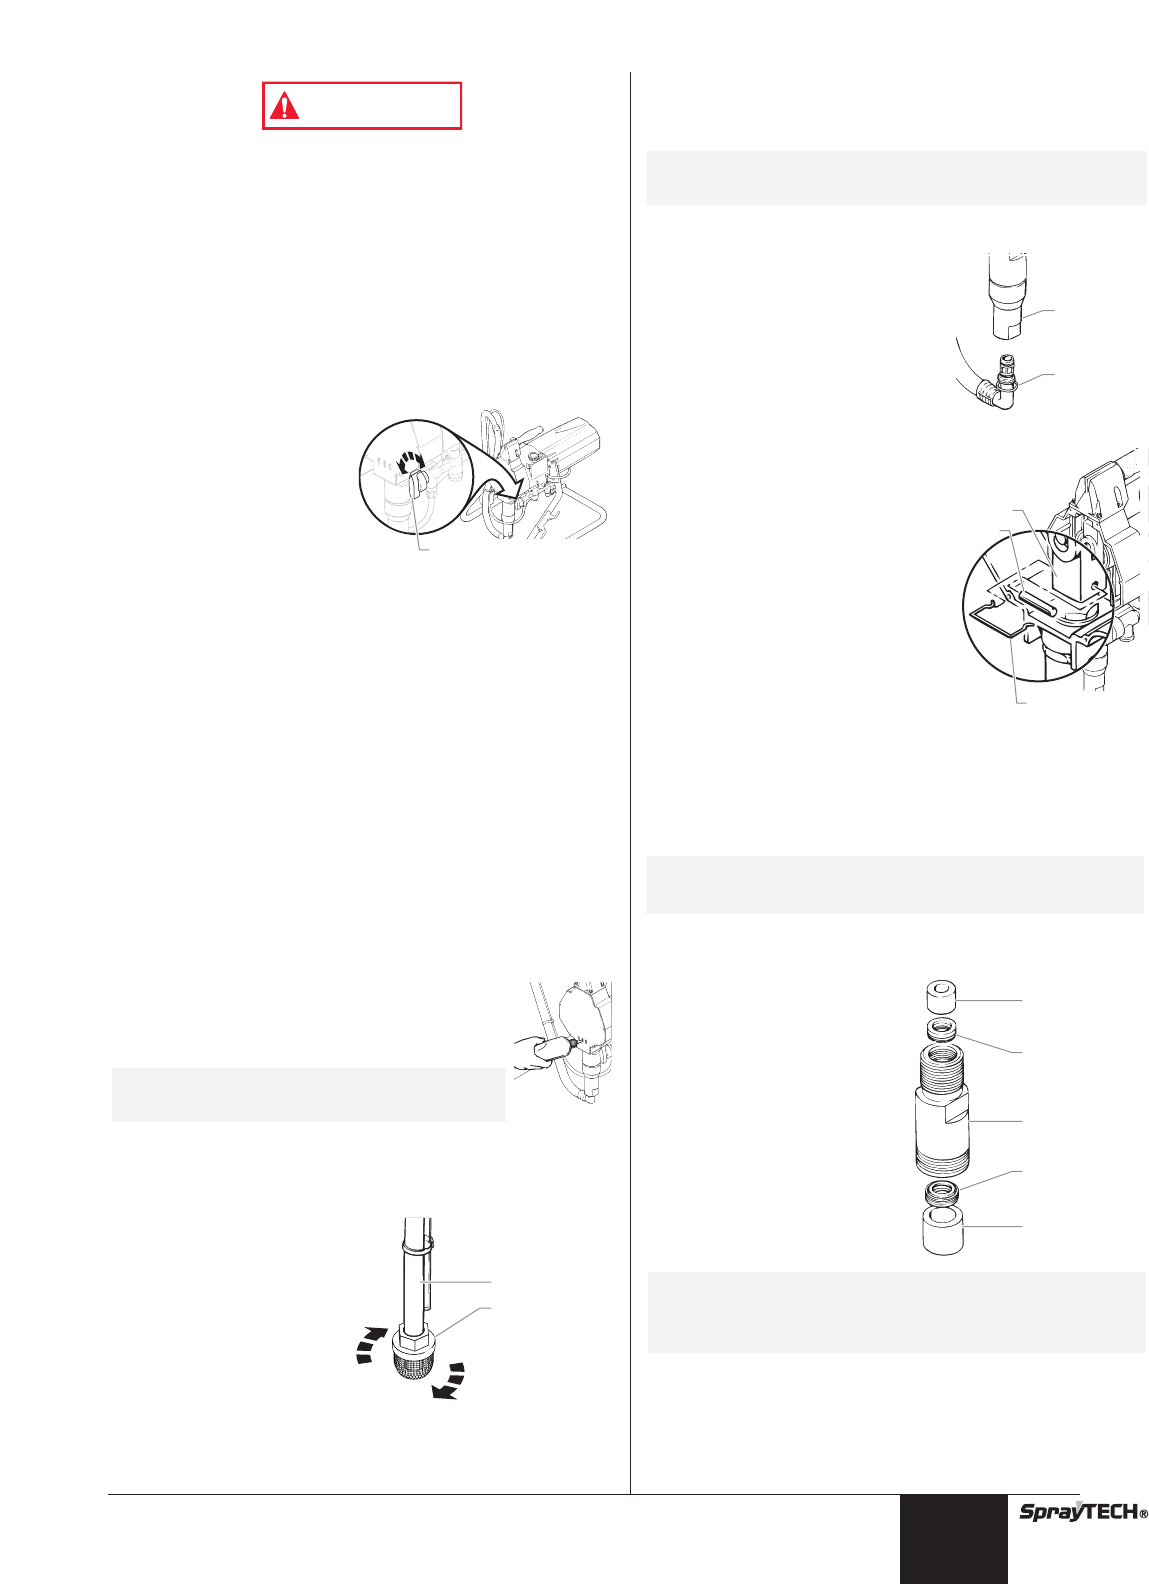
Maintaining the T-lip Packings
Removing the T-lip Packings
1. Place the wrench flats of the inlet valve housing into a
vise and unscrew the fluid section from the inlet valve
housing.
2. Unscrew the packing nut from the fluid section.
3. Push the piston out through the lower end of the fluid
section. Tap the top of the piston with a rubber mallet if
necessary.
4. Remove the upper and
lower spacers from the fluid
section.
5. Push the T-lip packings out
of the fluid section with a
screwdriver. To push out
the upper seal, insert the
screwdriver through the
lower end of the fluid
section. To push out the
lower seal, insert the
screwdriver through the
upper end of the fluid
section.
NOTE: When removing the T-lip packings, be careful
not to scrape or gouge the inside surface of the
fluid section with the screwdriver.
Fluid Section
Cylinder
Upper T-lip
Packing
Upper Spacer
Lower Spacer
Lower T-lip
Packing
NOTE: When removing the piston, keep the piston
from falling or the piston may be damaged.
Yoke
Pin
Retaining Clip
Retaining
Ring
Inlet Valve
Housing
NOTE: If any parts are difficult to disassemble, soak them
in an appropriate solvent until the paint softens.
© SprayTECH. All rights reserved. 7