


Cleanup
• Release system and spray gun pressure before
cleaning or performing maintenance on the gun.
• Use only the cleaning solvent recommended by the
material manufacturer.
• Never spray into an enclosed vessel (this will create
an explosive gas / air mixture).
Daily cleaning
1. Flush out the spray gun material tube thoroughly with the
appropriate solvent.
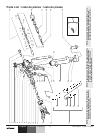
2. Unscrew the tip guard and remove the air cap. Take out
the tip and immerse in the appropriate solvent until all
traces of material are dissolved. Remove the tip and put
into the appropriate solvent for 1 to 2 days until all
material residues are gone.
4. Clean the spray gun body using a brush.
Hold spray gun downward or horizontal while cleaning the
spray gun. Cleaning solvent must not be allowed to enter
the air channels as this will cause swelling of the O-rings.
Maintenance
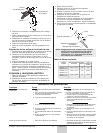
Adjusting the Needle Packing
If material begins leaking at the valve rod, flush the gun and
carefully tighten the packing screw using the gun spanner that
came with this gun.
CAUTION
NOTE: Handle the tip with care. Do not clean it with
sharp metal objects. Use tip cleaning brush
(P/N 9997001) only. If necessary, use
corresponding tip cleaning needle (P/N
8612001, set of 12) for cleaning tip.
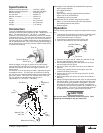
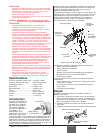
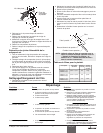
Air channels behind
distributor ring
Air Cap
Tip
Tip Guard
NOTE: When using two component materials more
frequent flushing may be required.
NOTE: Do not immerse the spray gun in solvent.
WARNING
4©Wagner. All rights reserved.
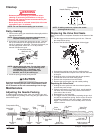
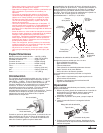
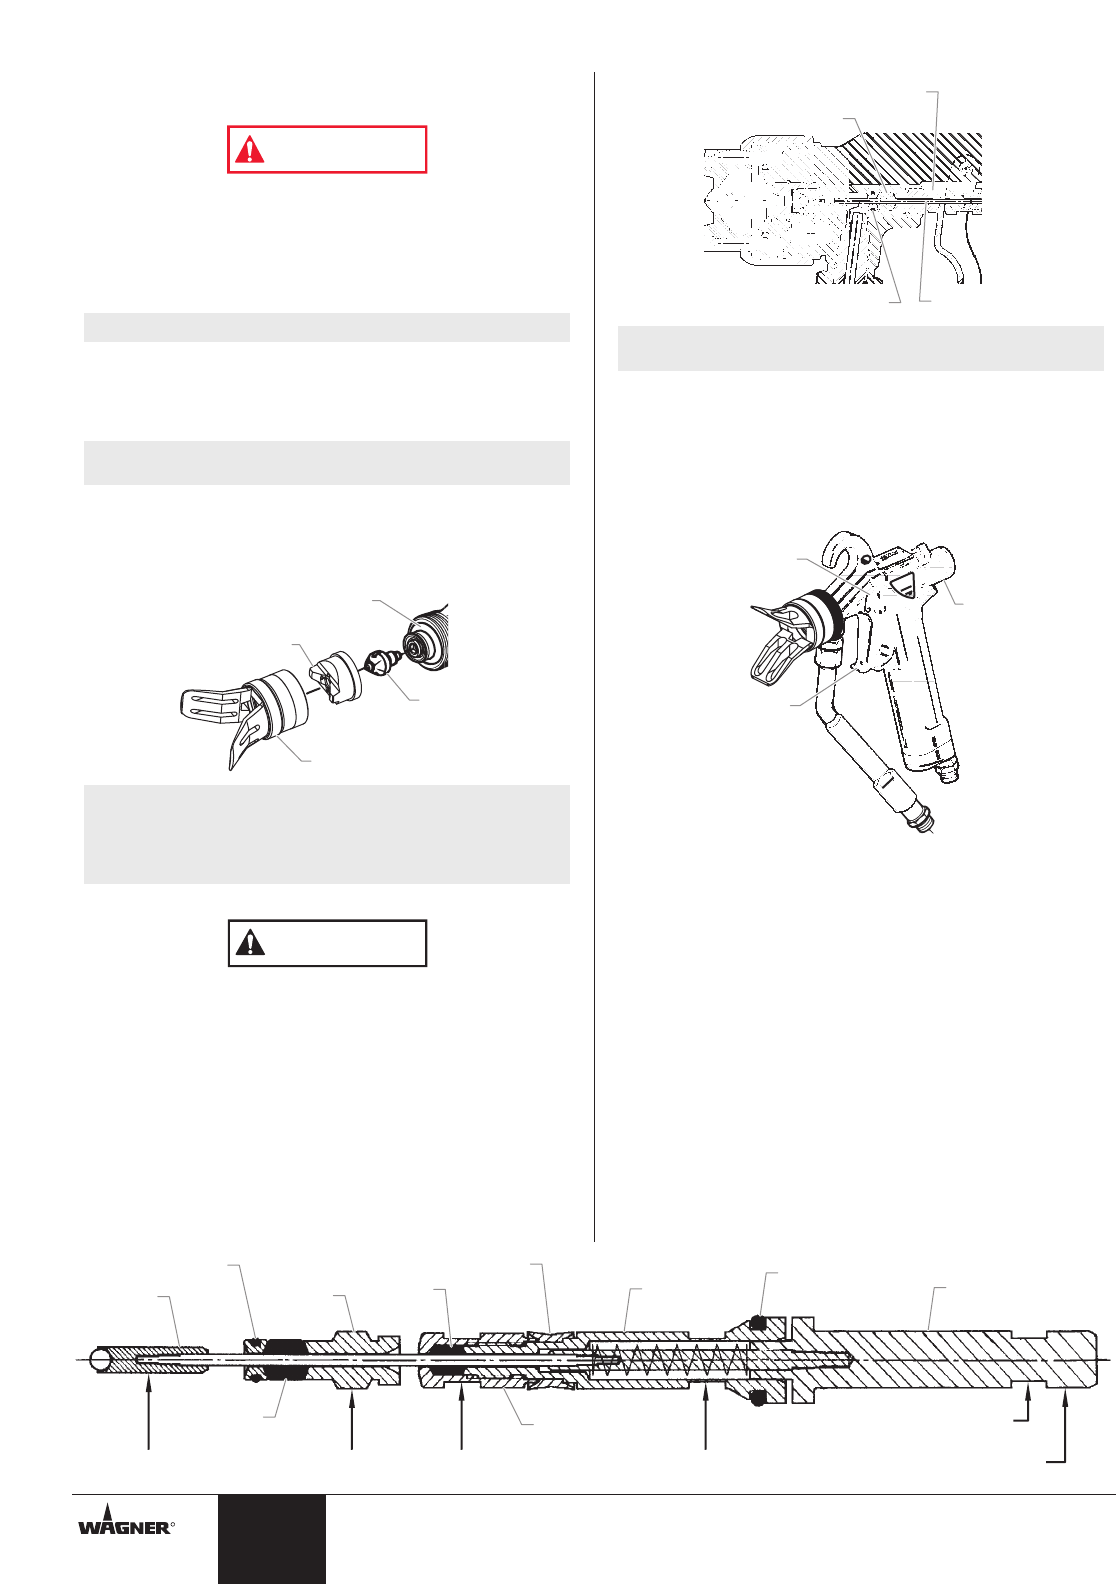
Replacing the Valve Rod Seals
Refer to the valve rod complete illustration at the bottom of the
page.
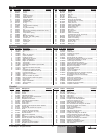
1. Pull the trigger and unscrew the gun lock nut. Remove
the compression spring.
2. Remove the flat-head screw and take off the trigger.
3. Unscrew the packing screw from the sealing sleeve.
4. Carefully withdraw the complete valve rod from the back
of the gun.
5. Holding the valve rod mounting with the gun spanner,
unscrew the valve ball holder using pliers.
6. Remove the components from the needle.
7. Remove the compression ring and needle packing.
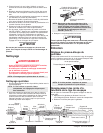
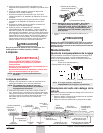
Repairing Air Valve Seals
1. Holding the valve push-rod with the universal spanner,
unscrew the push-rod cap.
2. Change compression ring (with O-ring), needle packing,
rear seal, and, if necessary, the push-rod seal and air
valve seal of the air valve
3. Reassemble in reversed order
4. The trigger must be pulled before replacing the gun lock
nut and the compression spring. Screw on the nut until a
noticeable resistance is felt at the trigger. Release the
trigger. The lever travel is now correctly set for air and
material release.
Trigger
Flat-Head
Screw
Gun
Lock
Nut
NOTE: If leaking continues, replace the needle
packing and the o-ring.
Needle Packing
Packing Screw
O-Ring
Valve Rod
English
R
Use pliers
here
Unscrew
here
Unscrew
here
Hold with
spanner here
Hold with
spanner here
Hold to remove
valve rod here
Valve Ball
Holder
Packing
Screw
Rear
Seal
Push-Rod
Seal
Air Valve
Seal
Valve
Push-Rod
Valve Rod
Mounting
Push-Rod
Cap
Needle
Packing
Compression Ring