


GB
R
HAZARD: HAZARDOUS VAPORS - Paints, solvents,
insecticides, and other materials can be
harmful if inhaled or come in contact with body.
Vapors can cause severe nausea, fainting, or
poisoning.
PREVENTION:
• Use a respirator or mask if vapors can be inhaled. Read
all instructions supplied with the mask to be sure it will
provide the necessary protection.
•Wear protective eyewear.
•Wear protective clothing as required by coating
manufacturer.
HAZARD: GENERAL - Can cause severe injury or
property damage.
PREVENTION:
• Read all instructions and safety precautions before
operating equipment.
• Follow all appropriate local, state, and national codes
governing ventilation, fire prevention, and operation.
• Use only manufacturer authorized parts. User assumes
all risks and liabilities when using parts that do not meet
the minimum specifications and safety devices of the
pump manufacturer.
• Before each use, check all hoses for cuts, leaks, abrasion
or bulging of cover. Check for damage or movement of
couplings. Immediately replace hose if any of those
conditions exist. Never repair a paint hose. Replace with
a grounded high-pressure hose.
• All hoses, swivels, guns, and accessories must be
pressure rated at or above the maximum operating
pressure range of the sprayer.
• Do not spray outdoors on windy days.
•Wear clothing to keep paint off skin and hair.
• Always unplug cord from outlet before working on
equipment (electric units only).
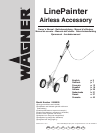
General Description
The LinePainter is a portable line striping tool used for painting
parking lot lines, athletic field lines, curbs, etc... The
LinePainter can be used with most airless sprayers. Read and
follow this instruction manual carefully for proper setup,
operating instructions, and safety information.
Assembly
The LinePainter requires some assembly before its first use. A
hammer is needed for the first assembly. Otherwise, the
LinePainter is designed to be assembled and disassembled
easily using the hand-tighten knobs.
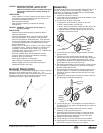
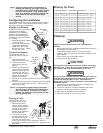
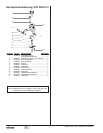
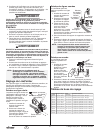
1. Unpack the contents of the box.
2. Locate the axle, three wheels, three wheel washers, three
wheel caps, and grease packet.
3. At each wheel location on the axle:
a. Squeeze a small amount of grease on the axle.
b. Slide a wheel washer onto the axle.
c. Slide a wheel onto the axle. Make sure the side of the
wheel with the extended hub goes on the axle first.
d. Using a hammer, pound a wheel cap over the end of
the axle to secure the wheel.
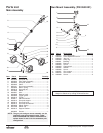
4. Locate the gun pole support, support bracket, and two
support knobs.
5. Thread one of the support knobs through the support
bracket and into one of the holes in the bottom of the gun
pole support. Do not tighten the support knob. Leave
enough space between the support bracket and the gun
pole support for the axle to pass through.
6. Set the gun pole support on the front axle. Make sure the
gun pole support is resting on the axle with the support
bracket underneath the axle.
7. Align the support bracket with the remaining hole on the
gun pole support. Thread the remaining support knob
through the support bracket and into the hole in the gun
pole support.
8. Tighten both support knobs until they are secure with the
gun pole support standing straight up.
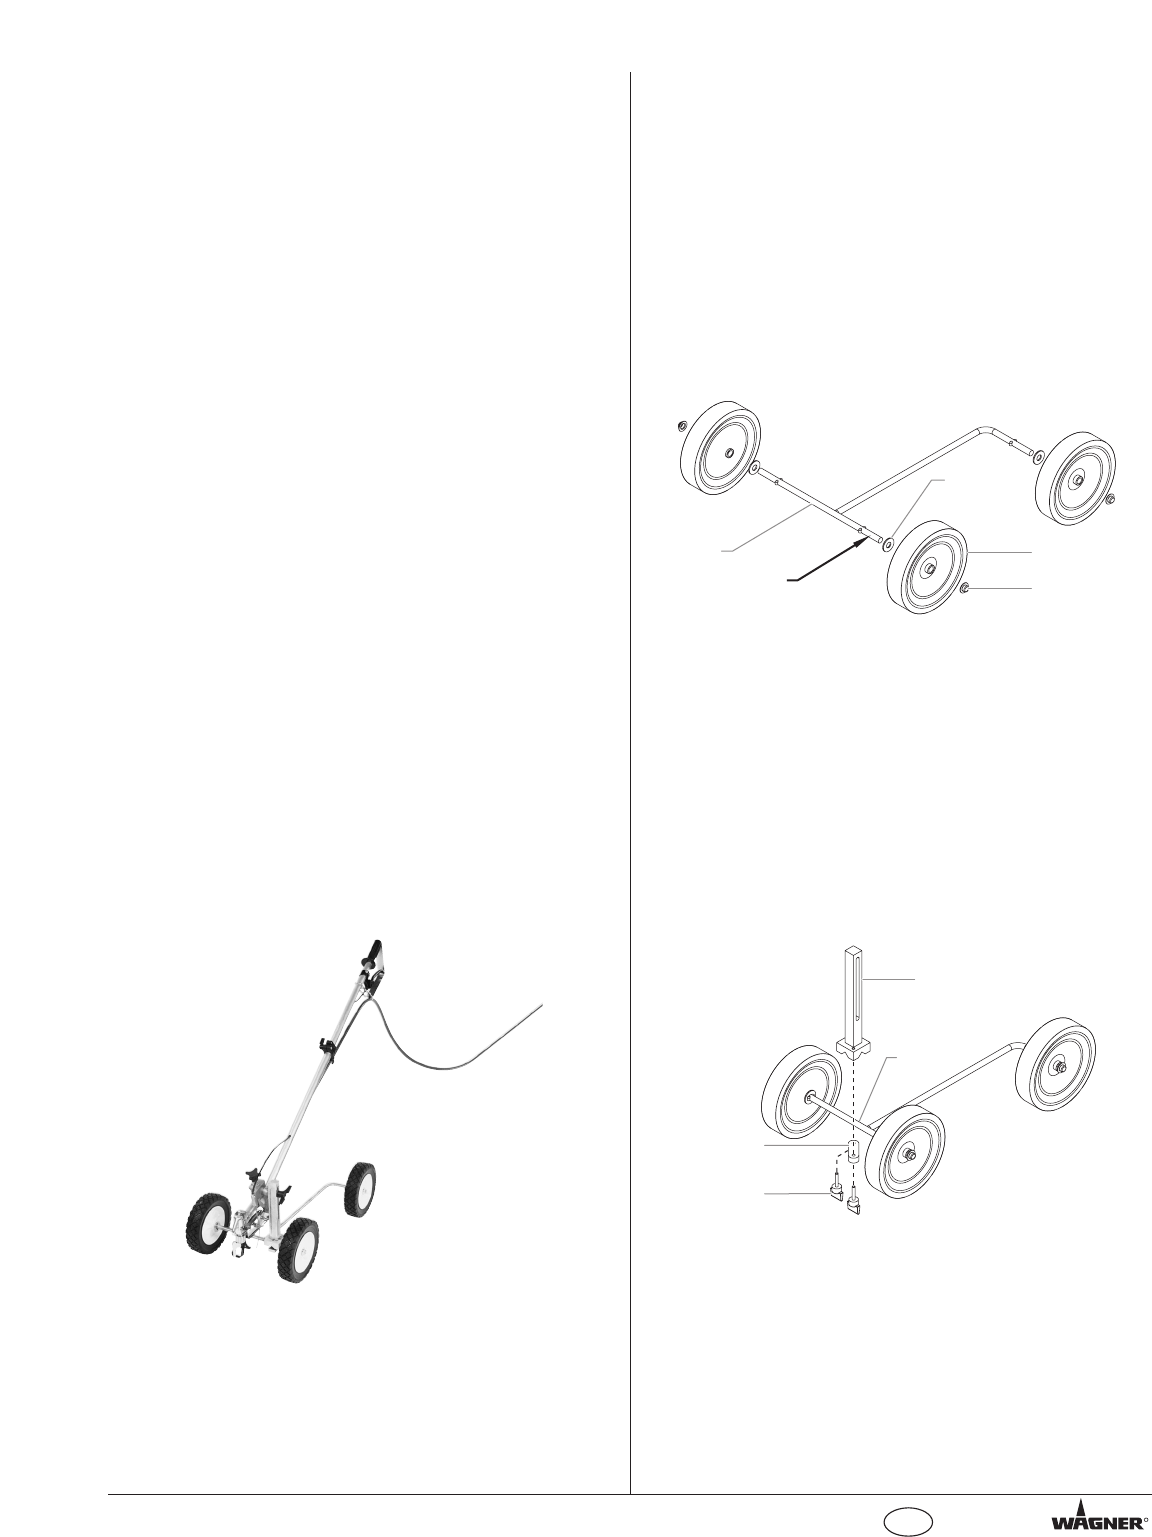
9. Locate the gun pole. It is shipped in two pieces that are
connected by the gun cable running through the center of
the pole pieces.
10. Insert the gun pole bottom piece into the pole clamp
assembly on the gun pole top piece.
11. Align the pieces so that the trigger on the gun pole top
piece faces down and the gun cable coming out of the
gun pole bottom piece comes out on top of the pole.
12. Tighten the pole clamp assembly.
13. Locate the gun pole knob and two star lock washers.
14. Align the gun mount assembly on the bottom of the gun
pole with the long slot on the gun pole support.
Gun Pole
Support
Front
Axle
Support
Bracket
Support
Knob
Wheel
Washer
Wheel
Wheel
Cap
Axle
Apply
grease here
©Wagner Spray Tech. All rights reserved. 3