


10
Flexio 867
AUS
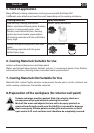
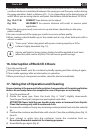
12. Selecting the Spray Setting
(WallPerfect I-Spray spray attachment)
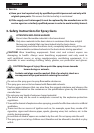
WARNING! Danger of injury! Never pull the trigger guard while adjusting
the air cap.
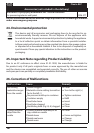
2 dierent spray jet shapes can be set by turning the adjustment ring (g. 10, 1)
Fig. 11 A = vertical at jet
for horizontal surfaces
Fig. 11 B = horizontal at jet
for vertical surfaces
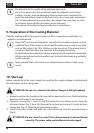
13. Adjusting the Material Volume (Fig. 7, item 3)
Set the material volume by turning the regulator on the trigger guard of the spray gun.
- turn to the left lower material volume
+ turn to the right higher material volume
14. Setting the Amount of Air (Fig. 7, item 1)
Depending on the viscosity of the material to be sprayed and the nish of the object to be
coated, it may be advisable to vary the amount of air. Very low viscosity materials, such as
watery glazes do not have to be atomised with the maximum amount of air. In this case it
is advisable to reduce the amount of air and thus minimize the spray vapour.
This also applies for the use of the low-scale and radiator/detail spray attachment
(accessory).
- turn to the left lower amount of air
+ turn to the right higher amount of air
15. Spray Technique
i
The spray result depends heavily on the smoothness and cleanliness of the
surface to be sprayed. Therefore the surface should be carefully prepared and
kept free of dust.
•
Cover all surfaces not to be sprayed.
•
Cover screw threads or similar parts of the target object.
i
Important: Start at the edge of the area to be sprayed. Start the spray
movement rst of all, and then press the trigger. Avoid interruptions
within the area to be sprayed.