


11
Flexio 867
AUS
•
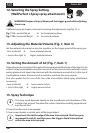
The spray movement should come from the arm, not just from the wrist. This ensures that
a uniform distance is maintained between the spray gun and the spray surface during
the spray operation. Select a distance of 5 - 15 cm, depending on the desired spray jet
width. When you are using interior wall paint, the distance should be about 20-30 cm.
Fig. 12 A/ 12 B: CORRECT Even distance to the object.
Fig. 12 B:
INCORRECT An uneven distance will result in uneven paint
application.
•
Move the spray gun evenly cross-wise or up-and-down, depending on the spray
pattern setting.
•
An even movement of the spray gun results in an even surface quality.
•
When coating material builds up on the nozzle and air cap, clean both parts with a
solvent or water.
i
"Cross spray" when using paint with a poor covering capacity or if the
surface is highly absorbent (Fig. 13).
i
Interior wall paint in strong colour shades should be applied at least twice
(allow rst paint coat to dry rst). This will ensure good coverage.
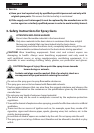
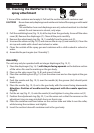
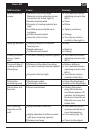
16. Interruption of Work till 4 Hours
•
Turn the machine o.
•
During longer breaks, vent the container by briey opening and then closing it again.
•
Clean nozzle openings after an interruption in operation.
•
When processing 2-component varnishes, clean the device immediately.
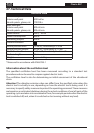
17. Taking Out of Operation and Cleaning
Proper cleaning is the prerequisite for problem-free operation of the paint application
device. No warranty claims are accepted in case of improper or no cleaning.
1) Turn the machine o.
2)
Divide the spray gun. Press the hook (Fig. 6 "click") slightly downwards.
Turn the gun front part and gun rear part against each other.
ATTENTION: Never hold the gun handle under water or immerse it into liquids.
Clean the housing only with a moistened cloth.
3) Unscrew the container. Empty any remaining coating material back into the material
tin.
4) Preclean the container and feed tube with a brush. Clean the ventilating bore (Fig.14,
item A).
5)
Pour solvent or water into the container. Screw the container back on.
Do not use ammable materials for cleaning purposes.
6) Assemble the gun again (Fig. 6).