


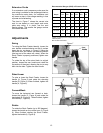

10
6. Tighten the screws firmly with a 19mm
wrench.
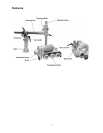
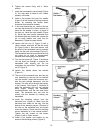
7. Insert the pin assembly into the hole (Figure
2). You may need to rotate it until it seats
properly in the hole.
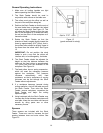
8. Install a flat washer and cast iron handle
(Figure 2) to the threads of the top screw as
shown, by screwing the handle down
clockwise onto the screw threads.
9. In the area above the pin, remove the hex
nut from the screw with a 19mm wrench, but
leave the flat washer in place. In place of
the hex nut, install the cam handle (Figure
2). Screw the cam handle clockwise onto
the threads (the cam handle will contact the
pin on each rotation and push the pin
downward.) Tighten the cam handle.
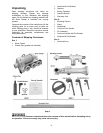
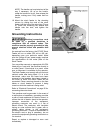
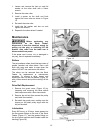
10. Loosen the hex nut (A, Figure 3) with a
12mm wrench, and back off the set screw
(B, Figure 3) with a 4mm hex wrench, until
the shaft of the handwheel can be inserted
freely into the hole in the bracket (Figure 3).
The handwheel should be positioned so that
the pinion on its shaft is approximately
centered with the keyway of the bracket.
11. Turn the set screw (B, Figure 3) clockwise
into the shaft just enough to prevent the
handwheel from slipping out. Do not
overtighten the set screw. Tighten the hex
nut (A, Figure 3).
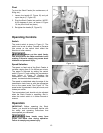
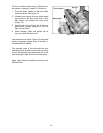
12. Loosen the handle above the bracket
(Figure 4).
13. The end of the horizontal arm that has the
rack extending to the end will be inserted
into the bracket. Insert the horizontal arm,
with the rack pointed downward, into the
bracket. The rack will fit through the keyway
in the bracket. See Figure 4. Continue to
push the horizontal arm into the bracket
while slightly rotating the handwheel
counterclockwise, until the rack and pinion
mesh. The horizontal arm can now be
moved into the bracket by rotating the
handwheel.
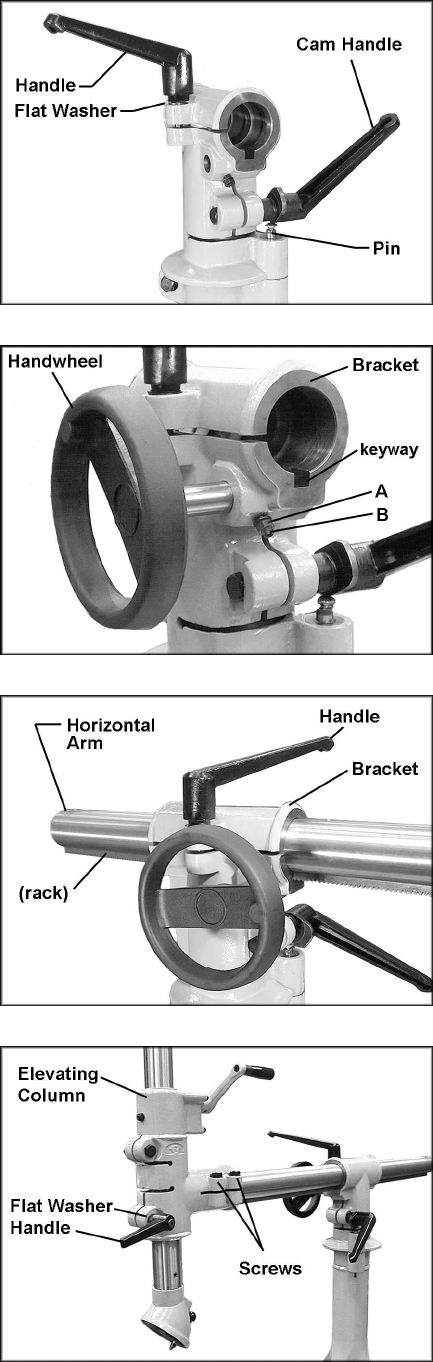
14. Install the elevating column onto the
horizontal arm (Figure 5). Make sure the
horizontal arm slides all the way into the
sleeve of the elevating column (The end of
the rack on the horizontal arm will almost
touch the sleeve). Check that the elevating
column assembly is in the vertical position.
Tighten the two screws on the sleeve
(Figure 5) with a 19mm wrench.
15. Install a flat washer and handle on the
screw of the elevating column (Figure 5).
Figure 2
Figure 3
Figure 4
Figure 5