You can now choose to either:
Click Reset; the device resets, utilizing the new cmp you loaded and utilizing the
current configuration files.
Click Cancel; the device resets utilizing the cmp, ini and all other configuration files
that were previously stored in flash memory. Note that these are NOT the files you
loaded in the previous Wizard steps.
Click Back; the ‘Load a cmp File’ screen is reverted to; see
Figure 27.
Click Next; the ‘Load an ini File’ screen opens; see
Figure 29. Loading a new ini file
or any other auxiliary file listed in the Wizard is optional.
Note that as you progress, the file type list on the left indicates which file type loading is
in process by illuminating green (until ‘FINISH’).
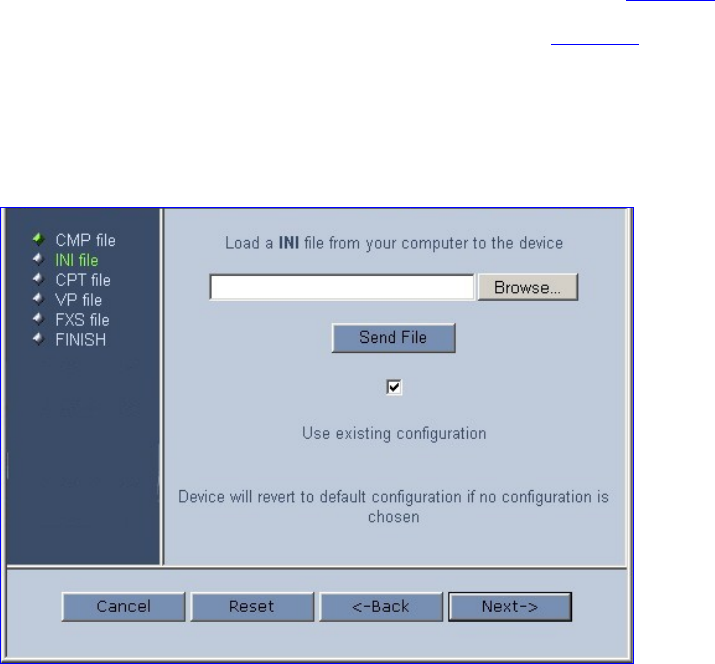
Figure 29 Load an ini File Screen
6 In the ‘Load an ini File’ screen, you can now choose to either:
Click Browse and navigate to the ini file; the check box ‘Use existing configuration’,
by default checked, becomes unchecked. Click Send File; the ini file is loaded to the
device and you’re notified as to a successful loading.
Ignore the Browse button (its field remains undefined and the check box ‘Use
existing configuration’ remains checked by default).
Ignore the Browse button and uncheck the ‘Use existing configuration’ check box; no
ini file is loaded, the device uses its factory-preconfigured values.
50 3Com VCX V7111 Analog Gateway Installation Guide


