Powering on the Router 33
Powering on the
Router
Before you power on the router, verify that:
■ The connection between the power cord and ground wire is secure
■ The voltage of the power supply complies with the requirement of the router
■ The console cable is correctly connected to either the PC or the terminal, and
that the parameters are correct, as described in
“Setting the Parameters of the
Console Terminal” on page 29.
WARNING: Before switching on the power, locate the power-off switch in the
workroom so that, in case of an electrical accident, power can be turned off
quickly.
Turn on the power switch of the router.
Checking and Operating
after Power-on
After the router is powered on, verify that:
■ The LEDs on the front panel are normal.
For the status of the LEDs during normal operation after power-on, see the LED
tables in
Chapter 1.
■ The console terminal display is normal
For the local configuration, the startup interface on the console terminal
displays after the router is powered on. See
“Startup Process” on page 33.
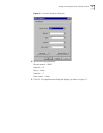
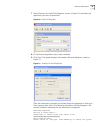
For the remote configuration, you must dial up, using HyperTerminal, after the
router is powered on, as shown in
Figure 19. After the dial-up, the startup
interface is displayed on the terminal. See “Startup Process” on page 33.
Figure 19 Connect Dialog Box
After the POST, press Enter. When the [3Com] prompt displays, you can configure
the router.
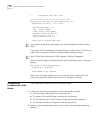
Startup Process After the router starts up, the Boot ROM program runs and the following
information displays on the terminal screen:
Booting
********************************************


