Q2
• Unplug the sprayer from the power source.
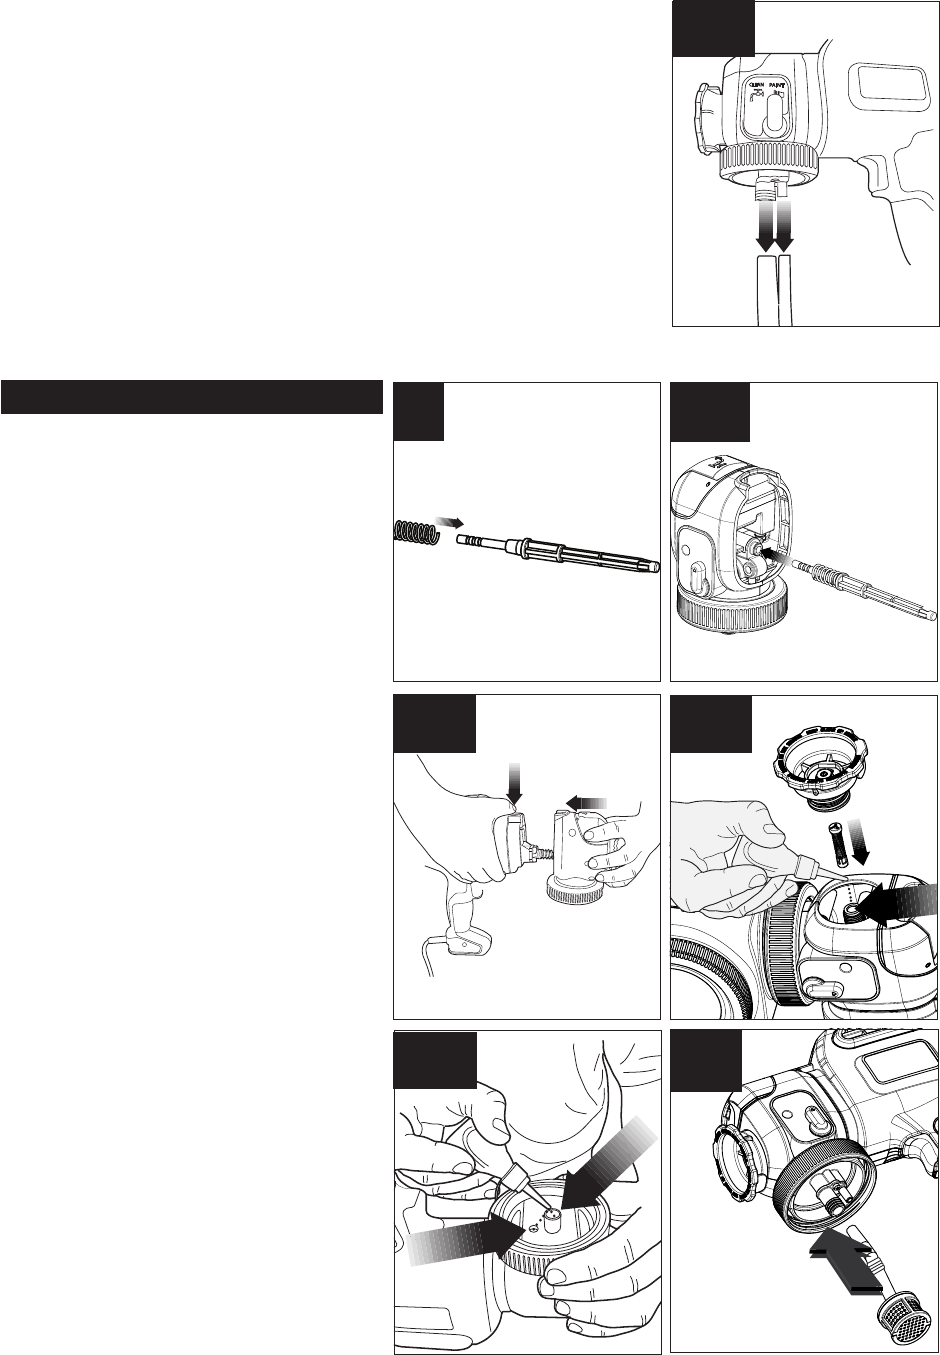
• Remove the tubing from the intake and return ports (figure Q2).
• Hold the tubing over the waste container and let any remaining liquid in the
hose drain out.
REASSEMBLY
• Slide the spring onto the front of the piston
(figure R).
• Insert the piston and spring into the front
housing (figure R1).
• Pressing down on the release button, insert
the front housing with piston, into the sprayer
until the release button pops into place
(figure R2).
NOTICE: The unit will not reassemble with-
out the piston and spring in place.
• Place a few drops of oil through the cylinder
opening. Insert the atomizer valve into the front
housing. Thread the spray nozzle onto the front
housing and hand tighten (figure R3).
• Using the oil lubricant provided, place a few
drops of oil down the intake and return openings
of the sprayer as shown in figure R4.
• Rotate the quick clean lever from paint to
clean and back 3 times after oiling.
• Insert the pickup tube into the intake opening
on the sprayer (figure R5).
R1
R2
R3
R
R4
15
R5


