


8
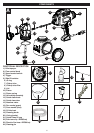
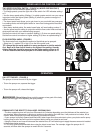
LIQUID MATERIAL PREPARATION - (FIGURES E, E1)
T
IP: Make sure the type of material you
use can be cleaned with either mineral
spirits or paint thinner (for oil-based
paints) or a warm water and soap solution
(for water soluble paints like latex). Use
drop cloths during pouring, mixing, and
viscosity testing of materials to be
sprayed to protect your floors and
anything else in the spraying area that
y
ou wish to remain untouched.
The liquid being sprayed may need to be
thinned (diluted) before starting. When thin-
ning, use the proper liquid thinner recom-
mended on the container by the material
manufacturer and the proper dilution rate.
WARNING: Do not use materials with
a flashpoint higher than 60°C (140°F) .
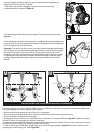
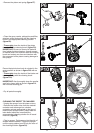
A 2-
3
/4 quart mixing bucket is provided to use when transferring spray material from the original container into
the bucket for thinning and measuring
purposes (figure E).
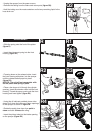
• If material needs thinning, add the appropriate liquid thinning material recommended by the manufacturer
(figure E1).
• The quick clean fill cup has a measurement of 2.5 ozs. This can be used as a quick measurement when thinning to
5% in the side fill canister.
• It is possible to spray latex paint with this unit, however, the required thinning may exceed material manufacturerʼs
recommendation. The operator should consider the type of application and final location of the project when spraying.
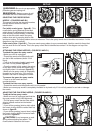
PREPARATION TIPS
• With any spraying job you should always ensure that you have properly prepared the surface to get the best finish.
That is, that all surfaces are free from dust, dirt, rust and grease. Lightly pressure wash decks or exterior surfaces and
ensure that they are dry before spraying.
• It is recommended that you mask all edges and other areas and use drop cloths to protect your floors and anything
else in the spraying area that you wish to remain untouched.
• Skin that forms on the top of paint can clog the sprayer. Remove skin before mixing. Older material may need to be
strained with a funnel with a filter attached or through hosiery to remove any impurities that could clog system.
• Before starting have gloves, paper towels, rags etc. available for unexpected spills.
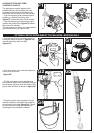
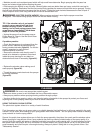
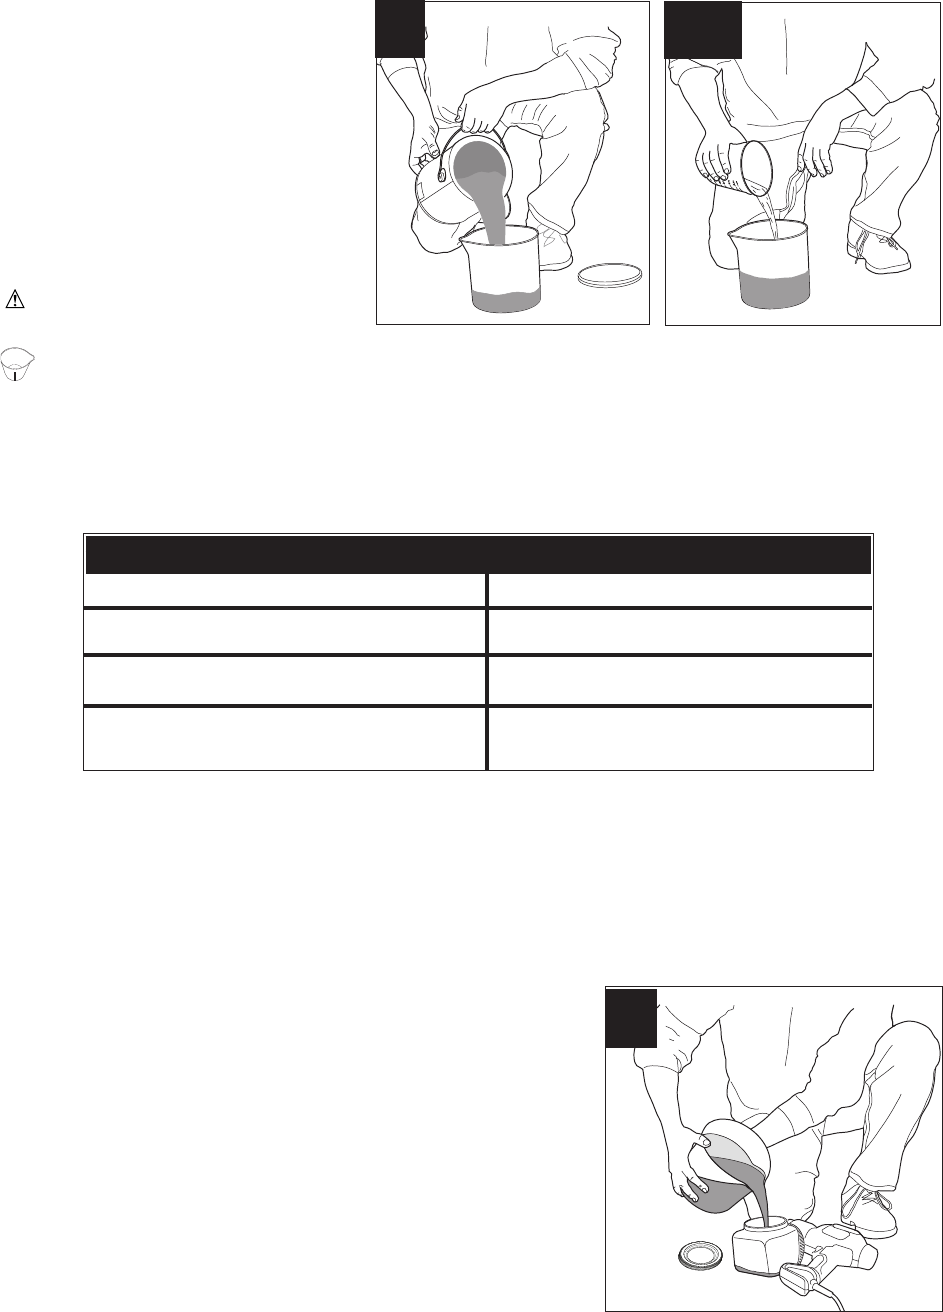
FILLING THE CANISTER - (FIGURE F)
• Check to make sure that the canister is completely screwed onto the
sprayer.
• Lay the sprayer on its side with the canister side lid facing up.
• Unscrew the lid on the side of the canister.
• Pour the properly thinned and strained material to be sprayed into the
side fill canister (figure F). TIP: Use the mixing bucket provided to pour
material from the original material container into the side fill canister.
• Clean any residual liquid from the threads or sides of the canister and
sprayer.
• Starting the threads evenly, screw the lid completely onto the side fill
canister. Check the lid to make sure it is threaded on squarely and
completely before picking up the sprayer.
E1
E
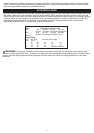
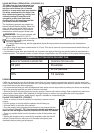
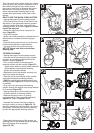
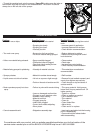
COMMON DILUTION RATES ON PAINT CAN
MANUFACTURERS SUGGESTED OUNCES PER GALLON
1/2 pint 8 ounces
5% 6-1/2 ounces
10% 13 ounces
F