5
FIG. 40
FIG. 41
5”
48.
When WIDTH OF RIP is NARROWER than 2" the Push Stick
CANNOT be used because the guard will interfere … USE the
AUXILIARY FENCE, and PUSH BLOCK.
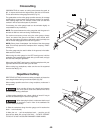
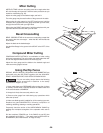
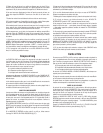
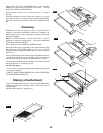
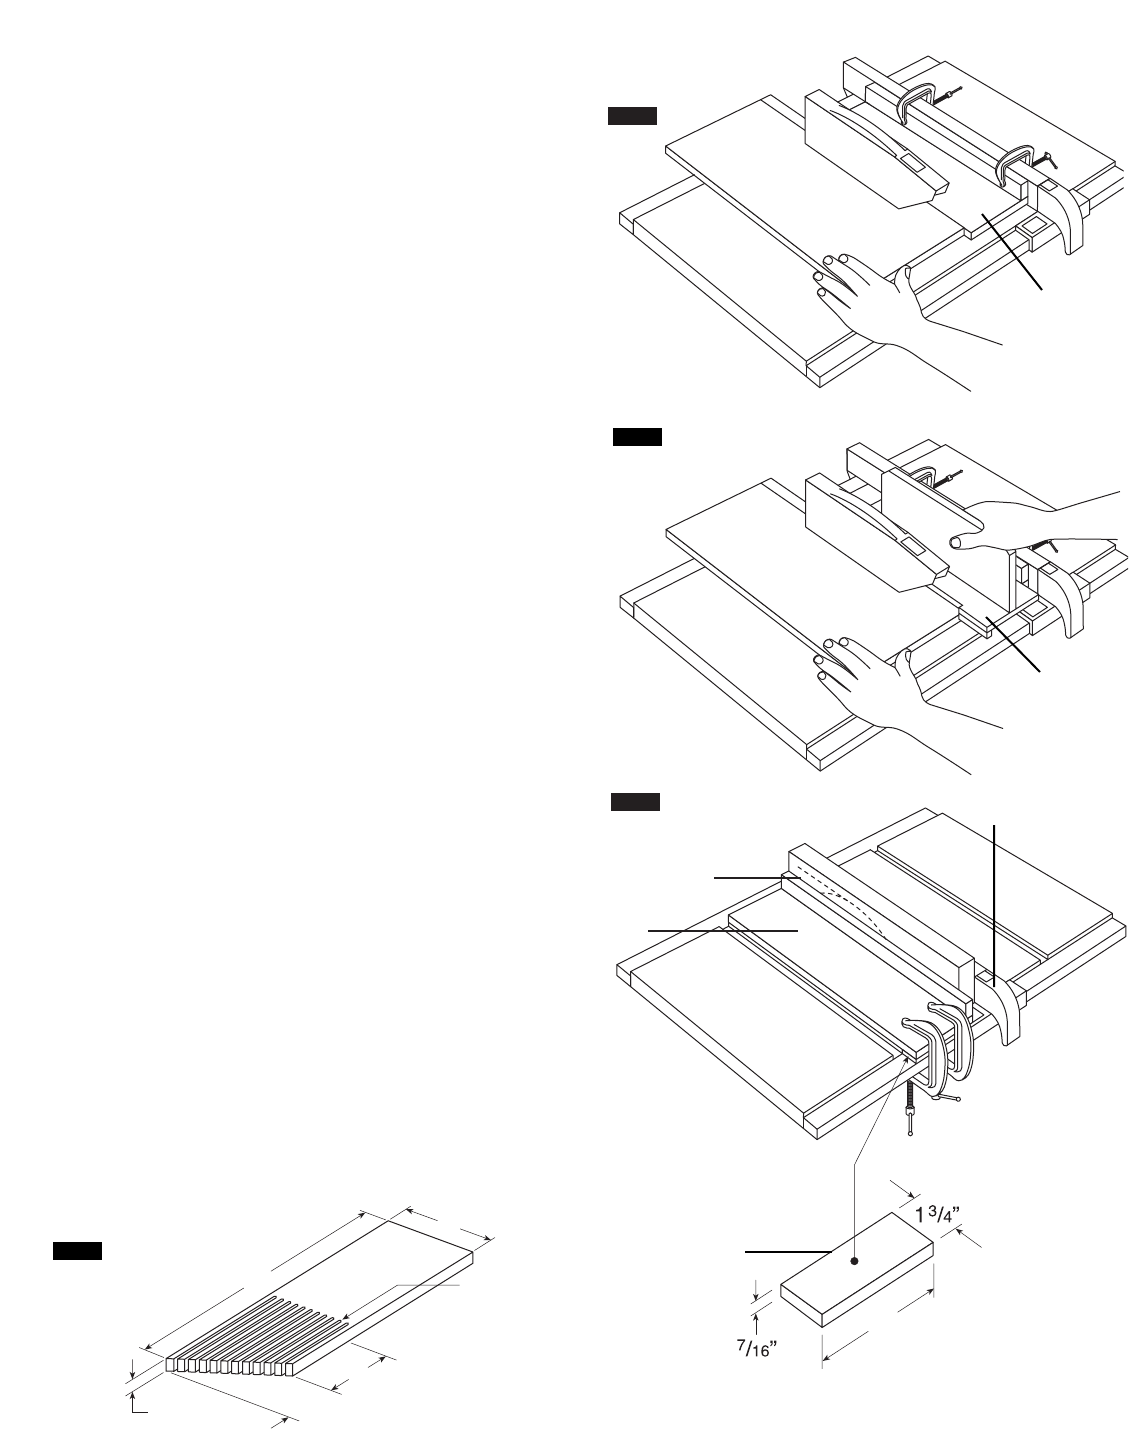
Attach auxiliary fence 1 to rip fence with two “C” clamps
(Fig. 38).
Feed the workpiece by hand until the end is approx. 1" from the
front edge of the table. Continue to feed using the PUSH BLOCK
2 on top of auxiliary fence UNTIL THE CUT IS COMPLETE (Fig.
39).
Resawing
RESAWING is known as ripping a piece of wood through its
thickness. The Bosch model 4000 table saw is capable of re-
sawing wood up to 6" wide by making two passes, one through
each thickness edge.
NOTE: To RESAW a piece of wood wider than 3" it will be
necessary to remove the blade guard … and use the AUXILIARY
FENCE (See “WORK HELPERS”).
Do not attempt to resaw BOWED or WARPED material.
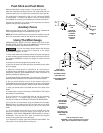
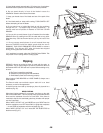
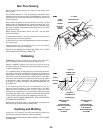
Clamp the auxiliary fence 1 and the rip fence 3 to the table so that
the workpiece 4 will SLIDE EASILY but not TILT or MOVE
SIDEWAYS without BINDING between the two fences during the
cut (Fig. 40).
Do not clamp directly to the bottom edge of the table because the
“swivel” of the clamp will not grip properly. Place a small strip of
wood between the bottom edge of the table and the “C” clamp.
A wood spacer 6 placed between auxiliary fence and front rail will
help support when “C” clamping (Fig. 40).
For your own safety …
1. Do not “back up” (reverse feeding) while resawing because this
could cause a kickback.
2. INSTALL BLADE GUARD IMMEDIATELY UPON COMPLETION
OF THE RESAWING OPERATION.
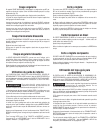
Making a Featherboard
Figure 41 illustrates dimensions for making a typical featherboard.
It should be made from a straight piece of wood that is free of
knots or cracks.
Kerf 5 should be about 1/4" apart (fig. 41).
3
4
1
4-1/2
8
5
3/4
25
2
1
FIG. 38
FIG. 39
6


