


+8</)+
8+<+4:/<+3'/4:+4'4)+
6+8,583+*(?;4';:.58/@+*
6+89544+23'?8+9;2:/43/962')/4-5,
/4:+84'2=/8+9'4*)53654+4:9=./).
)5;2* )';9+ 9+8/5;9 .'@'8* We
recommend that all tool service be performed
by a Bosch Factory Service Center or Autho -
rized Bosch Service Station.
!
Your Bosch tool has been properly lubricated
and is ready to use. It is recommended that
tools with gears be regreased with a special
gear lubricant at every brush change.
!
The brushes and commutator in your tool
have been engineered for many hours of
dependable service. To maintain peak
efficiency of the motor, we recommend every
two to six months the brush es be examined.
Only genuine Bosch replace ment brushes
specially designed for your tool should be
used.
After about 300-400 hours of operation, or at
every second brush change, the bearings
should be replaced at Bosch Factory Service
Center or Au thorized Bosch Service Station.
Bearings which become noisy (due to heavy
load or very abrasive material cut ting) should
be replaced at once to avoid overheating or
motor failure.
2+'4/4-
5'<5/*'))/*+4:9'2='?9
*/9)544+)::.+:552,853
:.+65=+89;662?(+,58+)2+'4/4-58
6+8,583/4-'4?3'/4:+4'4)+ The tool may
be cleaned most effectively with compressed
dry air. 2='?9=+'89',+:?-5--2+9=.+4
)2+'4/4-:5529=/:.)5368+99+*'/8
Ventilation openings and switch levers must
be kept clean and free of foreign matter. Do
not at tempt to clean by inserting pointed
objects through openings.
+8:'/4)2+'4/4-'-+4:9
'4* 952<+4:9 *'3'-+
62'9:/)6'8:9 Some of these are: gasoline,
carbon tetrachlo ride, chlo rinated cleaning
solvents, ammonia and house hold detergents
that contain ammonia.
!
WARNING
!
WARNING
'/4:+4'4)+
!
CAUTION
!
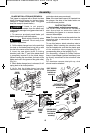
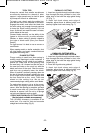
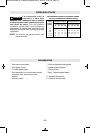
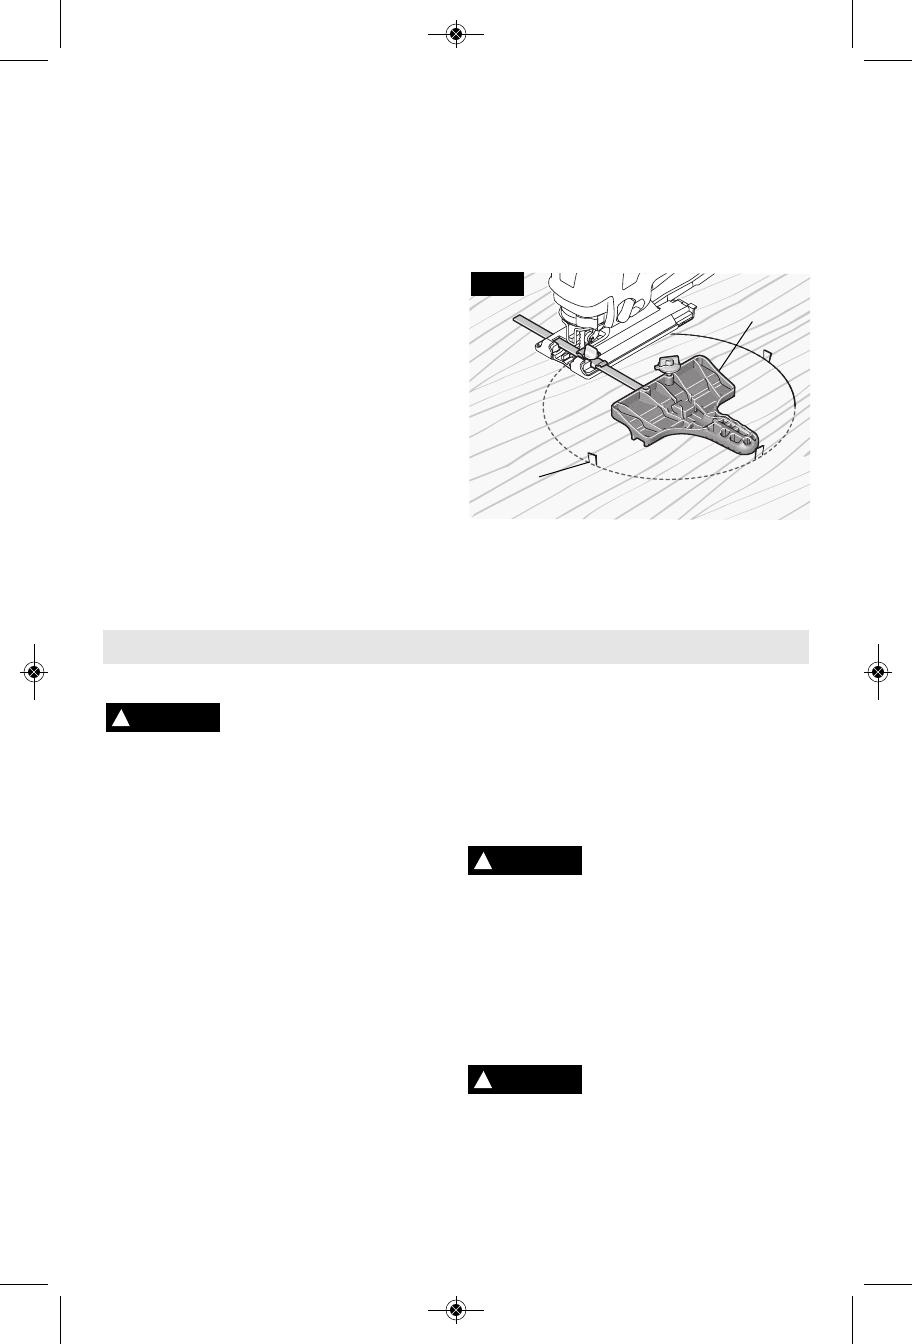
1. Before attaching the guide, draw a circle
and predrill a 3/16” (5 mm) center hole in
workpiece.
2. Drill or plunge cut near the circles edge,
turn saw off and disconnect the plug from
power source.
3. Attach guide to saw with edge guide facing
down as shown (Fig. 9).
4. Remove guide pin from end of guide, push
pin through hole provided in guide, then into
center hole of workpiece.
5. Measure the distance from the selected
hole to the blade to be equal to the circle
radius.
6. Hook lock knob clamp onto edge of
footplate, adjust fence to desired width, and
securely tighten lock knob clamp (Fig. 9).
7. Insert plug into power source, hold the saw
firmly, squeeze trigger and slowly push the
saw forward. To make a hole, cut from inside
the circle; To make wheels or discs, cut from
the outside.
Cutting Tip: Cut slowly so the blade will stay
straight in the cut. Place small wedges in the
cut as shown in Fig. 9, to keep the inner circle
from spreading when near the end of the cut.
-12-
FIG. 9
WEDGE
EDGE GUIDE
DOWN
BM 2610008439 06-10:BM 2610008439 06-10 6/16/10 2:59 PM Page 12