


15
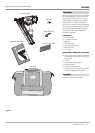
Operating Instructions and Parts Manual
www.chpower.com
The nailer should be stored in a cool dry location.
Maintenance
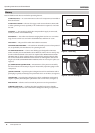
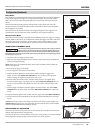
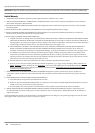
CLEARING A JAM FROM THE NAILER
1. Disconnect nailer from air supply.
2. Remove all nails from the magazine (See Loading/ Unloading).
3. Press down on the Quick-Clear Nose (QCN) lever to disengage portion of nose barrel
(See Figure 23).
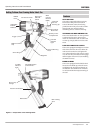
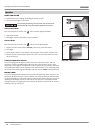
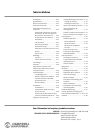
4. If necessary, use small hand tools to help free the jammed nail. Sometimes it is
necessary to use a hammer and a long, thin screwdriver to force the driver ram back
all the way into the gun (See Figure 24).
5. Dump jammed nail out.
6. Release QCN lever.
7. Nail pusher must be in the back lock position.
8. Disconnect air supply and reload (See Loading the Tool section).
NAILER REPAIR
Only qualified personnel should repair the tool and they should use genuine Campbell
Hausfeld replacement parts and accessories, or parts and accessories which perform
equivalently.
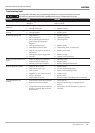
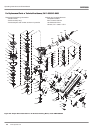
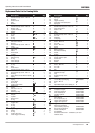
REPLACEMENT PARTS
Use only genuine Campbell Hausfeld service parts. Tool performance,
safety and durability could be reduced if improper parts are used.
When ordering replacement parts, specify by part number.
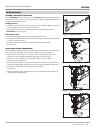
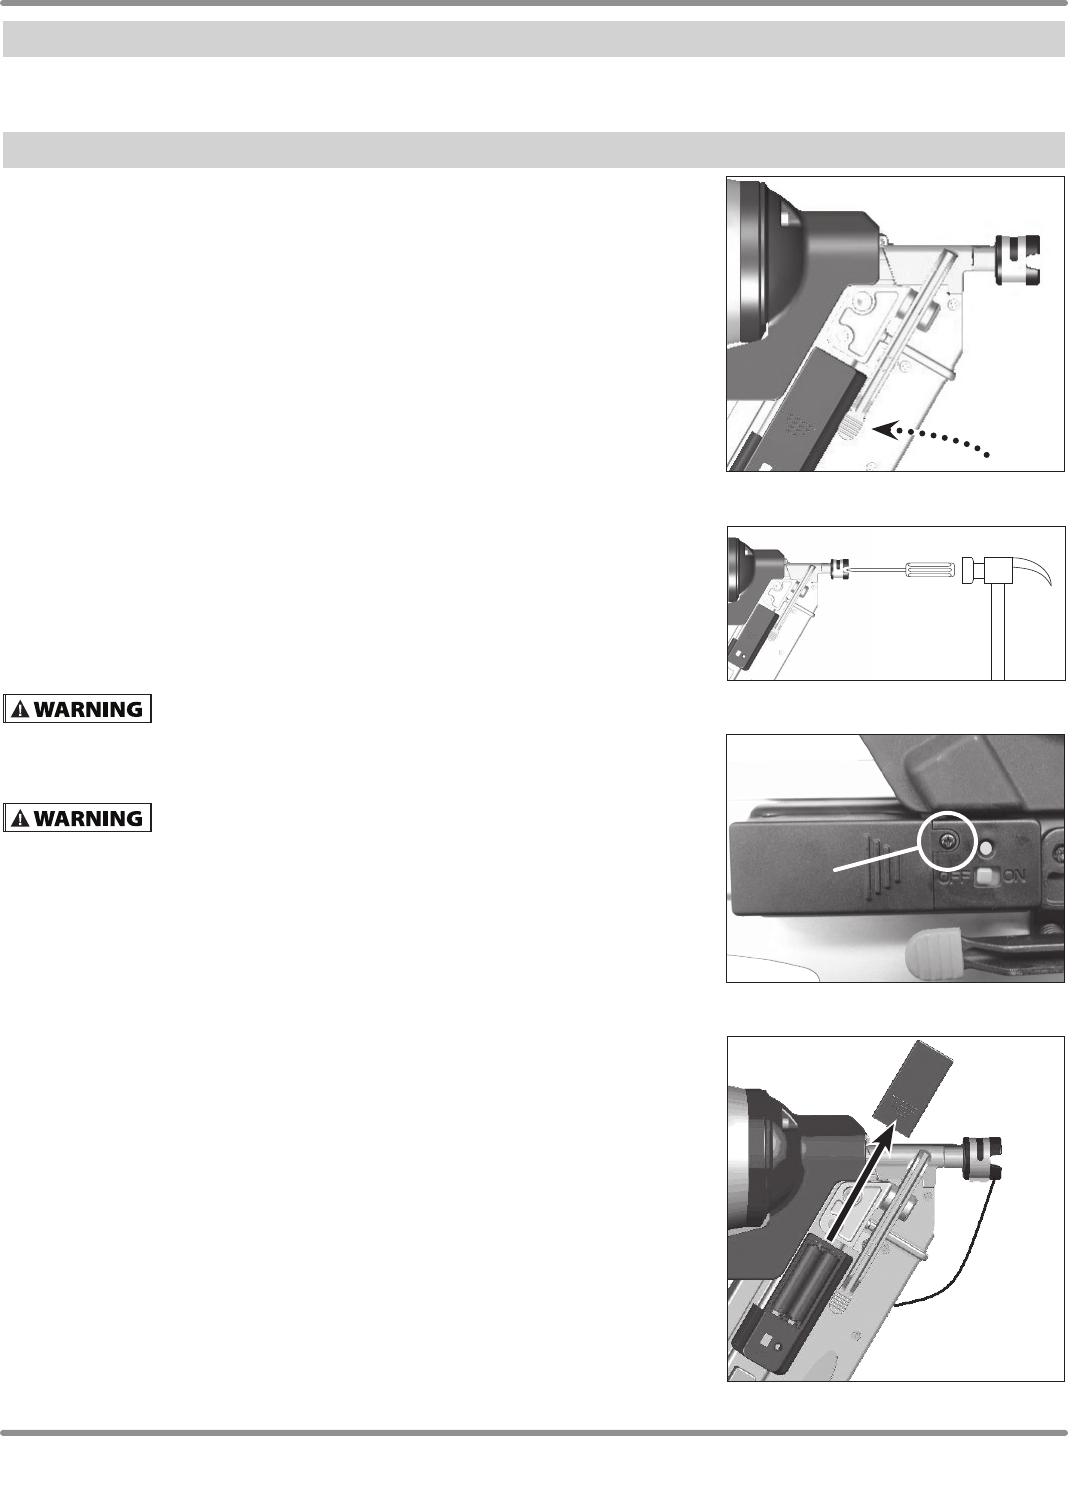
BATTERY REPLACEMENT
Always disconnect the tool from the power source when unattended,
performing any maintenance or repair, clearing a jam, loading,
unloading, or moving the tool to a new location.
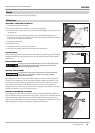
The electronics on the tool (low nail indicator lights) run off of two (2) AAA batteries
located in the compartment on the back of the magazine. When the batteries’ power
is running low and they need to be replaced, the electronic functions may not work
properly or at all. Disconnect the tool from air source. Remove screw and battery
compartment cover. Insert two (2) new batteries in the proper orientation. Do not mix
old and new batteries. Close cover. Replace screw.
ASSEMBLY PROCEDURE FOR SEALS
When repairing a nailer, the internal parts must be cleaned and lubricated. Parker O-
lube or equivalent must be used on all o-rings. Each o-ring must be coated with O-lube
before assembling. A small amount of oil must be used on all moving surfaces and
pivots. After reassembling, a few drops of 30W non-detergent oil or equivalent, must be
added through the air line one time before normal operational use.
Storage
Figure 24
Figure 26 - Battery Replacement
CHN70899
Figure 23 - Quick Clear Nose Lever
Figure 25 - Battery Replacement
Screw