


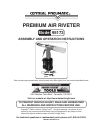
SKU 95173 For technical questions, please call 1-800-444-3353 PAGE 6
OPERATION
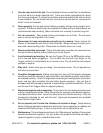
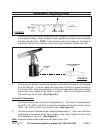
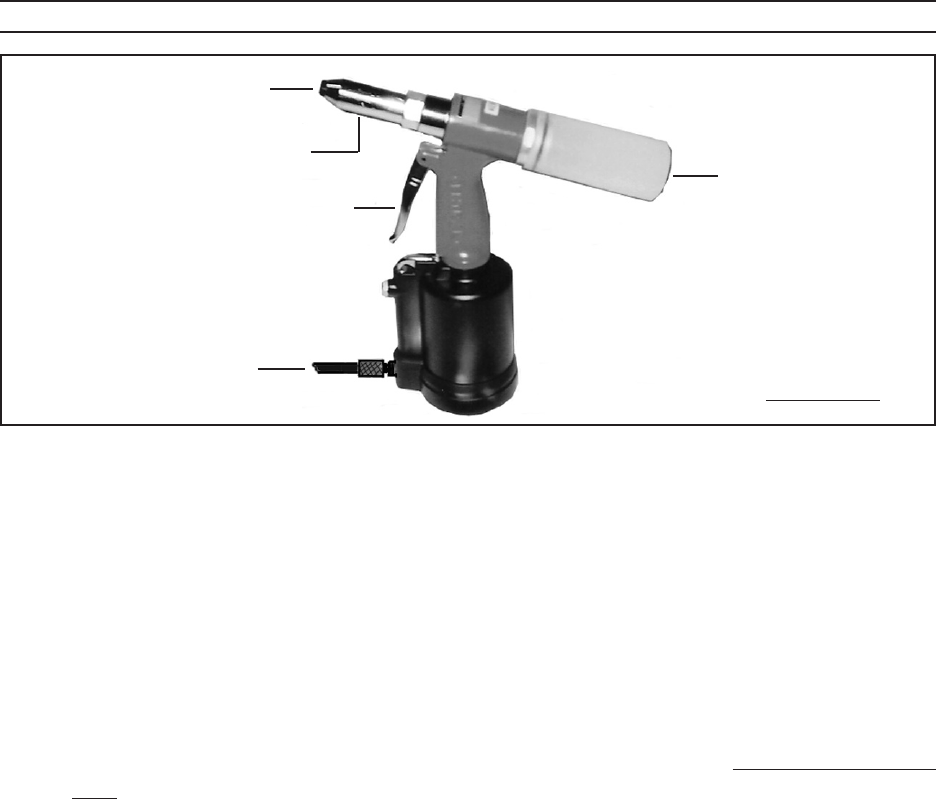
BOTTLE
(15)
TRIGGER
(25)
NOSEPIECE
(1)
OUTER CYLINDER
(2)
AIR SUPPLY HOSE
(NOT INCLUDED)
FIGURE D
Make sure the Bottle (15) is firmly inserted onto the Airproof Lid (16) of the Riveter.
(See Figure D.)
Depending on the size of rivet pin used, attach the corresponding Nosepiece size
(3/32”, 1/8”, 5/32”, or 3/16”) with the accessory Spanner. (See Figure D.)
IMPORTANT: When drilling rivet holes in a workpiece, make sure to use the same
diameter drill bit as the outer diameter of rivet sleeve you will be using.
Attach an air hose to the previously installed Quick Connector of the Riveter.
(See Figure D.)
Turn on the air compressor, and set its regulator at 90 PSI. Do not exceed 90
PSI.
Insert the pin (long, thin end) of a rivet fully into the Nosepiece (1). CAUTION!
Make sure to NEVER to touch the Trigger (25) when you are inserting rivets.
(See Figure D.)
Insert the sleeve (short, thick end) of the rivet through the pre-drilled hole in the
workpiece.
Hold the Riveter firmly with both hands, and squeeze the Trigger (25) to activate
the Riveter. Repeat as necessary. Then, release pressure on the Trigger.
(See Figure D.)
When finished using the Riveter, turn off the air compressor. Squeeze the Trigger
(25) again to release any compressed air in the Riveter. Then, disconnect the air
hose from the tool. (See Figure D.)
Remove the Bottle (15), and empty the used rivets in a proper trash container. Then,
store the Riveter in a clean, dry, safe location out of reach of children and other
unauthorized people. (See Figure D.)
1.
2.
3.
4.
5.
6.
7.
8.
9.
10.