


SKU 95173 For technical questions, please call 1-800-444-3353 PAGE 7
INSPECTION, MAINTENANCE, AND CLEANING
WARNING! Always wear ANSI-approved safety impact goggles when perform-
ing any inspection, maintenance, or cleaning procedures.
WARNING! Prior to performing any inspection, maintenance, or cleaning of the
Riveter, make sure to disconnect the air hose from the tool. Then, squeeze the
Trigger (25) again to release any compressed air in the Riveter.
To clean the exterior of the Riveter, wipe with a clean, damp cloth using a mild
detergent or mild solvent. Do not immerse the tool in liquids.
To clean and change the Jaws:
Unscrew and remove the Outer Cylinder (2), using the accessory Spanner.
Use the Spanner to unscrew and remove the Jaw Carrier (3). Use care as there
is a Jaw Push Spring (6) behind the Jaw Carrier which may fly out.
Remove the Jaws (4) from between the Jaw Carrier (3).
If you are going to clean the Jaws (4), use a steel brush and mild solvent. Then,
apply a light coat of machine oil to the Jaws. If you are going to replace the
Jaws:
Insert the new Jaws (4) into the Jaw Carrier (3). (See Assy. Diagram.)
When re-assembling the Jaw Carrier (3), make sure the Jaw Pusher’s (5) head
lines up with the Jaws. (See Assy. Diagram.)
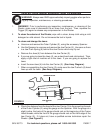
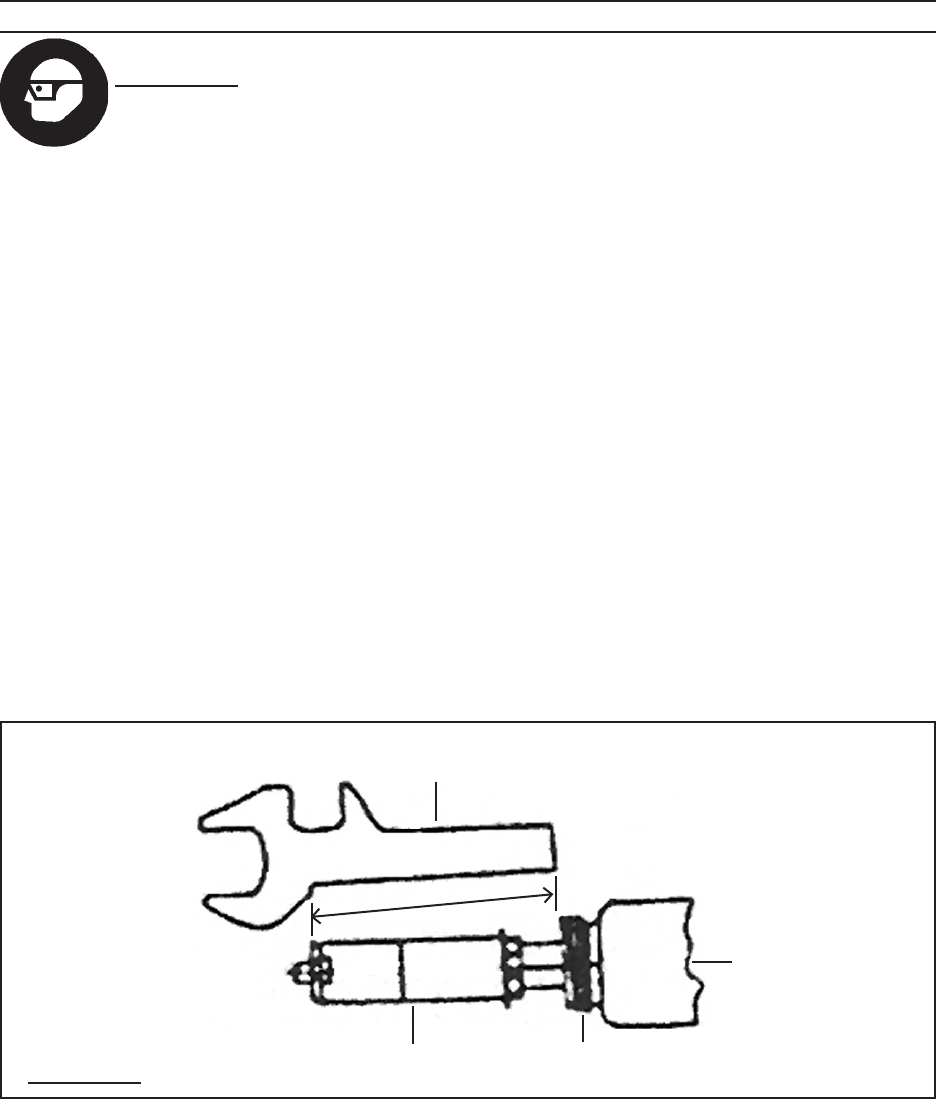
SPANNER GAUGE
(THREADS)
JAW CARRIER
(3)
FIGURE E
OUTER CYLINDER
(2)
Check the distance from the head of the Jaw Carrier (3) to the mounting threads
of the Outer Cylinder (2) using the gauge on the Spanner. With the gauge at a
slight incline, the back of the gauge should rest on the beginning of the Frame
Head threads, while the front of the gauge should rest on the front edge of the
Jaw Carrier (3). If it does not, have a qualified service technician repair the
Riveter. (See Figure E.)
1.
2.
3.
a.
b.
c.
d.
e.
f.
g.