


Page 13For technical questions, please call 1-800-444-3353.Item 69275
SAFETYOPERATIONMAINTENANCE SETUP
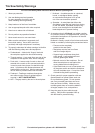
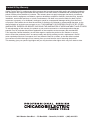
Miter Adjustment
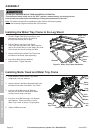
Note: The Miter Gauge can be used from
either the left or the right side of the Blade.
1. Place the slot on the underside of the
Miter Gauge on the Table Fence.
2. Lock the Miter Gauge securely to the table by
turning the Gauge Lock Knob clockwise.
3. To adjust angles:
a. Loosen the Miter Lock Lever.
b. Set to the desired angle by moving
the Guide left or right.
c. Tighten the Miter Lock Lever securely
before turning on the saw.
Figure K: Miter Gauge
Miter Gauge
Miter Lock
Lever
Gauge
Lock
Knob
Table
Fence
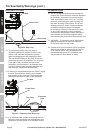
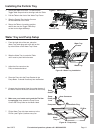
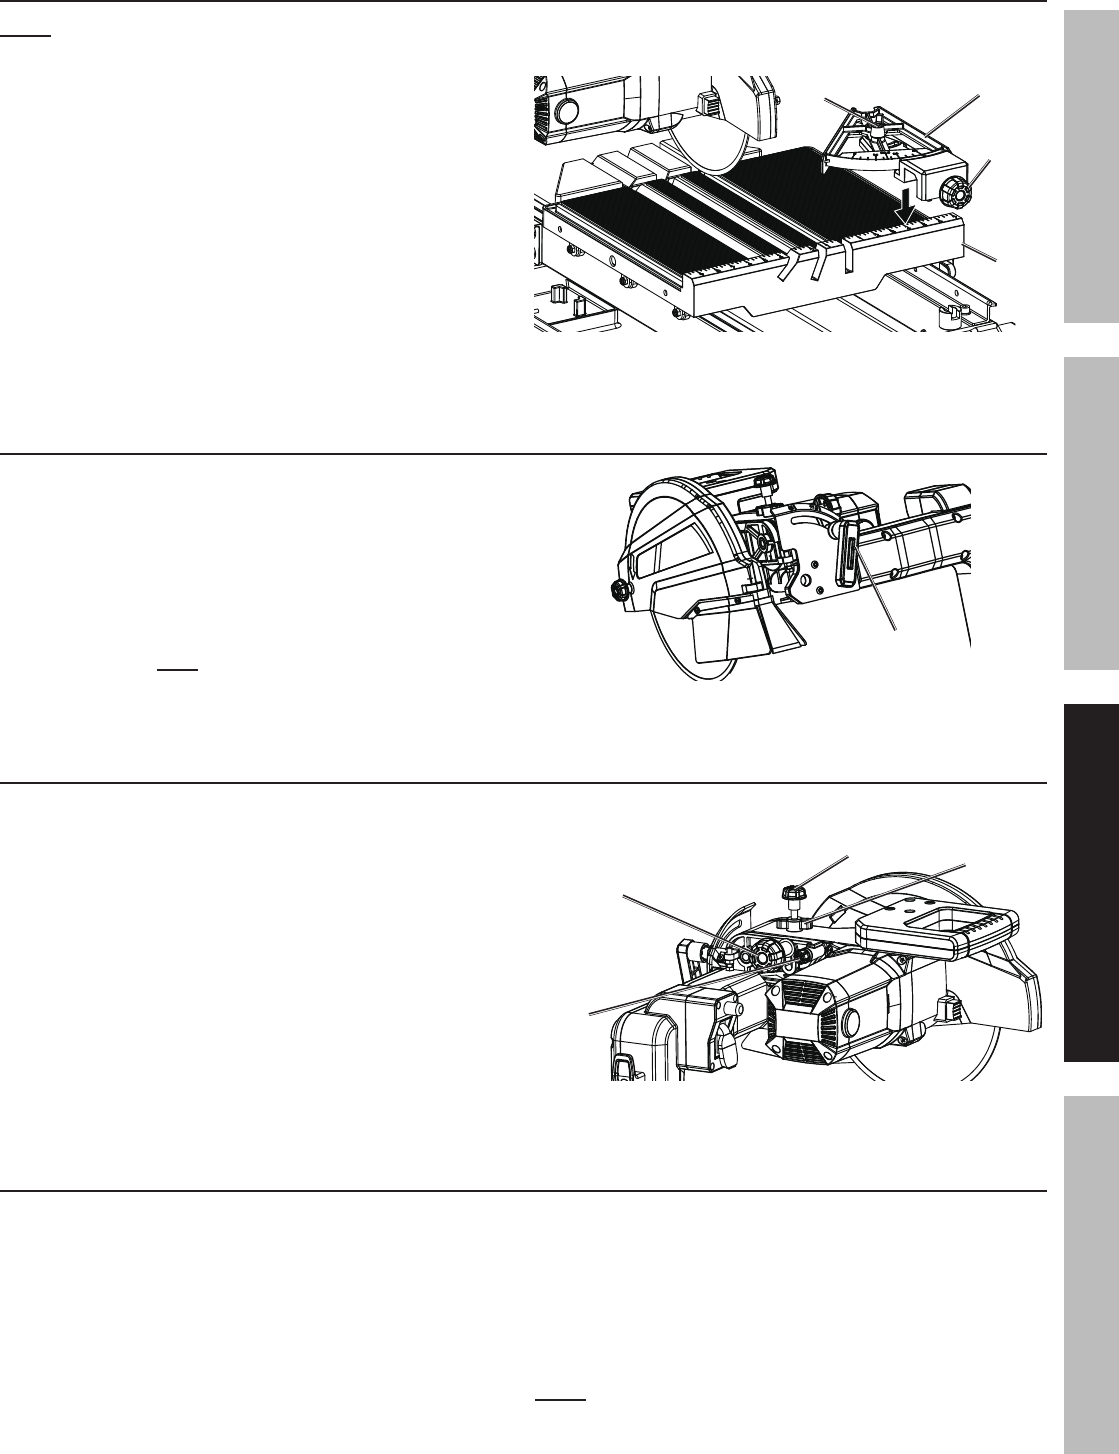
Bevel Adjustment
1. Slide the Table clear of the Blade
to prevent blade damage.
2. Loosen the Bevel Lock Lever.
3. Adjust the Motor Head to the desired angle:
0º, 22.5º or 45º. Do not set bevel to
any other setting, the slots in the table
are designed only for these cuts.
4. Tighten the Bevel Lock Lever.
Figure L: Bevel Lock Lever
Bevel Lock
Lever
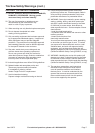
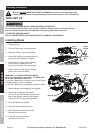
Depth Adjustment
1. Depth Lock: Use the Depth Lock to lock the
Motor Head in the down position; press it in while
the Motor Head is down to lock, and pull out
while holding down the Motor Head to unlock.
2. Depth Knob: The Depth Knob can be used to
lock the Motor Head at a particular cutting depth;
tighten it to lock the Motor Head in place,
loosen it to allow adjustment.
3. Depth Stop: This controls the maximum cut depth.
If the blade cuts too deeply or too shallowly;
loosen the Depth Stop Lock, adjust the Depth Stop,
and tighten the Depth Stop Lock again.
Figure M: Depth Controls
Depth Knob
Depth
Lock
Depth Stop Depth Stop
Lock
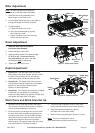
Work Piece and Work Area Set Up
1. Designate a work area that is clean and well-lit.
The work area must not allow access by children
or pets to prevent distraction and injury.
2. Route the power cord along a safe route to reach
the work area without creating a tripping hazard
or exposing the power cord to possible damage.
The power cord must reach the work area with
enough extra length to allow free movement
while working. Set up the Power Cord with a drip
loop, see Position of Tile Saw on page 6.
3. There must not be objects, such as utility lines,
nearby that will present a hazard while working.
4. Keep workpieces pressed firmly against
the Table and Fence while cutting.
5. Mark cut lines using waterproof marker or crayon.
Note: This tool is intended for use on
man-made masonry and tile products only.