


For technical questions, please call 1-800-444-3353;
Troubleshooting section at end of manual.
SKU 91814 PAGE 14
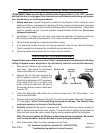
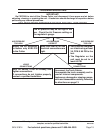
PROPER CUTTING TECHNIQUE
14. To cut efficiently, the following steps must be carefully followed:
√ Lightly touch the Tip to the cutting surface.
√ CONTACT WITH THE WORK SURFACE MUST BE MAINTAINED OR THE UNIT
WILL SHUT OFF. If contact is lost with the cutting surface, the arc will stop within
two seconds. Squeeze the Trigger once and release before attempting to restart
the arc.
√ Slowly move the Torch handle at a slight angle along the cutting line with
the Torch tip trailing.
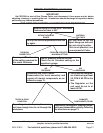
√ Cut 4 minutes*, then shut the welder off for at least 6 minutes* to allow it to
cool properly, or else the welder will overheat, possibly damaging itself.
*Times based on highest amp setting. For other amp settings, see Duration of Use, previous page.
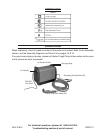
√ If the unit stops and the Red Overheat Indicator (4) lights:
Turn the power switch to OFF.
Allow the unit to cool completely (at least 15 minutes).
Turn the cutter back ON and continue cutting.
To prevent this, reduce the welding time between rest periods and ensure
proper ventilation.
√ If proper cutting is not achieved, adjust the current and/or air flow. The air
causes the molten metal to fall away from the workpiece being cut. To adjust the
current or air flow, press the Power Switch (7) to the Off (O) position, then adjust
the current and/or air pressure. The air will continue to come out of the Torch handle
for 30 seconds once the trigger is released. Repeat steps 9 through 12 again.
15. When finished cutting:
A. Release the Torch handle trigger and lift the Torch handle from the workpiece,
B. Press the Power Switch to the Off (O) position,
C. Set the Torch handle down on the metal workbench,
D. Turn the air supply off,
E. Unplug the line cord plug from the electrical outlet.