Page 13For technical questions, please call 1-800-444-3353.SKU 98265
General Operating Instructions
1.
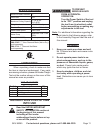
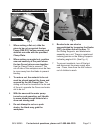
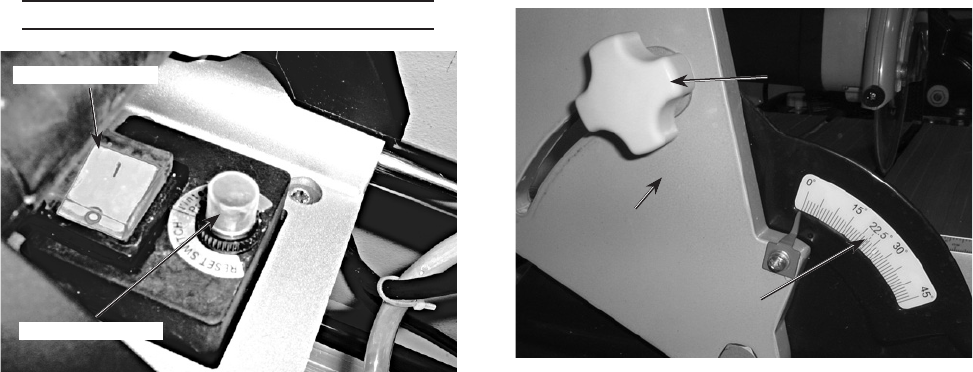
Fig. 3
Power Switch
Reset Button
When making a at cut, slide the
piece to be cut up against the two
Fence (D09,D12) halves securely and
stabilize one side with the provided
Clamp Plate.
2. When making an angled cut, position
one end securely at the point where
the two Fence halves come together.
Use the Clamp Plate to secure it. The
cut-off side of the workpiece must be free
to move away from the blade to prevent
binding.
3. To make a cut, the material to be cut
must be placed against the fence and
secured by the the Clamp Plate. The
sliding unit must be located at the far end
of the unit, opposite the Fence and mate-
rial to be cut.
4. With the saw and the water pump
turned on and operating, pull Handle
to move blade through material at a
slow and steady pace.
5. Do not attempt to cut on a push
stroke, the blade may grab the
workpiece.
6.
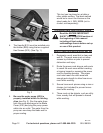
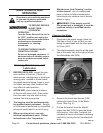
Fig. 4
Knob
Bevel Scale
Sliding Bar
Support
Beveled cuts can also be
accomplished by loosening the Knobs
(D27) on either side of the saw. Tilt
the Sliding Supports, and blade/motor
assembly as a unit. There is a scale and
indexing pointer on the Sliding Supports
indicating angle of tilt. (See Fig. 4.)
7. To prevent accidents, turn off the tool
and disconnect its power supply after
use. Clean, then store the tool indoors
out of children’s reach.


