


17
5 Power Up the Router
Checklist for Power-Up
You are ready to power up the Cisco router after the following steps are completed:
• Chassis is securely mounted and grounded.
• Power and interface cables are connected.
• Your PC terminal emulation program is configured for 9600 baud, 8 data bits, 1 stop bit, and no parity.
• You have selected passwords for access control.
• You have determined the IP addresses for the Ethernet and serial interfaces.
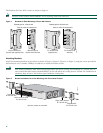
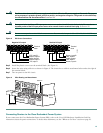
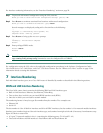
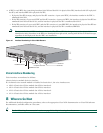
Front Panel Indicators
The following indicator LEDs provide power, activity, and status information:
• PWR (green)—Lit when power is on
• SYS/RPS or RPS (green)
–
Rapid blinking (200 ms)—System is booting
–
Slow blinking (1 s)—Redundant power supply (RPS) failure
–
Continuous on—System OK
• ACT (green)—Blinks during system activity, such as interrupts and packet transfers
Power-Up Procedure
To power up your Cisco router and verify that it goes through its initialization and self-test, perform this procedure. When the
procedure is finished, the Cisco router is ready to be configured.
Note To view the boot sequence through a terminal session, you must have a console connection to the Cisco router before
it powers on.
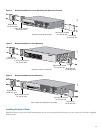
Step 1 Make sure that your PC is powered up and connected as described in the “Checklist for Power-Up” section.
Step 2 Move the power switch to the ON position.
The green POWER or PWR LED on the front of the chassis comes on and the fan operates. If this does not happen, see
the power-up procedure in the Cisco 2600 Series Routers Hardware Installation Guide.
Messages begin to appear in your terminal emulation program window.
Caution Do not press any keys on the keyboard until the messages stop. Any keys pressed during this time are interpreted
as the first command typed when the messages stop, which might cause the router to power off and start over. It
takes a few minutes for the messages to stop.