


33
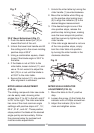
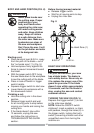
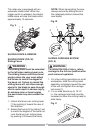
The miter saw is equipped with an
automatic blade brake. When the
trigger switch is released, the electric
blade brake will stop the blade within
approximately 10 seconds.
Fig. V
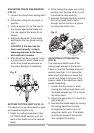
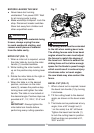
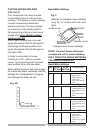
SLIDING FENCE & REMOVE
SLIDING FENCE (FIG. W)
Sliding Fence
The sliding fence must be extended
to the left when making bevel cuts.
The sliding fences note three bevel
angles where the user must adjust
the fences to match the degree of
the bevel cut. Failure to extend the
sliding fence will not allow enough
space for the blade to pass through
which could result in serious injury.
At extreme miter or bevel angles
the saw blade may also contact the
fence.
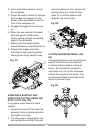
1. Unlock the fence cam locking lever
(1) by pushing it toward the rear of
the machine.
2. Extend the fence (2) by sliding it out
to match the degree of the bevel cut.
Lock the fence cam locking lever
by pushing it IN toward the fence.
1
2
NOTE: When transporting the saw,
always secure the sliding fence in
the collapsed position (toward the
saw blade).
Fig. W
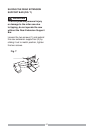
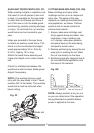
SLIDING CARRIAGE SYSTEM
(FIG. X)
To reduce the risk of injury, return
carriage to the full rear position after
each crosscut operation.
1. For chop cutting operations on small
workpieces, slide the cutting head
assembly completely toward the rear
of the unit and tighten the carriage
lock knob (1).
2. To cut wide boards up to 12-1/4
in., the carriage lock knob must be
loosened to allow the cutting head to
slide freely.
Fig. X
WARNING
!
1
2
1
WARNING
!