


18 19
18 19
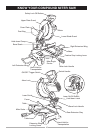
1
2
3
4
5
6
7
8
9
10
10
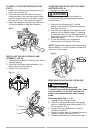
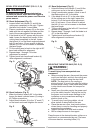
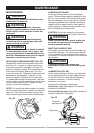
NOTE: Mounting hardware is not included with
this tool. Bolts, nuts, washers, and screws must
be purchased separately.
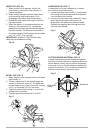
2. For portable use, place the saw on a 3/4 in.
thick piece of plywood. Bolt the base of the
miter saw securely to the plywood using the
mounting holes on the base. Use C-clamps
to clamp this mounting board to a stable work
surface at the worksite.
Fig . S
3/4 Inch Plywood
Hand Hold for
Transportation
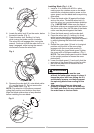
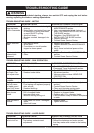
THE LASER GUIDE (Fig. T)
1. To turn laser on, turn switch (1) to “I” position.
2. To turn laser off, turn switch to “O” position.
Fig . T
Your tool is equipped with the Laser Guide
using a Class III laser beam. The laser beam
will enable you to preview the saw blade path on
the stock to be cut before starting the miter saw.
This laser guide is powered by two AAA 1.5 volt
batteries.
AVOID DIRECT EYE CONTACT
● Laser is radiated when laser guide is
turned on. Avoid direct eye contact.
Always un-plug the miter saw from power
source before making any adjustments.
●
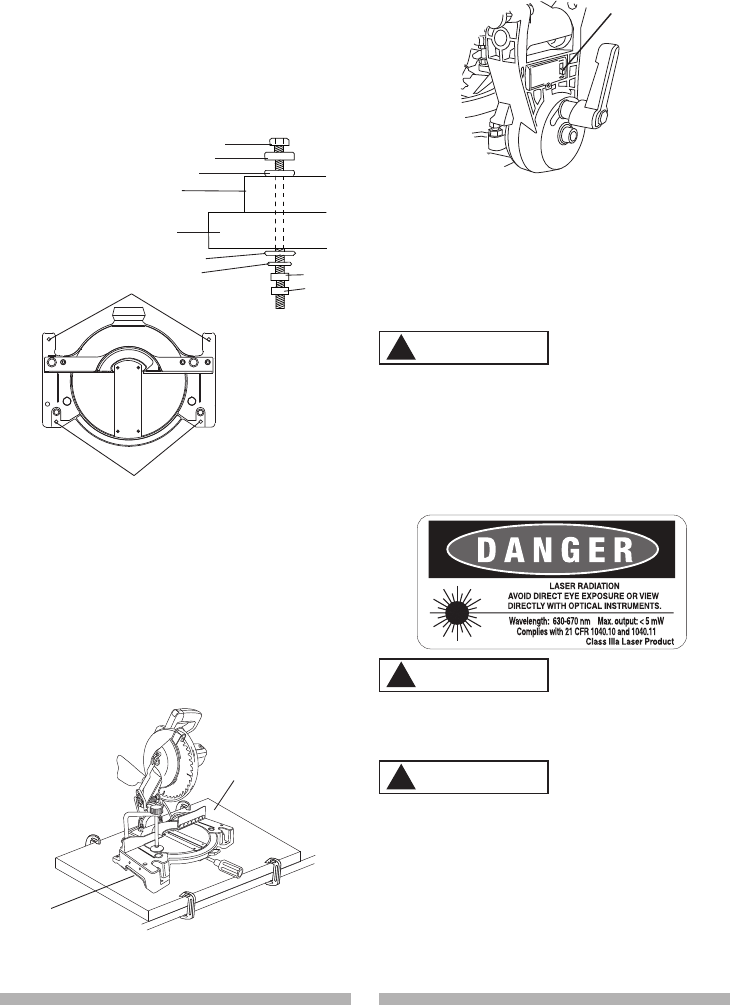
Laser Warning Label:
Max output <5mW DIODE LASER:
630-670nm, Complies with 21CFR 1040.10
and 1040. 11.
●
Use of controls or adjustments or
performance of procedures other than
those specified herein may result in
hazardous radiation exposure.
●
The use of optical instruments with this
product will increase eye hazard.
●
Do not attempt to repair or disassemble
the laser. If unqualified persons attempt
to repair this laser product, serious injury
may result. Any repair required on this
laser product should be performed by a
Sears or other qualified service center.
NOTE: All the adjustments for the
operation of this machine have been
completed at the factory.
1
WARNING
!
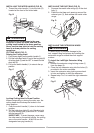
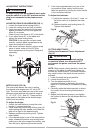
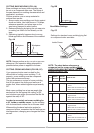
Mounting instructions
1. For stationary use, place the saw in the
desired location, directly on a workbench
where there is room for handling and proper
support of the workpiece. The base of the
saw has four mounting holes. Bolt the base
of the miter saw (1) to the work surface (5),
using the fastening method as shown in
Fig. R.
Fig . R
1. Miter saw base
2. Hex head bolt
3. Rubber washer
4. Flat washer
5. Workbench
6. Flat washer
7. Lockwasher
8. Hex nut
9. Jam nut
WARNING
!
WARNING
!