


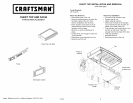


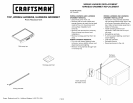

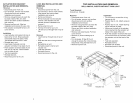

TOP INSTALLATION AND REMOVAL
Tools Required:
Screwdriver, Crosstip
Roll-away top removal
• Disconnect power from unit.
• Remove pull out work surface. (See
drawer and work surface installation
and removal.)
• Remove enough drawers to reach the
top back inside of the unit. (See
Drawer and Work surface installation
and removal.)
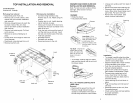
• Remove lock retaining clip. Pull lock
out to remove.
• Remove (4) screws holding top in
place.
• Lift top off of unit enough to reach the
wiring harness.
• Disconnect wiring harness from unit.
• Remove top from unit.
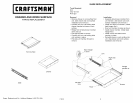
Roll-away top installation
• Connect wiring harness to top.
Position top on unit. Attach using (4)
screws.
• Position lock in unit. Install retaining
clip to hold lock in place.
• Make sure the back of the lock rod is
inserted into the lock rod holder in the
back of the unit.
• Push the lock rod toward the back of
unit the and line up with lock. Insert
the lock rod into the back of the lock.
• Test lock operation.
• Reinstall drawers.
• Reinstall work surface.
• Reconnect power to the unit.
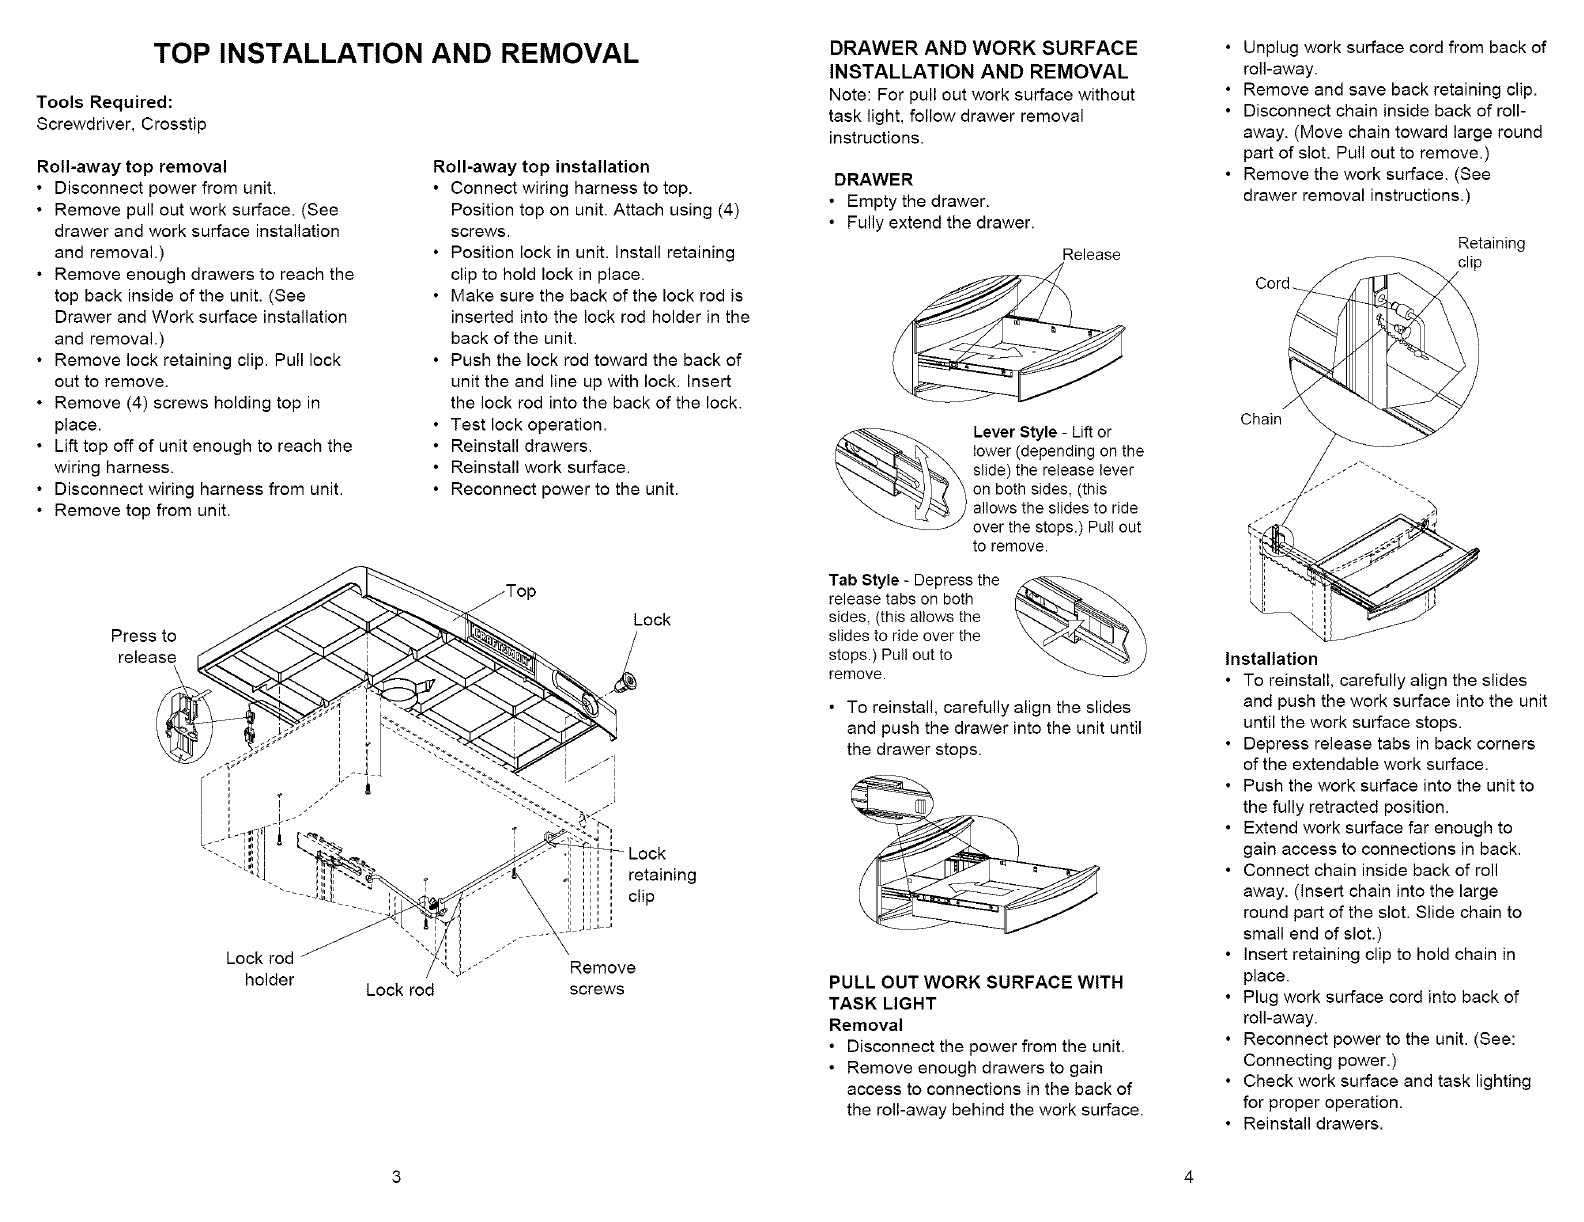
Press to
release
Lock
Lock rod
holder
retaining
clip
Lock rod
Remove
screws
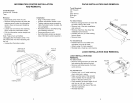
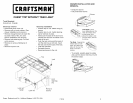
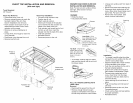
DRAWER AND WORK SURFACE
INSTALLATION AND REMOVAL
Note: For pull out work surface without
task light, follow drawer removal
instructions.
DRAWER
• Empty the drawer.
• Fully extend the drawer.
Release
Lever Style - Lift or
lower (depending on the
slide) the release lever
on both sides, (this
allows the slides to ride
over the stops.) Pull out
to remove.
Tab Style - Depress the
release tabs on both
sides, (this allows the
slides to ride over the
stops.) Pull out to
remove.
• To reinstall, carefully align the slides
and push the drawer into the unit until
the drawer stops.
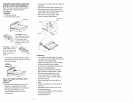
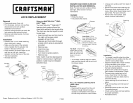
PULL OUT WORK SURFACE WITH
TASK LIGHT
Removal
• Disconnect the power from the unit.
• Remove enough drawers to gain
access to connections in the back of
the roll-away behind the work surface.
• Unplug work surface cord from back of
roll-away.
• Remove and save back retaining clip.
• Disconnect chain inside back of roll-
away. (Move chain toward large round
part of slot. Pull out to remove.)
• Remove the work surface. (See
drawer removal instructions.)
Retaining
Chain
Installation
• To reinstall, carefully align the slides
and push the work surface into the unit
until the work surface stops.
• Depress release tabs in back corners
of the extendable work surface.
• Push the work surface into the unit to
the fully retracted position.
• Extend work surface far enough to
gain access to connections in back.
• Connect chain inside back of roll
away. (insert chain into the large
round part of the slot. Slide chain to
small end of slot.)
• insert retaining clip to hold chain in
place.
• Plug work surface cord into back of
roll-away.
• Reconnect power to the unit. (See:
Connecting power.)
• Check work surface and task lighting
for proper operation.
• Reinstall drawers.
3 4