


11
ADJUSTMENTS
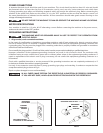
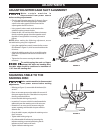
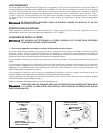
ADJUSTING MITER GAGE SLOT ALIGNMENT
Make certain machine is
disconnected from power source
before making adjustments.
• Check to see if the miter gage slot (A), shown in Figure
11, is parallel with the disc by placing a combination
square in the miter gage slot with one end of the
square against the disc as shown.
• Using a pencil, make a mark on the abrasive disc
where the square contacts the disc.
• Rotate the disc 180° and check the distance between
the disc and miter gauge slot at the opposite end of
the table. If an adjustment is necessary, proceed as
follows:
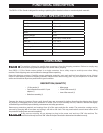
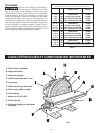
NOTE: When making the following adjustment, ensure
the table locking wing nut is tightened.
• Using the supplied hex wrench, loosen the four screws
(B) indicated in Figure 12, which secure the table to the
trunnions.
• Adjust the table by moving it in or out until the miter
gage slot is equidistant from the disc at both ends of
the table.
• Tighten the four screws securing the table to the
trunnions.
To avoid trapping the work or fingers
between the table and sanding disc,
the table edge should be positioned a maximum of
1/16" from the sanding disc.
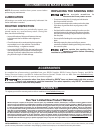
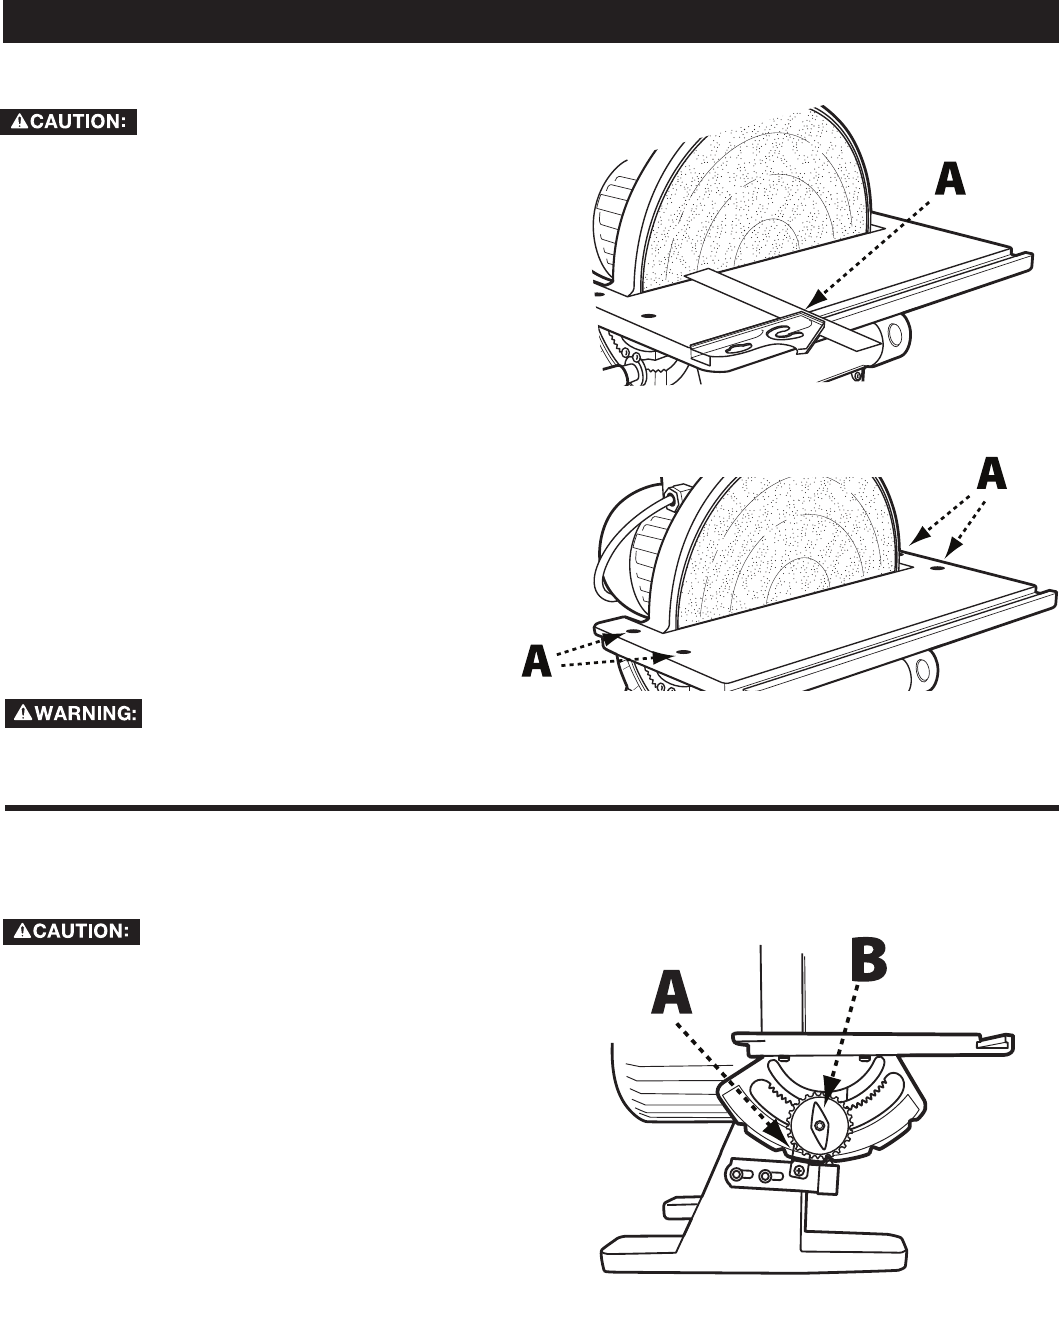
SQUARING TABLE TO THE
SANDING DISC
Make certain machine is disconnected
from power source before making
adjustments.
• Referring to Figure 13, ensure table tilt indicator (A) is
set to 0°.
• Place an accurate square on the table with one end of
the square against the disc. If the table is not square to
the disc, proceed as follows:
• Loosen the table locking wing nut (B).
• Locate the 0° set screw which is located beneath the
table and loosen the retaining nut on the set screw.
• Rotate the 0° set screw and re-measure using the
square, repeating until the table is square with the
abrasive disc.
• Once the table is square, retighten the retaining nut on
the 0° set screw.
• Tighten table locking wing nut.
• Re-calibrate table tilt indicator by loosening the
indicator retaining screw and positioning the tilt
indicator to the 0° mark on the scale.
• Tighten indicator retaining screw.
FIGURE 11
FIGURE 12
FIGURE 13