


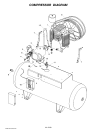
15—ENG
MGP-SL10120H-2A
SERVICE INSTRUCTIONS
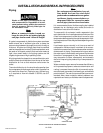
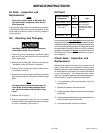
A dirty air filter will not allow the compressor to operate
at full capacity. Before you use the compressor, check
the air filter to be sure it is clean. If it is dirty, replace it
with a new filter.
Air Filter - Inspection and
Replacement
NOTENOTE
NOTENOTE
NOTE
Keep the air filter clean at all times. Do
not operate the compressor with the air
filter removed.
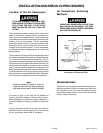
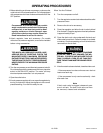
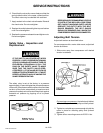
1. Check oil level in compressor crankcase before
each use. The oil level should be to the middle of
the oil sight glass.
2. Replace the oil after initial 100 hours of operation
- thereafter, every 300 hours of operation.
3. Remove the oil fill and drain plugs. Collect the oil
in a suitable container.
4. Replace the oil drain plug and refill the crankcase
with recommended oil. Always fill to middle of sight
glass.
Overfilling with oil will cause premature
compressor failure. Do not overfill.
Oil - Checking and Changing
5. Replace the oil fill plug.
6. Start the compressor outfit and run for several
minutes. Shut the compressor down and check the
oil level. If necessary, add more oil.
NoteNote
NoteNote
Note
It is important to maintain the proper oil
level. A low oil level reduces proper cylin-
der wall lubrication and increases ring
wear.
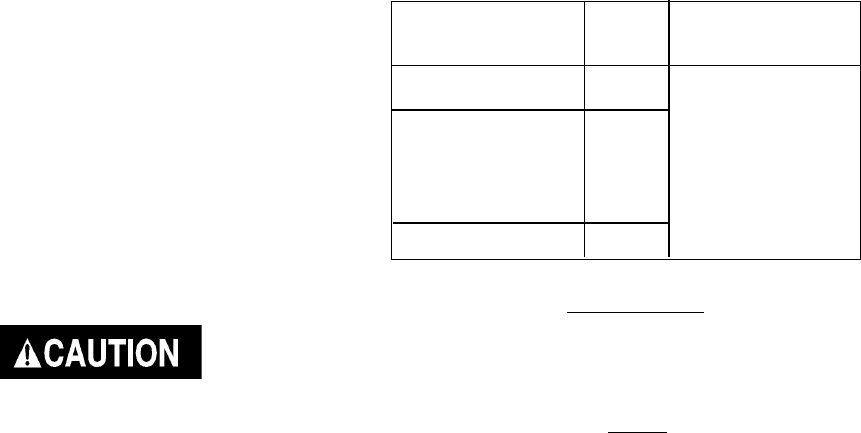
Oil Chart
Cold Climates - 10º F
Moderate Climates -
30º to 80º F
Hot Climates - 80º F
Type
Reciprocating
Non-detergent
petroleum based
compressor rated or
better oil
Oil
Weight
20 Wt.
30 Wt.
40 Wt.
Room or Ambient
Temperature
A compressor grade non-detergent oil should be used.
Most automotive detergent oils cause excessive carbon
buildup and should not be used. Please note that all units
run at a constant speed (not start and stop) and should
be lubricated by Rarus 847, Shell turbo 100, or Anderol
synthetic compressor oil. Do not use synthetic oil for the
first 300 hours. All units should be broken in on petro-
leum based oil.
Remove and inspect the check valve at least once a
year or more often if the compressor is heavily used.
Moisture and other contaminants in the hot compressed
air will cause an accumulation of a carbon-like residue
on the working parts. If the valve has heavy carbon
build-up, it should be replaced. Use the following proce-
dure to inspect, clean or replace the check valve.
1. Turn compressor off and disconnect or lock out
power source.
2. Release air pressure from the air tank.
3. Loosen the top and bottom tube nuts and remove the
outlet tube.
4. Loosen pressure release tube nuts, disconnect from
check valve and move tube aside.
5. Unscrew the check valve with a wrench.
Check Valve - Inspection and
Replacement