


English
18
• Replace the 9 volt battery. Turn the unit on.
• If the detector still does not turn on, take the detector to a
D
EWALT service center.
THE DETECTOR’S SPEAKER MAKES NO SOUND.
• Ensure that the detector is on.
• Press the power/volume button. It will toggle from high, to low,
to mute.
• Ensure that the rotary laser is spinning and that it is emitting a
laser beam.
• If the detector is still not making any sound, take it to a DEWALT
service center.
THE DETECTOR DOES NOT RESPOND TO A STATIONARY
LASER BEAM.
• The D
EWALT Digital Laser Detector has been designed to work
only with rotary lasers.
THE DETECTOR GIVES OFF A TONE BUT THE LCD
DISPLAY WINDOW DOES NOT FUNCTION.
• If the detector is very cold, allow it to warm up in a heated
area.
• If the LCD display window is still not functioning, take the
detector to a D
EWALT service center.
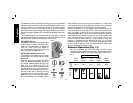
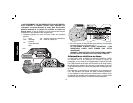
Construction Grade Rod
DANGER: NEVER attempt to use a grade rod in a storm or
near overhanging electric wires. Death or serious personal injury
will occur.
Some laser kits include a grade rod. The D
EWALT Grade Rod is
marked with measurement scales on both sides and is constructed
in telescoping sections. A spring-loaded button actuates a lock to
hold the grade rod at various lengths.
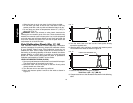
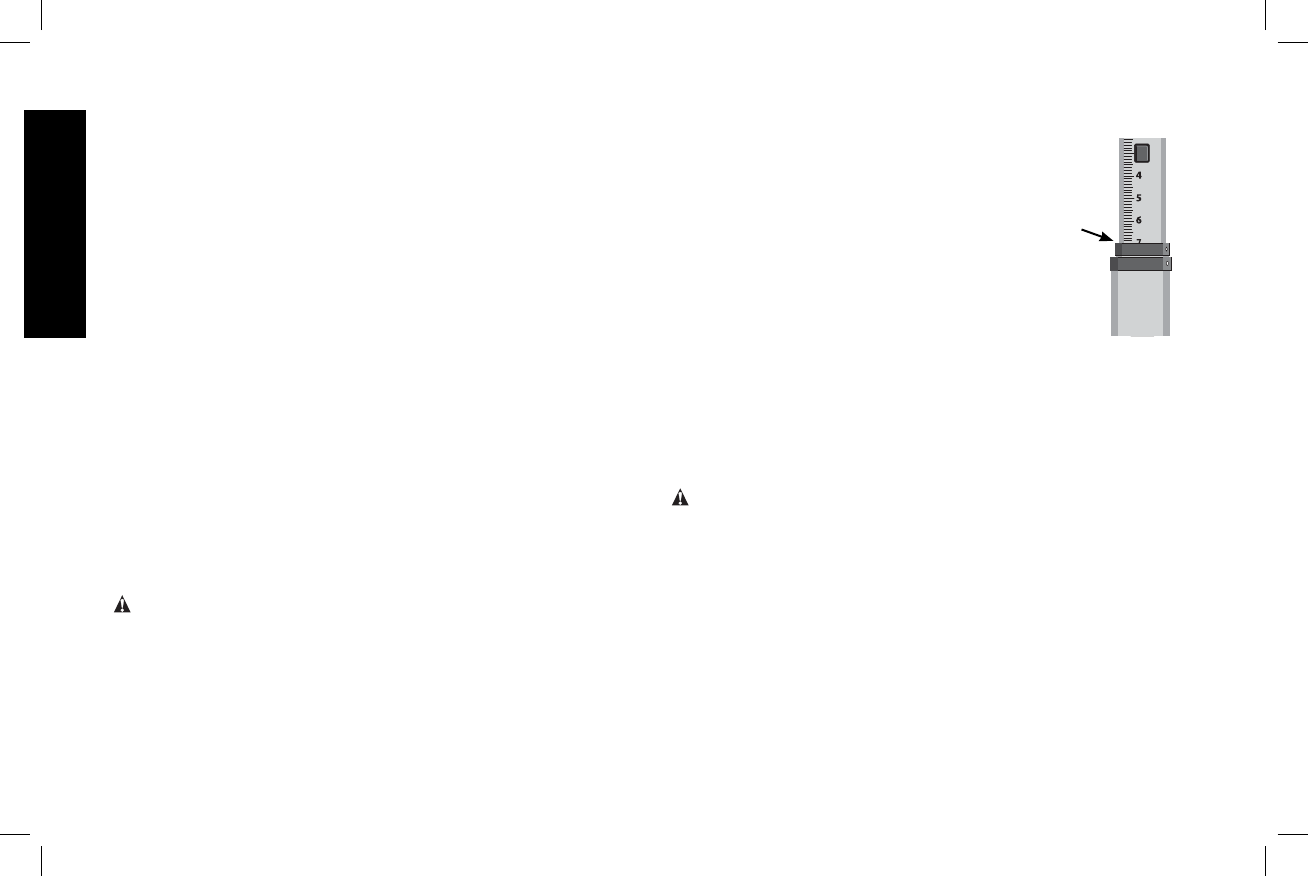
The front of the grade rod has the measurement
FIG. 13
scale starting at the bottom. Use this for measuring
from the ground up when grading or leveling
jobs.
The back of the grade rod is designed to measure
the height of ceilings, joists, etc. Fully extend the
top section of the grade rod until the button locks
into the previous section. Extend that section
either until it locks into the adjacent section or
until the grade rod touches the ceiling or joist. The
height is read where the last extended section
exits the previous lower section, as shown in
Figure 13.
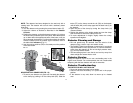
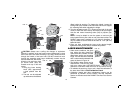
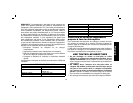
Using the Laser with a Wall Mount
(Fig. 14, 15)
Some laser kits include a Wall Mount. It can be used for attaching
the tool to track or ceiling angle and to aid in acoustical ceiling
installation. Follow the directions below for using the wall mount.
CAUTION: Before attaching the laser level to wall track or ceiling
angle, be sure that the track or angle is properly secured.
1. Place the laser on the mounting base (KK) aligning the hole (LL)
on the bottom of the laser with the hole (MM) in the mounting
base. Turn the mounting knob (NN) to secure the laser.
2. With the wall mount measuring scale (OO) facing you, loosen
the wall mount clamp locking knob (PP) to open the clamp
jaws.
3. Position the clamp jaws around the wall track or ceiling angle
and tighten the wall mount clamp locking knob (PP) to close
the clamp jaws onto the track. Be sure that the wall mount
clamp locking knob is securely tightened before proceeding.