


English
12
WARNING: The planer could tilt or fall from the table if it is not
properly secured opposite the end where the folding table is being
installed. Serious injury may result.
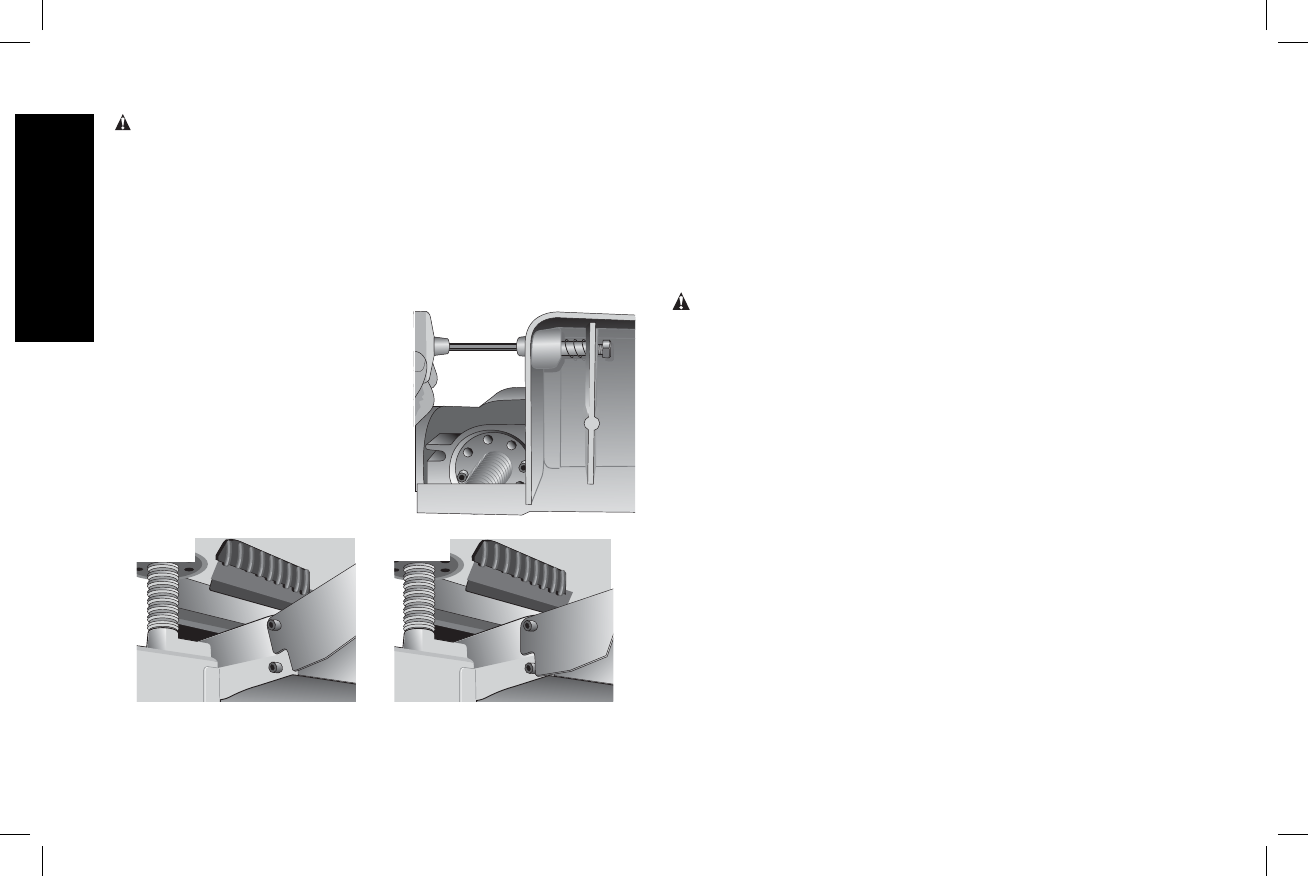
3. Place the spring onto the small end of the stepped bolt.
4. Insert the end of the bolt with the spring around it into the larger
hole on the side of the base.
5. Push the stepped bolt all the way through the hole in the first rib
on the underside of the planer. The spring should engage the rib
slightly and the threads should show on the right side of the rib.
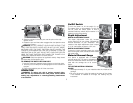
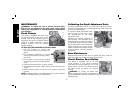
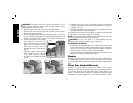
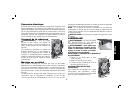
6. On the underside of the planer,
FIG. 7
use a wrench to hold the nut in
place while turning the stepped
bolt into it. The T-wrench on your
planer can be used to turn the
stepped bolt until it is fully secured
(Fig. 7).
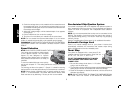
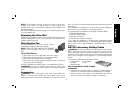
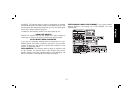
7. Install the smaller screw into the
lower threaded hole on the side
of the base. Use the T-wrench
to tighten that fastener securely
(Fig.8).
FIG. 8
FIG. 9
8. Depress the top pin until it is flush with the base and slide the
top hole of the table over the pin and release the pin so they lock
together (Fig. 8, 9).
9. To attach the table to the rear of the planer, install the bolts and
spring following the above procedure.
Your tables should now fold up and down on the top screw and rest
on the bottom screw while in position for planing.
NOTE: To transport the planer with the tables, fold them up and carry
the unit as recommended by the planer manual.
WARNING: For your own safety, it is recommended that two
people carry this machine or serious injury could result.
TO REMOVE THE TABLES
1. Depress the spring-loaded bolts on the base and slide each end
of the table toward you so they disengage the holes in the tables.
You may want to use the T-wrench from your planer to push the
bolts flush with the base to easily remove the tables.
2. Leave the hardware (stepped bolts and small cap screw) in the
base until you need to re-attach the tables.
Repairs
To assure product SAFETY and RELIABILITY, repairs, maintenance
and adjustment should be performed by authorized service centers
or other qualified service personnel. Always use identical replacement
parts.
Three Year Limited Warranty
DEWALT will repair, without charge, any defects due to faulty
materials or workmanship for three years from the date of purchase.
This warranty does not cover part failure due to normal wear or tool
abuse. For further detail of warranty coverage and warranty repair
information, visit www.dewalt.com or call 1-800-4-D
EWALT (1-800-