


OPERATION
WARNING: To reduce the risk of injury, turn unit off
and disconnect it from power source before installing and
removing accessories, before adjusting or when making
repairs. An accidental start-up can cause injury.
CAUTION: Prolonged grinding will cause most materials to
become hot. Handle them with pliers or thick gloves.
CAUTION: Never attempt to use your bench grinder unless it is
firmly bolted to a workbench or rigid frame that is also firmly attached
to the floor.
• Before turning the grinder on, put on safety glasses.
• Turn on the grinder and allow it to reach full speed (3450 RPM -
DW756, 3600 RPM - DW758).
• Hold the workpiece firmly and against the tool rest.
• Hold very small pieces with pliers or other suitable clamps.
• Feed the work smoothly and evenly into the grinding wheel.
• Move the work slowly and avoid jamming the work against the
wheel. As the wheel tends to slow down you should occasionally
release the pressure to let the wheel return to full speed.
• Grind only on the face of the grinding wheel and never on the
side. (Some wheels are designed for side grinding and will say so
on their instruction sheets).
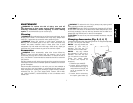
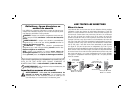
Switch (Fig. 1)
The switch (E) is located on the front of the grinder, on the base.
To turn the tool on depress the side of the rocker switch on the left
side, marked “ON”.
To turn off the grinder, depress the right side of the rocker switch,
marked “OFF”.
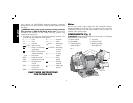
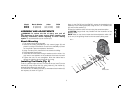
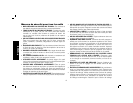
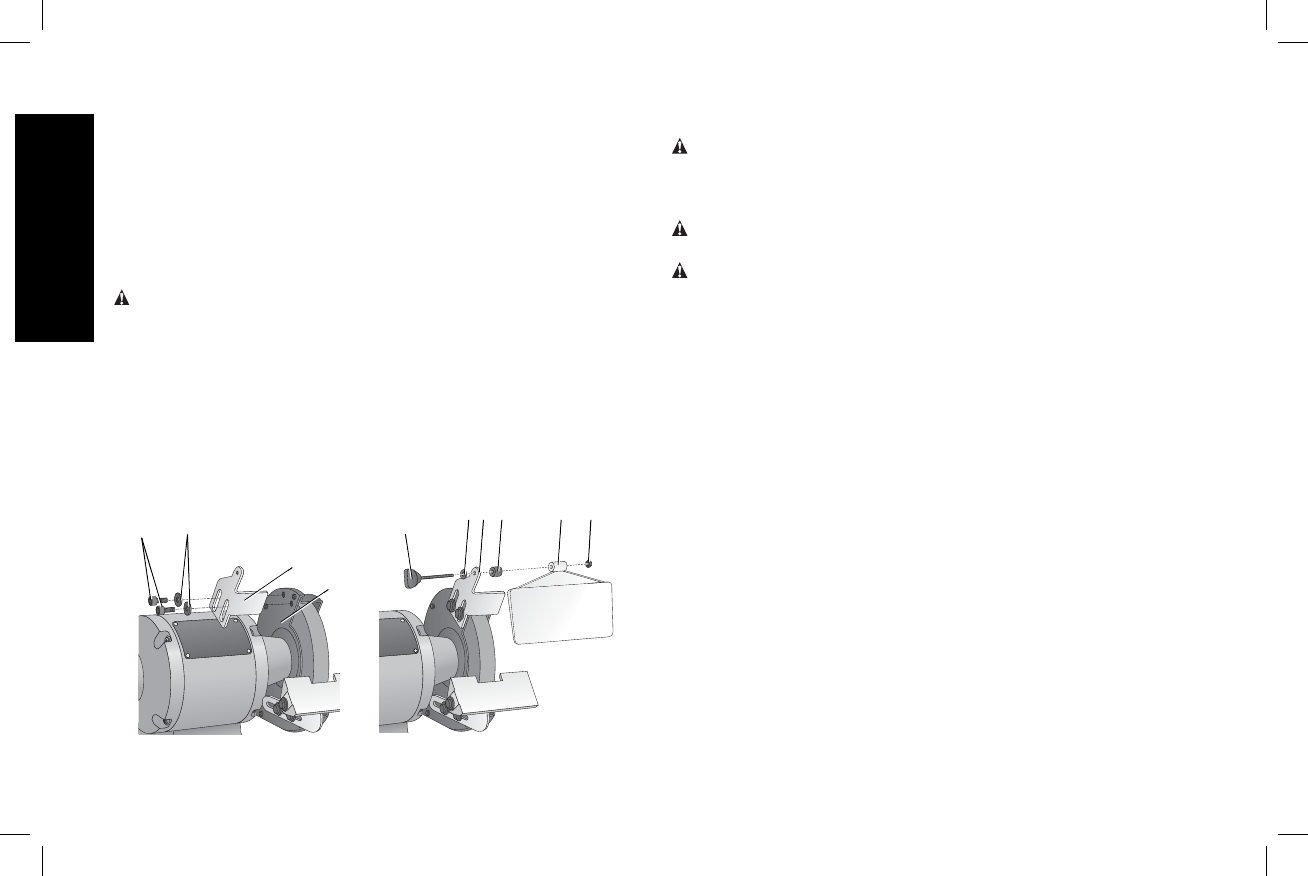
Installing Spark Guards (Fig. 3)
The spark guards (A) are identified L for left and R for right. Refer to
Figure3 to install the spark guard to the wheel guard (BB) using the
two bolts (O) and flat washers (J). Adjust the edge of the spark guard
to within 1/16" (1.6mm) of the grinding wheel or other accessory.
Tighten the two bolts (O) securely.
Proceed to install the other spark guard using the same description.
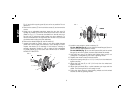
Installing Eye Shields (Fig. 4)
WARNING: Eye shields are not designed to replace safety glasses.
Install the eye shields (B) (they will fit either side) to the brackets, as
shown in Figure 4. Screw the plastic knob (P) through the washer (Q),
the spark guard (A), the spacer (R), the eye shield (B) and finally into
the nut (S). Adjust eye shields so they are between the wheels and
your eyes.
Proceed to install the other eye shield using the same description.
Tighten the shields in place by tightening the plastic knob (P) in the
bracket assembly. Remove protective film.
FIG. 4
P
Q R S
A B
FIG. 3
O
J
A
BB
English
6