


8 - ENG
a. Use D
e
WALT pneumatic tool oil or a non-detergent S.A.E. 20 weight oil.
DO NOT use detergent oil or additives as they will damage O-rings and rubber
parts.
b. Use a filter when possible.
c. Add 5 to 7 drops of oil in the air fitting a least twice a day.
3. Wear eye and ear protection.
4. Ensure canister is empty of all fasteners.
5. Check for smooth and proper operation of contact trip. Do not use tool if assembly
is not functioning properly. NEVER tamper with the contact trip. NEVER use a tool
that has the contact trip restrained in the actuated position.
6. Adjust air supply: Ensure air pressure does not exceed recommended operating
limits; 70 to 120 psi, (4.9 to 8.3 bar, 5 to 8.5 kg/cm
2
).
7. Keep tool pointed away from yourself and others.
8. Connect air hose.
9. Check for audible leaks around valves and gaskets. Never use a tool that leaks or
has damaged parts.
WARNING: To reduce the risk of personal injury, disconnect tool from air supply
and engage trigger lock before performing maintenance, clearing a jammed
fastener, leaving work area, moving tool to another location or handing the tool to
another person.
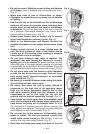
LOADING THE TOOL (FIG. 1–6)
WARNING: Keep the tool pointed away from yourself and others. Serious personal
injury may result.
WARNING: Never load nails with the contact trip or trigger activated. Personal injury
may result.
1. Read all Safety Warnings before
using tool.
2. Connect the air supply to the tool.
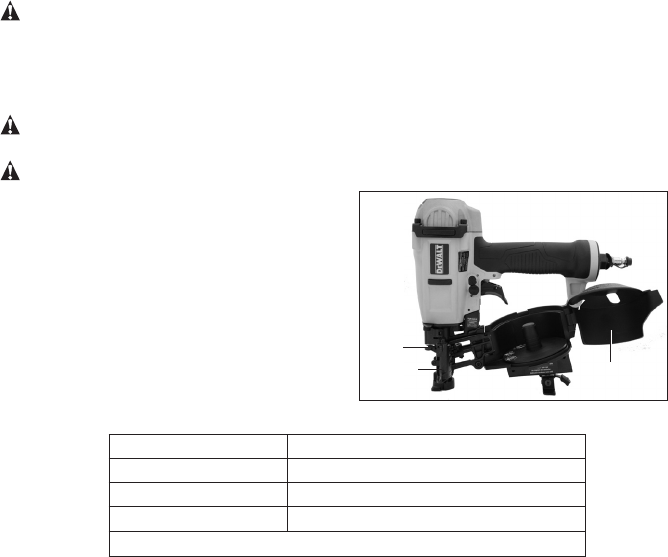
3. Lift the canister door latch (e) to open
the nail guide door (H).
4. Rotate the canister door (I) open.
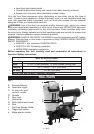
5. Adjust the nail platform (J) to properly
accommodate the nail length being
used. Pull the nail platform (J) up or
down for desired nail.
Platform Position Nail Length
lowest position 1-1/2" (38 mm) - 1 3/4" (44.5mm)
center position 1-1/4" (32 mm)
upper position 3/4" (19 mm) - 1" (25 mm)
NOTE: 3/4" (19 mm) nails are not available for this tool.
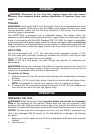
6. Place the coil on the nail platform (J). NOTE: Observe fastener icon (K) Fig. 4. Insert
fasteners (L) with points down. IMPORTANT: Fasteners must point in the same
direction as they will be driven.
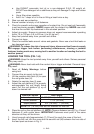
7. Uncoil enough nails [approximately 3" (76 mm)] to reach the nose of the tool.
8. Insert the first nail into the nose and the second nail (M) between the two rails of
the feed pawl as shown in Fig. 5.
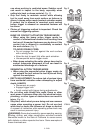
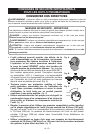
Fig. 2
E
H
I