


33
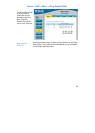
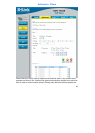
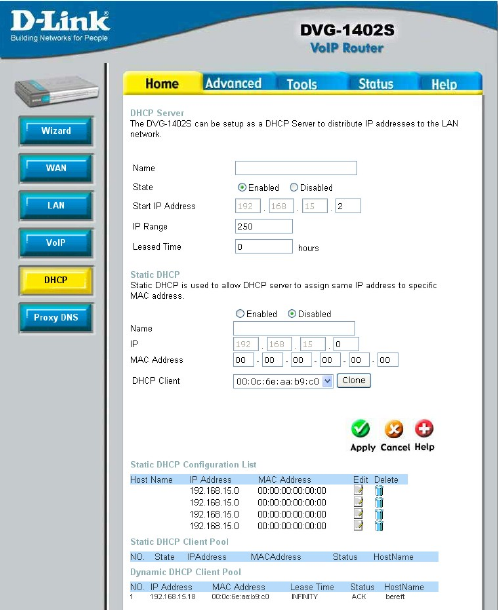
Home > DHCP
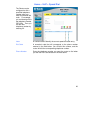
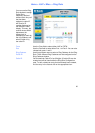
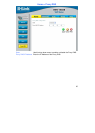
The next step is to set a range of IP addresses that you wish to allot to the devices on
your LAN by entering a Starting IP Address and an Ending IP Address. This may be
in a range from 2 to 254 (192.168.1.2 – 192.168.1.254). Computers on your LAN will
have an IP address within this range then automatically assigned to them. Finally, enter
the Lease Time, which is the time the Server will set for devices using DHCP to
re-request an IP Address. Clients authorized for DHCP will be listed in the table at the
bottom of the page. Click Apply to implement information set in this table. The DHCP
Server is enabled by default.
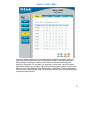
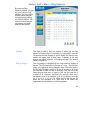
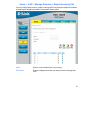
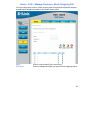
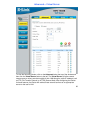
DHCP may also be statically configured as well. This method allows the router to assign
the same IP address information to a specific computer on the network, defined by its
MAC address. This computer will get the same DHCP implemented IP address
information every time the computer is turned on and this IP address will be specific to
that computer’s IP address on the local network. No other computer can be assigned
this address. This is useful for computers on the LAN that are hosting applications such
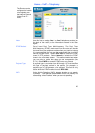
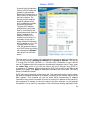
Dynamic Host Configuration
Protocol (DHCP) allows the
gateway to automatically
obtain the IP address from a
DHCP server on the service
provider’s network. The
service provider assigns a
global IP address from a
pool of addresses available
to the service provider.
Typically the IP address
assigned has a long lease
time, so it will likely be the
same address each time the
Router requests an IP
address. If DHCP is not
enabled on the Router, it is
necessary for the user to
assign a static IP address to
each computer on your LAN.
To setup DHCP for your
LAN, first enable the Router
as a DHCP server by clicking
the corresponding Enabled
radio button in the window
above.