


Page 15
Maintenance
Service
Preventive maintenance
performed by unauthorized
personnel may result in misplacing of internal wires
and components which could cause serious hazard.
We recommend that all tool service be performed by a
Dremel Service Facility.
CARBON BRUSHES
The brushes and commutator in your tool have been
engineered for many hours of dependable service. To
maintain peak efficiency of the motor, we recommend
every two to six months the brushes be examined. Only
genuine Dremel replacement brushes specially
designed for your tool should be used.
MAINTENANCE OF REPLACEABLE BRUSHES
MODEL 398-49
The brushes should be inspected frequently when
tools are used continuously. If your tool runs sporad-
ically, loses power, makes unusual noises or runs at a
reduced speed, check the brushes. To continue using
the tool in this condition will permanently damage
your tool.
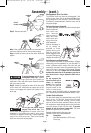
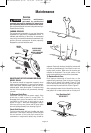
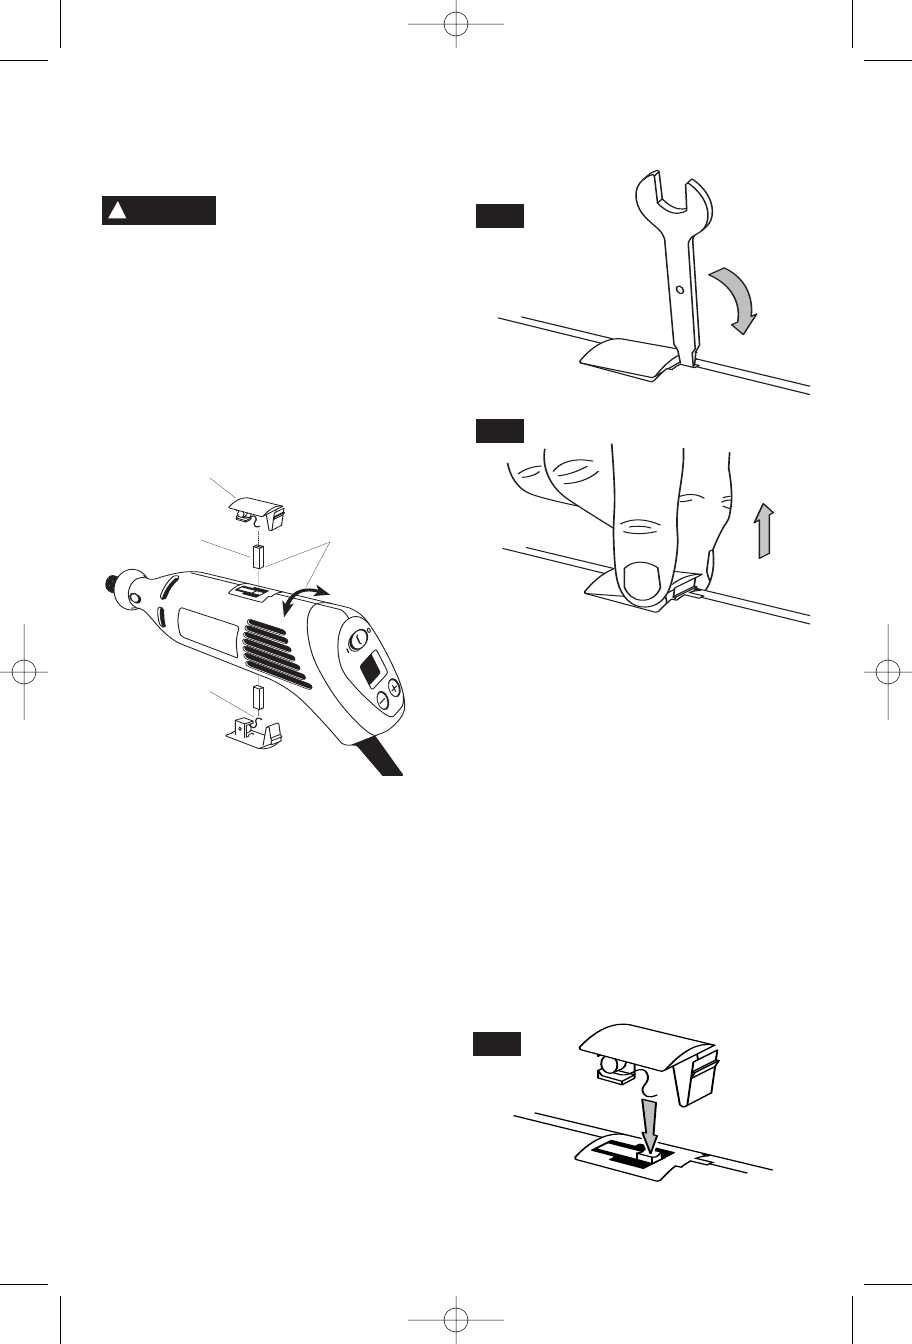
To Remove Brush Door
Disconnect the tool from the power supply. Each
brush door is held in place by a snap latch. To
disengage latch, place screwdriver end of wrench
(included) in slot at rear of door and pry up as
shown in Figure 1. With latch disengaged, using a
little force, pull up rear of door and lift away brush
door and spring assembly from housing, Figure 2.
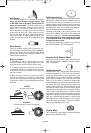
Check Both Brushes
Turn tool so the brush falls out of holder and check
each brush. If the brush is less than 3,2mm long and
the end surface of the brush that contacts the
commutator is rough and/or pitted, they should be
replaced. Check both brushes. Usually the brushes will
not wear out simultaneously. If one brush is worn out,
replace both brushes. Make sure the brushes are
installed as illustrated. The curved surface of the
brush must match the curvature of the commutator.
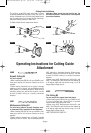
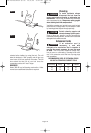
To Replace Brush Door
Rest squared underside of brush door on the
squared cavity openings. Check to be sure the spring
rests on the V groove of the brush, Figure 3. Push
front of door down into the slot, Figure 4, then push
down and snap the rear latch into it’s slot, Figure 5.
After replacing brushes the tool should be run at no-
load; place it on a clean surface and run it freely for 5
BRUSH
DOOR
BRUSH
SPRING
CURVED END OF
BRUSH MUST
MATCH CURVATURE
OF HOUSING
BRUSH
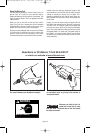
WARNING
!
FIG. 1
FIG. 2
FIG. 3
Any Questions Call
03-5415317
DM 2610934164 05-06 10/6/06 8:41 AM Page 15