


Page 8
#560
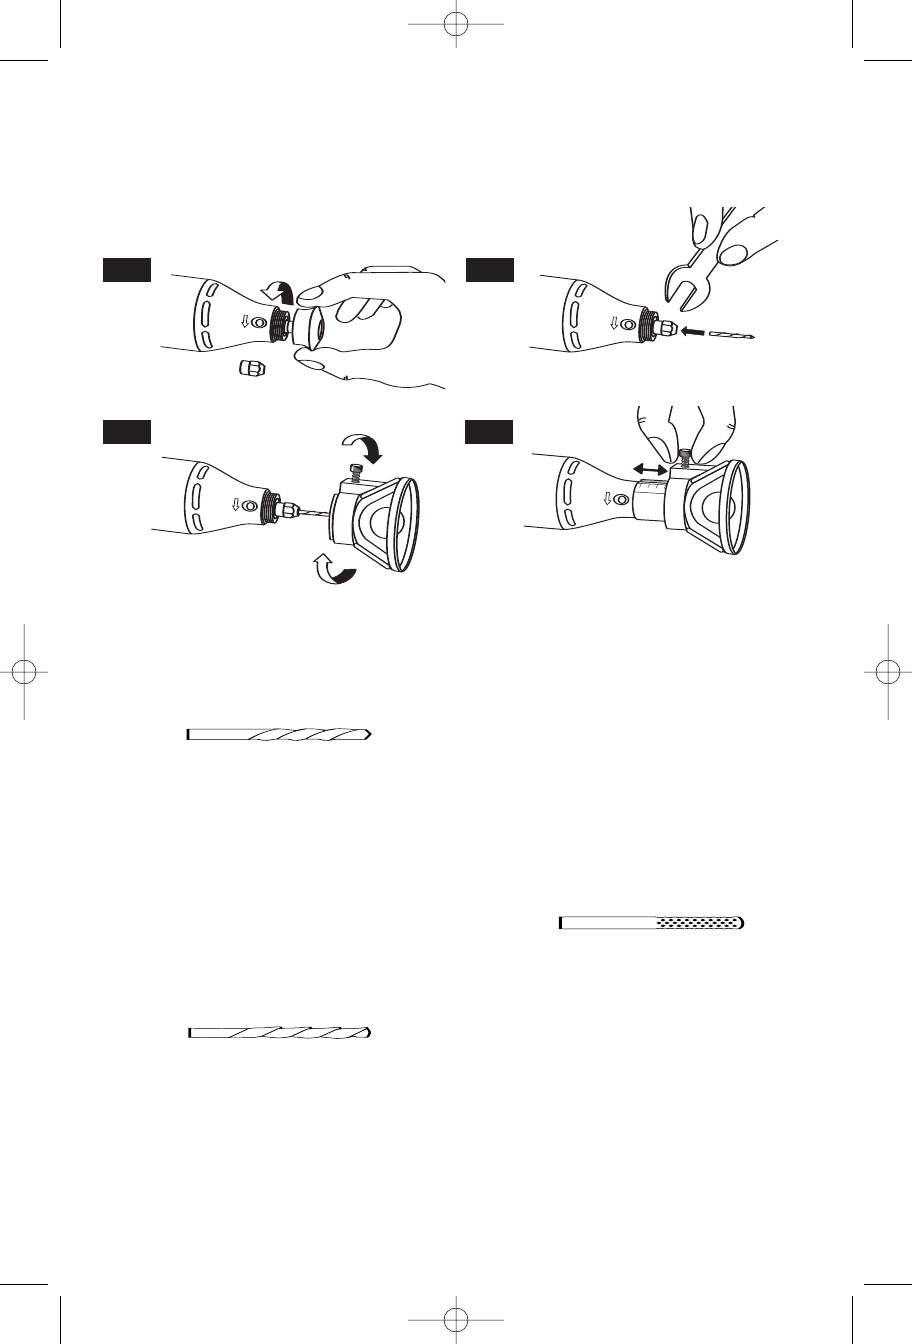
Drywall Cutting Bit
For use in drywall.
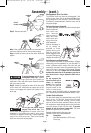
• When inserting the #560 bit into your MultiPro tool,
make sure that the bit has been inserted as far as
possible.
• When making freehand cuts in drywall, example
repairing a hole in drywall, use the Multipurpose bit
#561,cutting in a clockwise direction. When using a
template (outlet box) behind the drywall, use the
drywall bit #560, cutting in a counter-clockwise
direction.
#561
Multipurpose Cutting Bit
For use in wood, plastics, drywall, fiberglass, vinyl
or aluminum siding, acoustical tile and laminates.
• When inserting the #561 bit into your MultiPro tool,
make sure that the bit has been inserted as far as
possible.
• When making freehand cuts in Drywall, example
repairing a hole in drywall, use the Multipurpose bit
#561, cutting in a clockwise direction. When using a
template (outlet box) behind the drywall, use the
drywall bit #560, cutting in a counter-clockwise
direction.
• When using #561, Multipurpose Cutting Bit, and
#562, Tile Cutting Bit, start the bit into the material at
a 45 degree angle and then slowly bring it to a 90
degree angle to begin the cut.
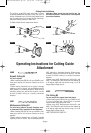
#562
Tile Cutting Bit
For use on wall tile, cement board and plaster
• When inserting the #562 bit into your MultiPro tool,
it is very important that 1,6mm-3,2mm of smooth
shank remains visible above the collet.
• When using #561, Multipurpose Cutting Bit, and
#562, Tile Cutting Bit, start the bit into the material at
a 45 degree angle and then slowly bring it to a 90
degree angle to begin the cut.
• NOT FOR USE ON FLOOR TILE
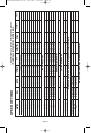
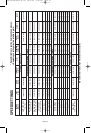
The cutting guide 565 (sold separately) comes
completely assembled and ready to use. For use in a
variety of materials up to 19,1mm thick. Match the bit
type to material to be cut. Always hold the tool firmly,
using slow steady pressure to make cuts.
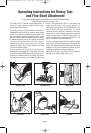
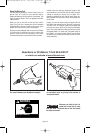
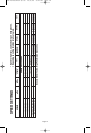
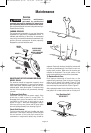
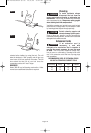
To attach, follow the four steps shown below.
Important: When viewing the tool from the top, the
bit rotates clockwise. Feed direction of cutting must
be counter-clockwise.
3
/4
1
/2
1
/4
0
FIG. 1 FIG. 2
FIG. 3
FIG. 4
C
utting Guide Installation
Operating Instructions for Cutting Guide
Attachment
DM 2610934164 05-06 10/6/06 8:41 AM Page 8