


www.drilldoctor.com 1514 www.drilldoctor.com
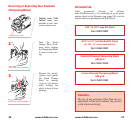
Creating or Replacing a Split Point
Leave bit in Chuck after
sharpening
Always align and sharpen a
bit before splitting it. To split
the point, do not remove the
bit from the Chuck after
sharpening.
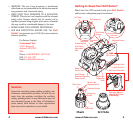
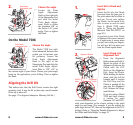
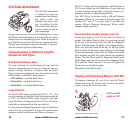
1.
Align Guides
Align one of the Sharpening
Guides on the Chuck (short
white marks) with the Split-
ting Guide on the Splitting
Port. Make sure the Align-
ment Guides insert into the
Split Point Guide Rails in the
Splitting Port.
2.
Split the point
Press Chuck slowly and firm-
ly into the Splitting Port until
it stops. Remove the chuck,
rotate one-half turn, and
repeat.
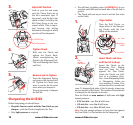
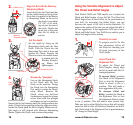
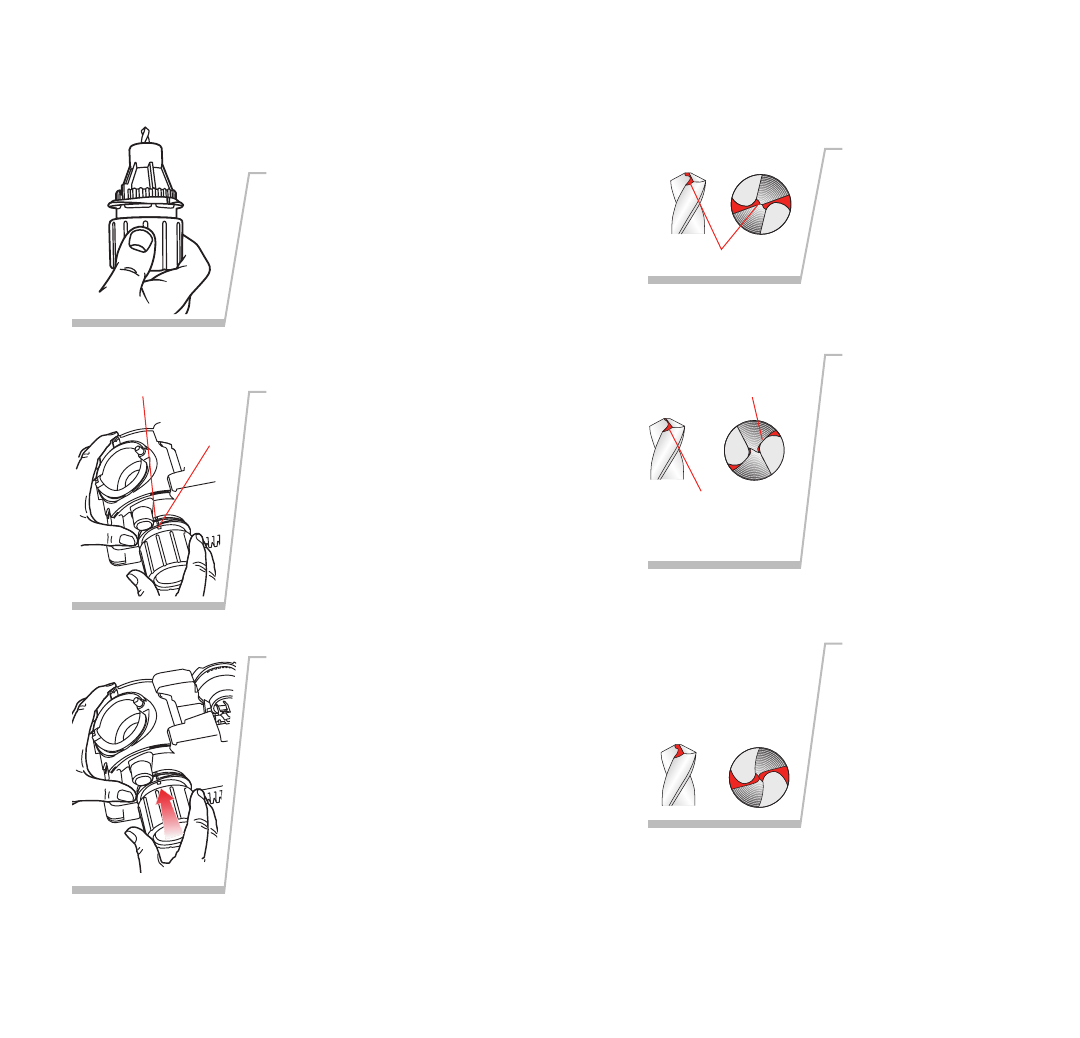
Check the tip of the bit care-
fully to determine that both
sides of the bit are split
equally. Compare it to the
illustrations. If it does not
match, study the information
following.
3.
Split lines are nearly straight
across.
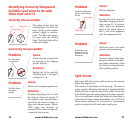
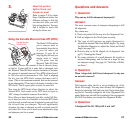
Identifying Correctly Split Drill Bits
(And What to Do With Those That Aren’t!)
Correctly Split
Solution
More grinding is needed for
larger drill bits. If one side of
the bit is undersplit, insert
the Chuck into the Splitting
Port again and split both
sides. Push the Chuck into
the Port until it stops. Repeat
until the split sides are equal
and look like the correctly
split bit shown above.
Undersplit
Oversplit
Solution
Reinsert the chucked bit into
the Sharpening Port and
remove enough of the tip
until the split tip looks like
the correctly split bit above.
Too much material
removed. Split lines are
joined in the center and
Chisel Edge has been
removed.
Split lines do not meet in
the center but Chisel
Edge remains.
Split line
Not enough material has
been removed from the
Heel of the drill bit.
Splitting Guide
Sharpening
Guide