


21
ENGLISH
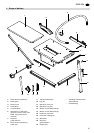
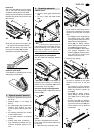
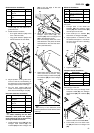
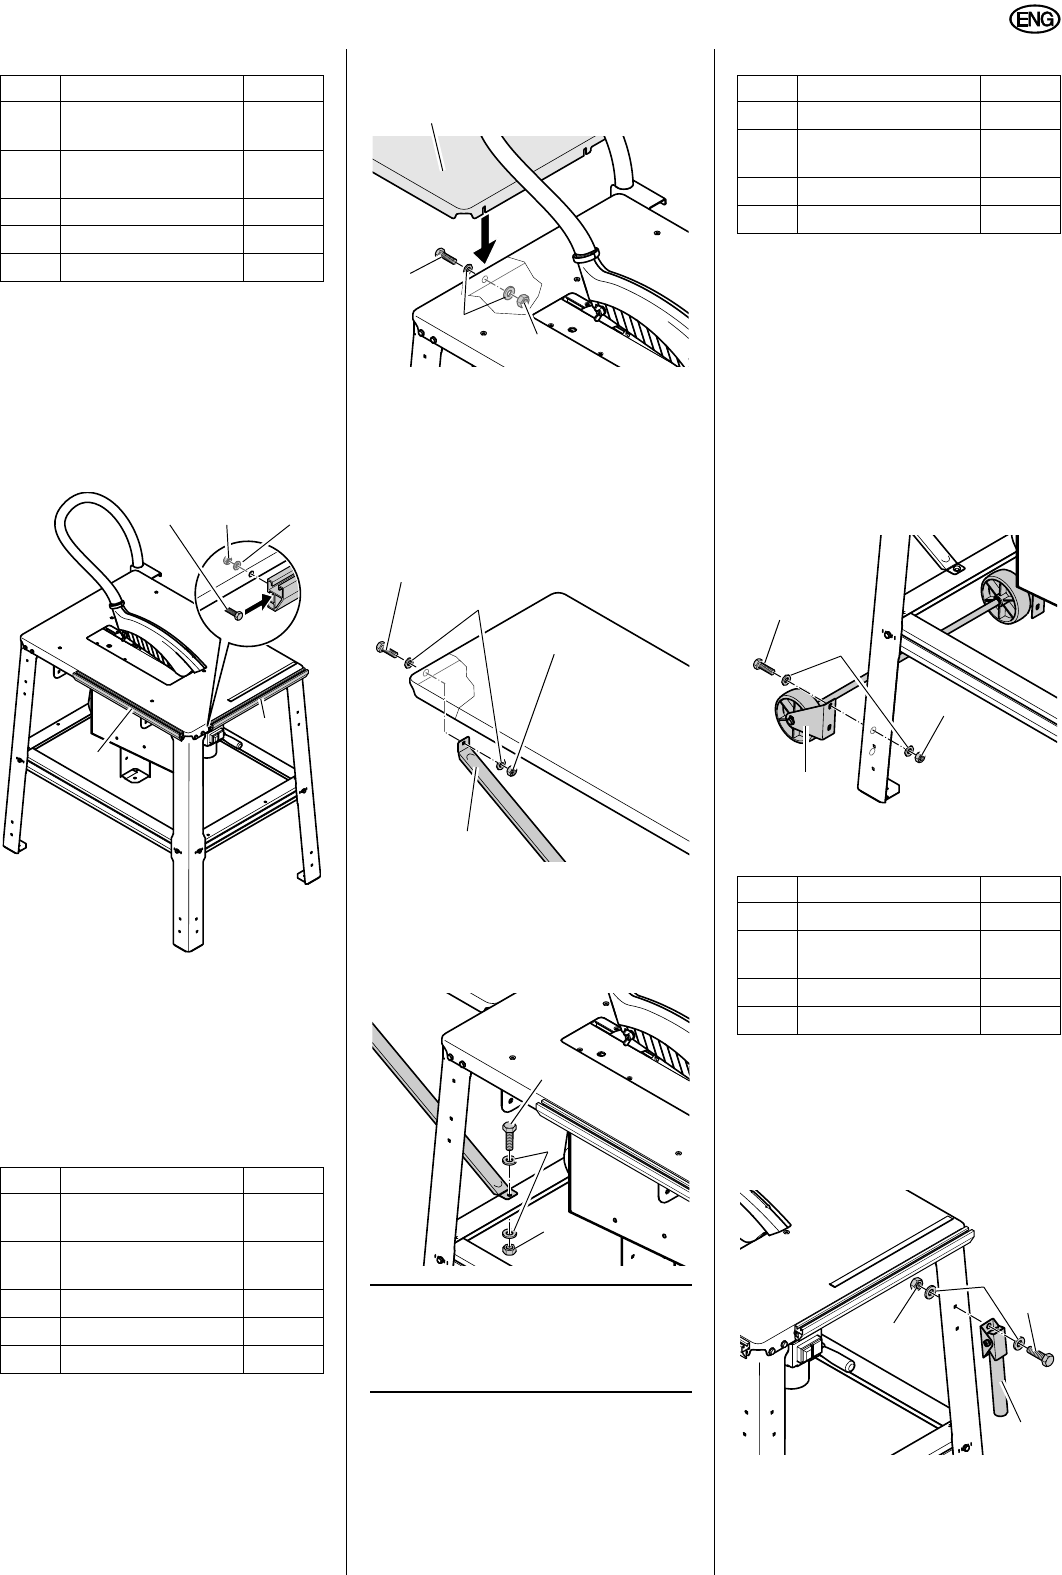
Guide extrusion installation
1. Slide two each hexagon head
screws (73) with the heads into a
guide extrusion.
2. Guide extrusion locations:
− short guide extrusion (74) at the
front of the saw table;
− long guide extrusion (75) at the
left-hand side of the saw table;
3. Adjust position of the guide extru-
sions so that the countersinking of
the extrusions will accommodate the
hexagon head screws of the legs.
4. Put one each washer (76) from
inside on the hexagon head screw,
then secure with hexagon nut (77).
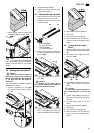
Rear table extension installation
A
Caution!
When installing the rear table
extension, both panel and support
struts need to be held as long as they
are only screwed to one end.
1. Install extension panel (78) with two
hexagon head screws (79), four
washers (80) and two hexagon nuts
(81) to the rear edge of the saw
table as illustrated.
2. Attach the struts (82) with one each
hexagon head screw (79), two
washers (80) and one hexagon nut
(81) to the extension panel.
The more sharply offset end of the
strut attaches to the panel, the other
end attaches to the short rear stan-
chion (see illustration).
3. Fasten both struts to the short stan-
chion at the rear of the saw, using
one each hexagon head screw (79),
two washers (80) and one hexagon
nut (81).
3
Note:
The top of the extension panel
must be parallel and level with the saw's
table top.
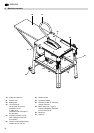
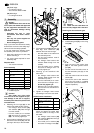
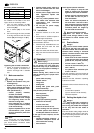
Wheel set installation
The wheel set attaches to the rear legs
of the saw.
1. Through each of the wheel set
brackets (83) two hexagon head
screws (84) with washers fitted (85)
must be put from the rear.
2. From inside put on washers (85)
and screw on hexagon nuts (86).
3. Adjust position of brackets so that
the wheels are approx. 1 mm above
the floor when the saw is standing
on all four legs.
4. Tighten hexagon nuts.
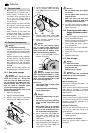
Transport handle installation
The transport handles are installed to
the front legs of the saw.
1. From the front put through each
transport handle (87) two hexagon
head screws (88)
with washers (89)
fitted.
2. Install transport handle in such way
that the tubes can be folded down.
3. From inside put on two each wash-
ers (89) and screw on hexagon nuts
(90).
Item Description Qty.
73
Hexagon head screw
M6 x 16
4
74
Guide extrusion,
short
1
75
Guide extrusion, long
1
76
Washer 6.4
4
77
Hexagon nut M6
4
Item Description Qty.
78
Plate, table rear
extension
1
79
Hexagon head screw
M6 x 16
6
80
Washer 6.4
12
81
Hexagon nut M6
6
82
Support
2
73
74
75
7677
78
79
80
81
82
79
80
81
79
80
81
Item Description Qty.
83
Wheel set
1
84 Hexagon head screw
M6 x 16
4
85 Washer 6.4
8
86 Hexagon nut M6
4
Item Description Qty.
87
Transport handle
2
88 Hexagon head screw
M6 x 16
4
89 Washer 6.4
8
90 Hexagon nut M6
4
83
84
85
86
87
88
89
90