


14
Accessories
Use only original Festool accessories and Festool
consumable material intended for this machine be-
cause these components are designed specifically
for the machine. Using accessories and consum-
able material from other suppliers will most likely
affect the quality of your working results and limit
any warranty claims. Machine wear or your own
personal workload may increase depending on the
application. Protect yourself and your machine, and
preserve your warranty claims by always using
original Festool accessories and Festool consum-
able material!
The order numbers of the accessories and tools can
be found in the Festool catalogue or on the Internet
under "www.festoolusa.com".
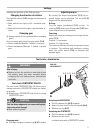
Systainer
Many Festool products are shipped in a unique sys-
tem container, called "Systainer". This provides
protection and storage for the tool and accessories.
The Systainers are stackable and can be inter-
locked together. They also can be interlocked atop
Festool CT dust extractors.
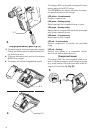
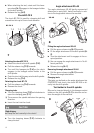
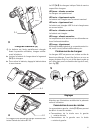
To open the Systainer
To lock the Systainer
To connect two Systainers
Place one Systainer on the top of the other (Fig.
[10
A]
).
The Systainers are connected and locked.
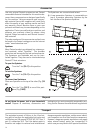
L
A new generation Systainer is connectable on
top of a previous generation Systainer by the
four latches of the previous Systainer.
Disposal
Do not throw the power tool in your household
waste!!
Dispose of machines, accessories and
packaging at an environmentally responsible recy-
cling centre. Observe the valid national regulations.
Transport
The equivalent amount of lithium in the LiIon bat-
tery pack is less than the applicable limit value and
certified as per UN manual ST/SG/ AC.10/11/rev. 3
part III, subsection 38.3. The LiIon battery pack is
therefore not subject to national and international
dangerous goods regulations, neither as an individ-
ual component nor as a fitted machine component.
However, dangerous goods regulations may apply
when several battery packs are transported, in
which case you may have to fulfil special conditions.
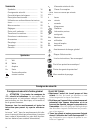
Turn the T-loc
[10-1]
to this position.
Turn the T-loc
[10-1]
to this position.
Turn the T-loc
[10-1]
to one of this posi-
tions (Fig.
[10 B]
).
open
lock
connect
connect
T-loc