


Basic Routing
Feed Direction Rules
WARNING! To reduce the risk of injury and loss of
control, always be aware of the proper router feed
direction. The proper router feed direction is a
Push-cut, and is described below.
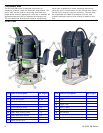
12 OF 2200 EB Router
Operating the router in the correct direction is important for
maintaining control over the router. The standard feed
direction for routing is that which opposes the cutter’s
rotation. This direction affords the operator the most control
over the router feed speed. If the router is operated in the
reverse direction, the router bit will tend to self-feed and
propel the router down the workpiece at a high feed rate.
To make it easier to remember the standard and reverse
feed directions, they are given descriptive names that
describe the behavior of the router bit during the cut. These
names are “Push-cut” for the standard direction, and
“Climb-cut” for the reverse direction.
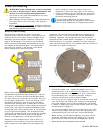
When making a push-cut, you are pushing
the router against the router bit’s rotation,
and therefore, the router pushes back
against your forward force. This is what
gives you more control.
When making a climb-cut, the router bit
wants to move in the same direction you
are pushing, and if the bit suddenly grabs
the wood, it can take off before you have
a chance to pull it back. This can lead to
a rapid loss of control. The term “Climb-
cut” comes from the action where the
router bit wants to “walk” or “climb” its
way down the edge of the workpiece.
The general rule for basic routing
is to always feed the router in the
push-cut direction. Climb-cutting is an advanced
routing technique and should be avoided by
inexperienced operators. This topic is briefly discussed
in the
Advanced Routing Techniques section on page 14.
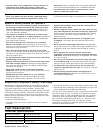
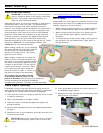
Push-Cut Routing
Always feed the router against the rotation of the bit. This
helps prevent the router from grabbing the wood and self-
feeding, resulting in a loss of control.
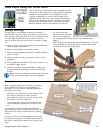
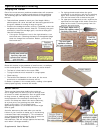
► When routing around the exterior of a shape, feed the
router counterclockwise (blue arrows shown below).
► When routing around the interior of a shape (such as
the yellow arrows shown below), feed the router
clockwise.
► To reduce tearout at the corners, begin routing across
the end grain first (as indicated with "Start Here" in
the figure below).
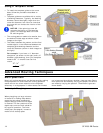
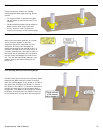
Fixed Depth Routing
Fixed depth routing is typically performed using router bits
with a guide bearing that rides along the edge of a workpiece.
The depth of cut is fixed before the router is engaged.
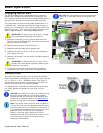
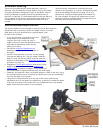
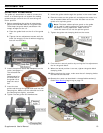
1. Verify that the router bit is properly secured, and the router
is ready for operation.
2. Secure the workpiece to a stable surface.
3. Lower the router to the desired depth and tighten the
plunge lock knob.
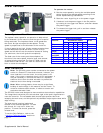
4. Set the router speed according to the speed settings table
on page 7.
5. Place the router on the workpiece, and make sure the bit is
not touching the wood.
CAUTION! Starting the router with the bit in contact
with the workpiece may cause a loss of control and
injury.
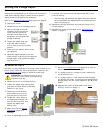
6. Firmly grasp both handles of the router and pull in
on the power trigger switch.
7. Advance the router through the cut according to the
feed direction rules above.