


14
Remember that saw blades are made for sawing and the cutting
edges are correspondingly sharp. So handle the saw blade
with care.
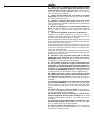
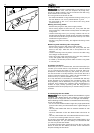
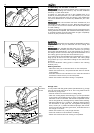
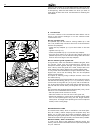
Saw blade removal:
- Remove the plug from the power supply socket.
- Set a cutting depth of about 30 mm, and press the saw
downwards to the stop. Hold the saw in this position for the
removal.
- Press the spindle stop (5.1). Using the hexagon socket
wrench supplied (5.8), loosen the fixing screw (5.7) for the
saw blade (5.4), and unscrew it the whole way.
- Remove the spring flange (5.6).
- Pull the saw blade away from the inner flange (5.9), and
draw it downwards out from the protective cover (5.2).
Saw blade insertion:
To guarantee trouble-free running of the saw blade, the
gripping surfaces on both flanges and on the saw blade must
be totally clean before insertion.
- Remove the plug from the power supply socket.
- Set a cutting depth of 30 mm, and press the saw downwards
to the stop. Hold the saw in this position for the insertion.
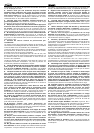
- Introduce the saw blade from below into the protective cover,
and set it with the bore on the inner flange.
The direction of rotation of the circular saw and
the prescribed direction of rotation of the saw blade must be
the same! Orientation is provided by the arrows on the saw
blade (5.5) and the protective cover (5.3).
- Set the spring flange so that both its knobs engage in the
recesses of the inner flange. Take care that the saw blade
lies flush with the gripping surfaces of both flanges.
- Press the spindle stop. Using the hexagon socket wrench,
tighten the fixing screw for the saw blade. The flanges are
designed as a safety coupling. therefore the fixing screw
must be tightly fastened.
- Remove the hexagon socket wrench. Release the spindle
stop.
4 Operation
Read and understand the safety instructions
before starting work!
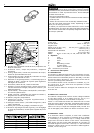
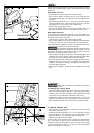
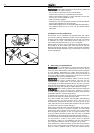
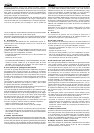
4.1 Setting the cutting depth
- Press the button of the cutting depth stop (6.3), and move it
along the cutting depth scale (6.1), until the cutting depth
marking (6.2) is at the required cutting depth (the scale
values apply to a saw blade diameter of 190 mm).
- Release the button of the cutting depth stop. If you now
push the unlocking block (9.1) forwards, you can press the
hand-operated circular saw down to the set cutting depth.
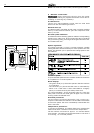
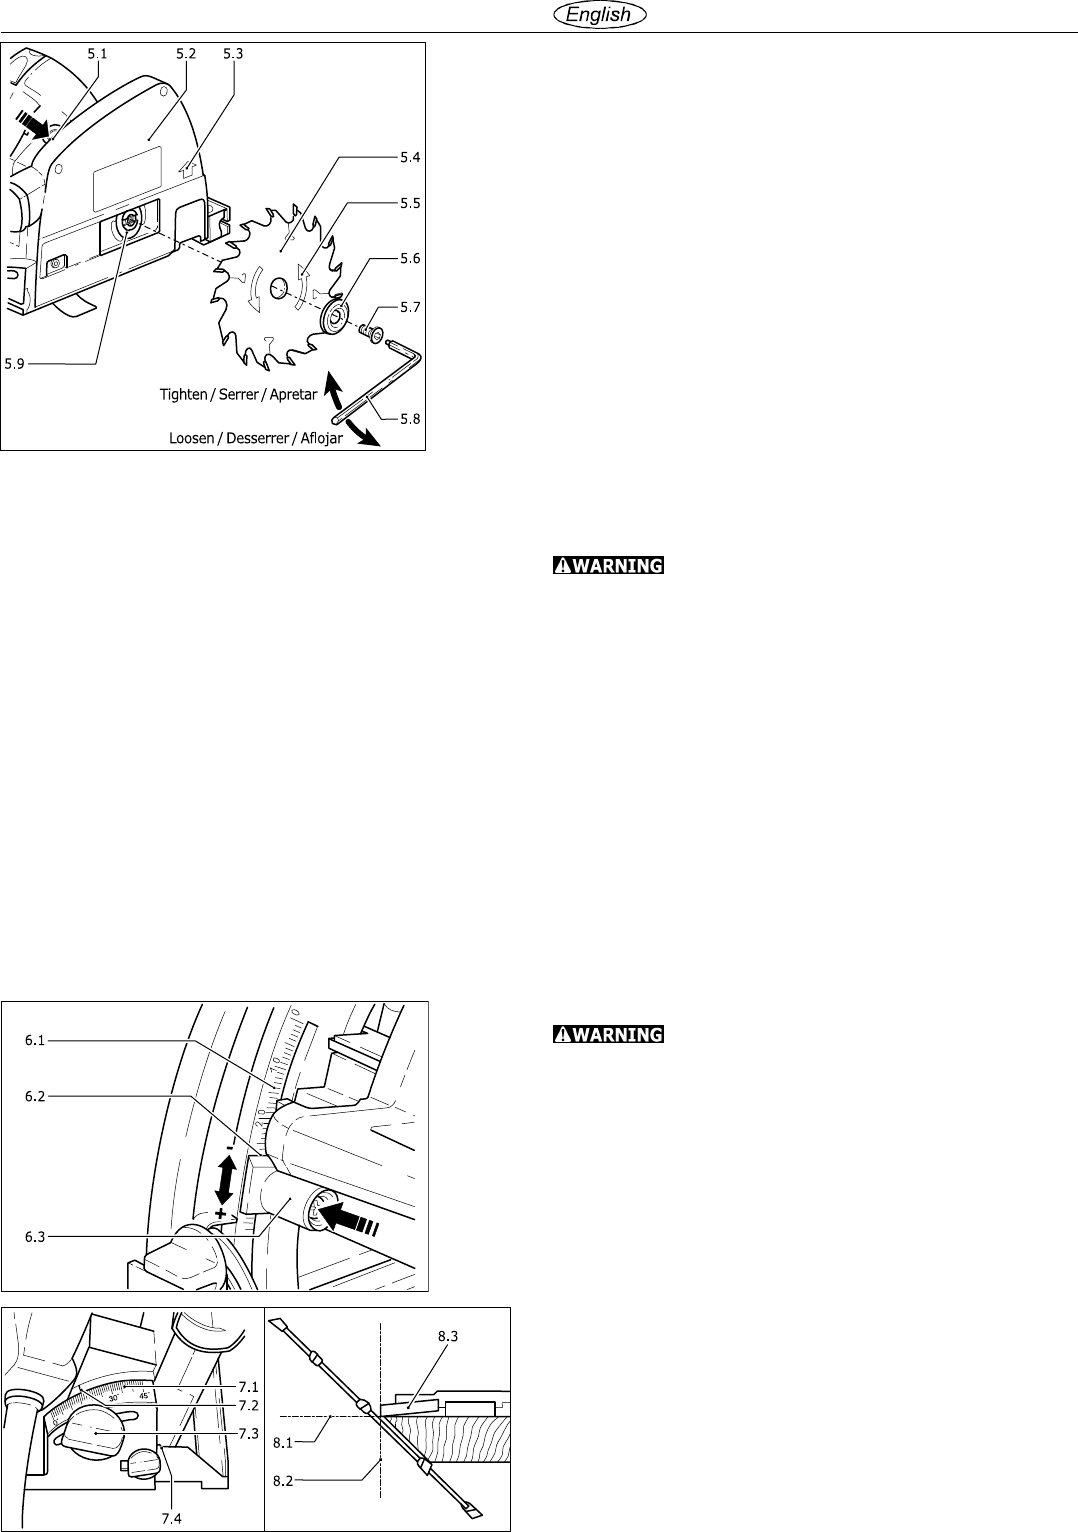
4.2 Setting diagonal cuts
- Before tilting, the saw table extension must be pulled
outwards to the slot (7.4)
- Loosen both the setscrews (1.5, 7.3). Tilt the saw until the
left-hand edge of the indicator (7.2) on the scale for the
diagonal setting (7.1) shows the required diagonal.
- Tighten both the setscrews again.
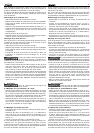
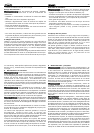
If the circular saw operates with a guide rail (see Chapter
6.2), the centre of gravity lies in intersecting points of the
contact surfaces of the guide rail (8.1) and the cutting edge
(8.2). With the both screws (1.14) you can re-adjust the final
position of the centre of gravity.