


13
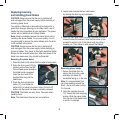
Note. Planing is easier if you incline the workpiece slightly
away from you so that you plane “downhill”.
6. The rate of planing and the depth of cut determine the
quality of the finish. For rough cutting, you can increase
the depth of cut, however to achieve a good finish you
will need to reduce the depth of cut and advance the tool
more slowly.
CAUTION. Moving the machine too fast may cause a poor
quality of cut and can damage the blades or the motor.
Moving the machine too slowly may burn or mar the cut.
The proper feed rate will depend on the type of material
being cut and the depth of the cut. Practice first on a scrap
piece of material to gauge the correct feed rate and the
cut dimensions.
CAUTION. Always use two hands to hold the planer.
CAUTION. Where possible, clamp the workpiece to
the bench.
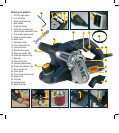
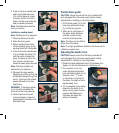
7. In between operations, you can rest the planer on a flat
surface with the blade protection foot (18) hinged down
to support the planer so that the blades are kept clear of
the surface.
Note. When planing the dust might settle in the front
extension shoe and block its movement. To clean out the
dust loosen the two clamping blocks and use a brush or
compressed air blower.
CAUTION. Wear eye protection if using a compressed air
blower.
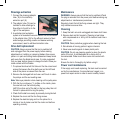
Adjusting the speed
The speed of the drum can be
adjusted to suit the material
being planned or sanded.
To adjust the speed, move the
variable speed control (19) until
you are satisfied that the speed
is what you need for the job in
hand. On the speed control dial (19); 1 is the lowest speed
and ‘max’ is the highest speed.
Note. For planing it is recommended to have the planer
running at full speed to obtain the cleanest possible planing
result. When sanding the speeds should be set from 1-6.
On maximum speed the unit will vibrate and be hard to hold.
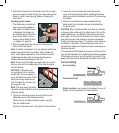
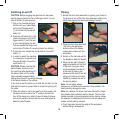
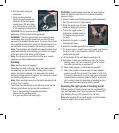
Chamfering
1. To make a chamfered cut as shown in fig.1, First align the
“v” groove (fig.2) in the front base (12) of the planer with
the corner edge of the workpiece.
2. Run the planer along the corner edge.
Fig. 1. Chamfered edge.
Fig. 2. Aligning the “v” groove
Full/Unlimited rebating
The GMC planer comes with an unlimited rebating
capability. When operating the planer to achieve a full
rebate the following instructions must be adhered for the
safety of the tool operator.
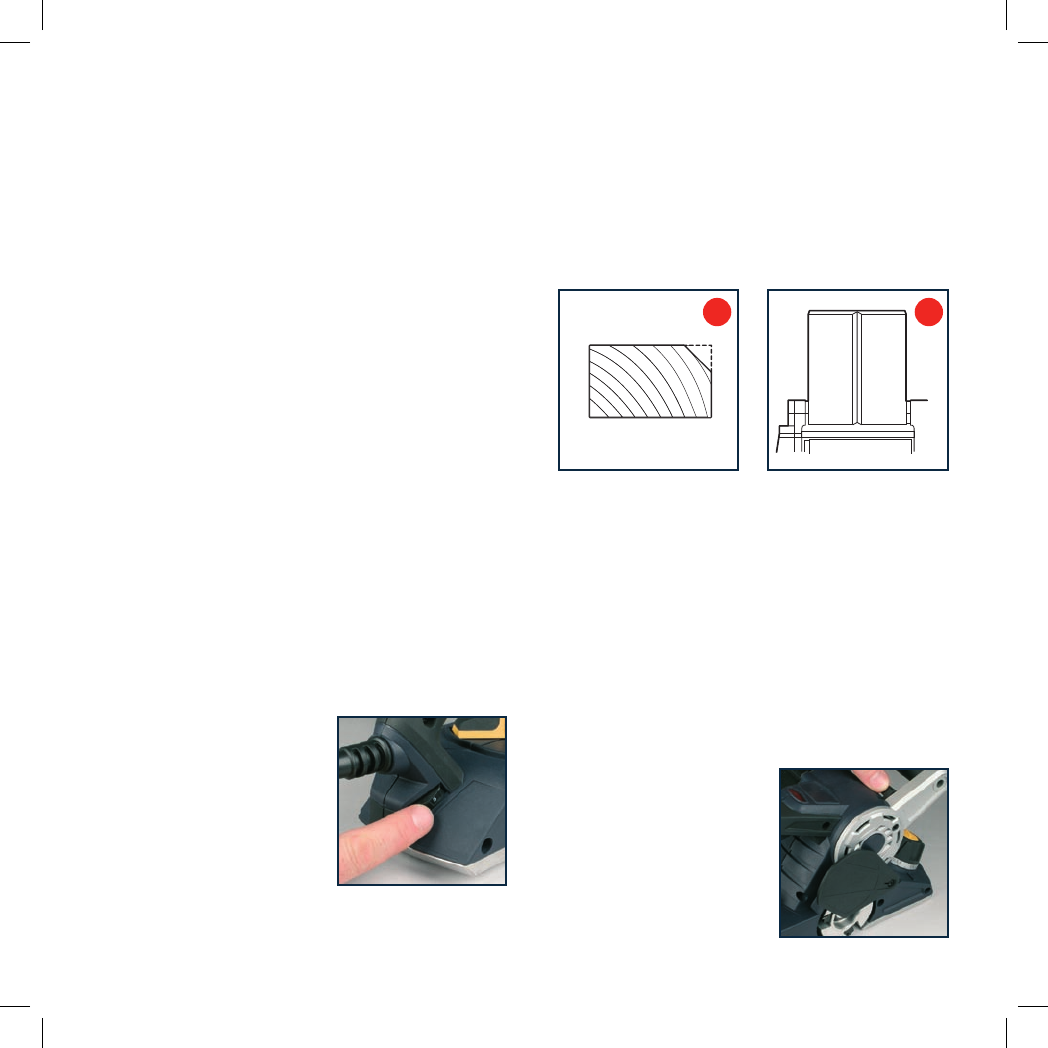
When you want to achieve a full rebate follow the steps 1
to 3.
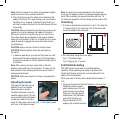
1. Using you thumb from the hand located on the front bail
handle (5) select the drum
guard release lever (23) and
push it forward. By pushing
forward on the drum guard
release lever (23) the blade
guard (22) will raise and
expose barrel/drum (10),
enabling full unlimited rebating.
1 2