


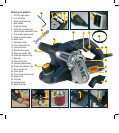

9
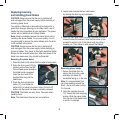
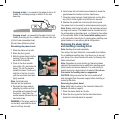
3. Now that the blade slot in the blade barrel (10) is empty
you can proceed to either turning over the existing planer
blade or install a new planning blade by following the
instructions.
Installing planer blades
1. The blades are reversible as
they have a cutting edge on
both sides. If a blade is worn
or damaged, the blade can
be removed and put the other
way around. Either turn the
existing planer blade (9) over
or replace it if required.
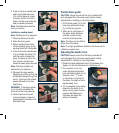
2. Slide the good blade face up onto the blade support
block of the blade barrel.
Note. If a blade is damaged, it can be replaced without the
need to replace the other two blades. When blades are
worn, they must be replaced as a set of three to prevent
unbalanced operation with consequential dangerous
vibration and possible damage to the tool.
Note. Ensure that the blades are positioned such so that
they are flush with the rebate side of the base to enable
correct rebating.
CAUTION. The blades must
not protrude out from the base
rebate side. This may cause an
injury and break the guard. There
has to be enough clearance so
that the blades do not touch the
drum guard in use.
Note: The ridge along the blade
should be on the blade face on the opposite side of the
clamping screws.
3. Tighten the clamping screws, ensuring that they are
tightened evenly in the following manner.
Tighten the two outside clamping screws snug tight,
then the middle screw.
Working in the same order, fully tighten all three screws.
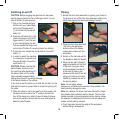
4. Loosen the vice and rotate the planer barrel and
move onto the next planer blade, repeating the above
blade removal and installation process for the remaining
two blades.
5. Once the new blades have been installed remove
blade barrel from vice and continue onto reinstalling
the planer drum.
CAUTION. When installing blades, first clean out all chips
or foreign matter adhering to the blade barrel (10) and the
blades themselves. Use blades of the same dimensions
and weight, or the barrel will oscillate and vibrate causing
poor planing action and possibly a machine breakdown.
Tighten the clamping screws (11) carefully when attaching
the blades to the planer. A loose clamping screw could
be extremely dangerous. Regularly check to see they are
tightened securely.
It is essential that the blades sit square in the slot and that
they are fully inserted prior to tightening the clamping screws.
If the blades protrude or are not square, they could hit the
casing with serious risk to the operator and others in the vicinity.
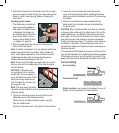
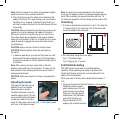
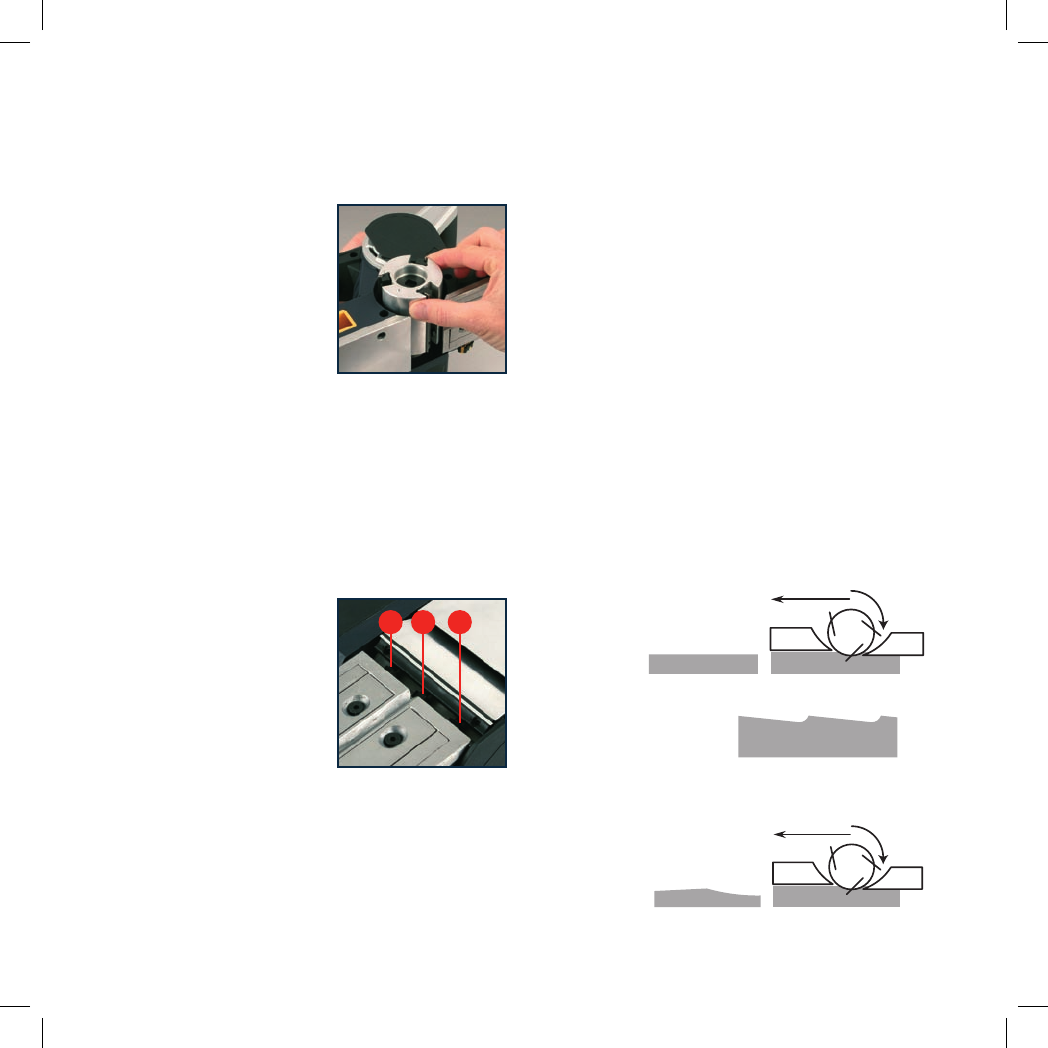
Correct setting
• Correct setting
• Clean smooth cut.
• Nicks in surface – as caused by the edge of one or all
blades not being parallel to the rear base line.
1 3
2
(a)
(b)
(a)
(b)
(a)
(b)
(a)
(b)
(a)
(b)
(a)
(b)
(a)
(b)
(a)
(b)
(a)
(b)