Troubleshooting
10 309977H
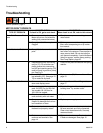
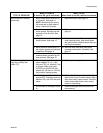
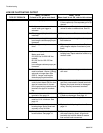
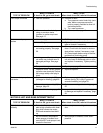
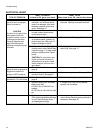
LOW OR FLUCTUATING OUTPUT
TYPE OF PROBLEM
WHAT TO CHECK
If check is OK, go to next check
WHAT TO DO
When check is not OK, refer to this column
Low Output 1. For worn spray tip. 1. Follow Pressure Relief Procedure, page
6, then replace tip. See separate gun or tip
manual.
2. Verify pump does not continue to
stroke when gun trigger is
released.
2. Service pump. Check piston and intake
valves for wear or obstructions. See 20.
3. Filter clogged (If optional filter is
installed).
3. Relieve pressure. Check and clean filter.
4. Material hose length. Longer
hose length reduces sprayer per-
formance.
4. Replace with hose length less than speci-
fied maximum.
5. Pump hopper adapter connec-
tions.
5. Tighten any loose connections. Replace
pump hopper adapter if cracked or punc-
tured.
6. Electrical supply with volt meter.
Meter must read:
210-255 Vac for 220-240 Vac
models;
85-130 Vac for 100-120 Vac
models
Low voltages reduce sprayer per-
formance.
6. Reset building circuit breaker; replace
building fuse. Repair electrical outlet or try
another outlet.
7. Extension cord size and length;
must be at least 1.0mm
2
(12awg)
wire and no longer than 90m
(295 ft). Longer cord lengths
reduce sprayer performance.
7. Replace with a correct, grounded exten-
sion cord.
8. Leads from motor to pressure
control circuit board (38) for dam-
aged or loose wires or connec-
tors. Inspect wiring insulation and
terminals for signs of overheat-
ing.
8. Be sure male terminal blades are centered
and firmly connected to female terminals.
Replace any loose terminal or damaged
wiring. Securely reconnect terminals.
9. For loose motor brush leads and
terminals. See page 14.
9. Tighten terminal screws. Replace brushes
if leads are damaged. See page 14
10. For worn motor brushes which
must be 1/4 in. minimum. See
page 14.
10. Replace brushes. See page 14.
11. For broken and misaligned motor
brush springs. Spring must rest
squarely on top of brush.
11. Replace brush if spring is broken. See
page 14.
12. Motor brushes for binding in
brush holders. See page 14.
12. Clean brush holders, remove carbon dust
with small cleaning brush. Align brush
lead with slot in brush holder to assure
free vertical brush movement.


