


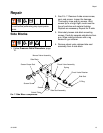


Repair
14 311322K
5. Remove check valve and clean with gun
cleaner. Inspect and replace if damaged.
6. Remove side seal and o-ring. Replace if
damaged.
7. Clean all components thoroughly. Use
brass brushes or drill bits to remove resid-
ual chemical from the gun block. Thorough
cleaning ensures unrestricted movement of
mixing chamber. Use cotton swabs soaked
in gun cleaner if necessary.
8. Repeat steps 4-7 for R-side block.
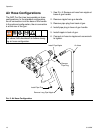
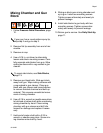
9. Place check valve assembly in check valve
retainer and thread into side block finger
tight. Use a 1/2 in. wrench to tighten
retainer 1/4 turn and no more. See FIG. 8.
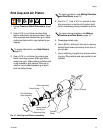
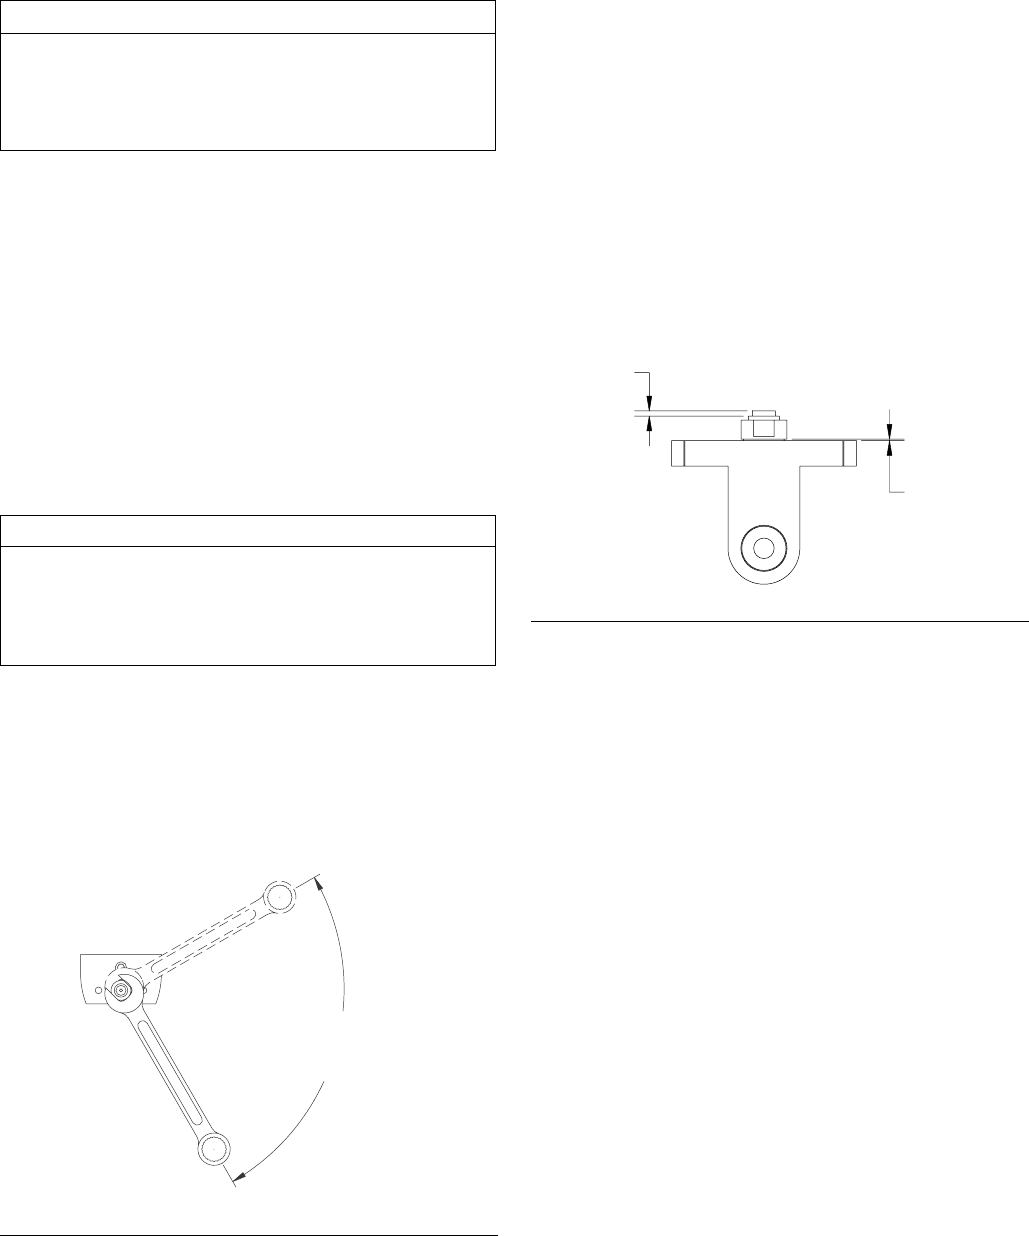
10.Check side seal for wear by measuring how
far seal protrudes from side seal assembly
insert. A worn side seal promotes chemical
leakage. Replace side seal if it protrudes
0.065 in. (1.65 mm) or less. In addition,
check seal for scratches, which also pro-
mote leakage. See FIG. 9.
11.Inspect check valve assembly for damage
by measuring gap between mating surface
of side block and bottom edge of side seal
assembly insert. If gap measures 0.018 in.
(.46 mm) or less, the check valve assembly
has been crushed due to overtightening
and it must be replaced. See FIG. 9.
12.Place spring in check valve retainer.
13.Lightly coat o-ring with grease and install
on side seal.
14.Push side seal into the check valve retainer
until o-ring engages detent groove and
remains in place.
15.Install side blocks to gun body with two
mounting screws. Tighten screws alter-
nately and evenly to prevent leakage.
16.Return gun to service. See Daily Start-Up,
page 11.
CAUTION
Clean side seals with a wooden or plastic
scraper or a brass brush. Do not use a pock-
etknife, razor blade, or any tool that may
scratch surface.
CAUTION
Do not overtighten check valve retainer.
Tightening more than 1/4 turn can damage
check valve or retainer and cause leaking
when gun is pressurized.
FIG. 8. Tighten Check Valve Retainer
One quarter of a
full turn (max.)
FIG. 9: Side Seal
.018 in.
(0.46 mm)
.065 in.
(1.65 mm)