


820-133 11
Startup
CAUTION
The
wallet sized warning card provided with the gun
should
be kept with the operator at all times. The
card
contains important information on reducing the risk of
a fluid injection injury, and treatment information
should an injection injury occur. Additional copies of
this
card are available at no cost.
WARNING
Pressure Relief Procedure
To reduce the risk of injury, including fluid injection,
splashing
in the eyes or on the skin,
injury from mov
-
ing
parts, or electric shock, always follow this proce
-
dure
whenever you shut
of
f the sprayer
, when check
-
ing or servicing any part of the spray system, when
installing,
cleaning or
changing spray tips, and when
-
ever
you stop spraying.
1.
Shut of
f the sprayer and unplug it.
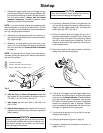
2. Hold a metal part of the gun firmly to the side of
a
grounded metal pail, and trigger the gun into the
pail
to relieve pressure.
3.
Lock the trigger safety lever
.
4. Turn the bypass valve counterclockwise one
turn
to drain paint back into the pail.
If
you suspect that the spray tip or hose is
completely
clogged,
or that pressure has not been fully relieved
after following the steps above,
very slowly loosen
the tip guard retaining nut or hose end coupling and
relieve pressure gradually, then loosen completely.
Now
clear the tip or hose obstruction.
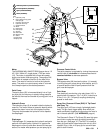
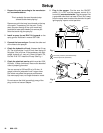
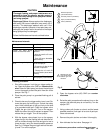
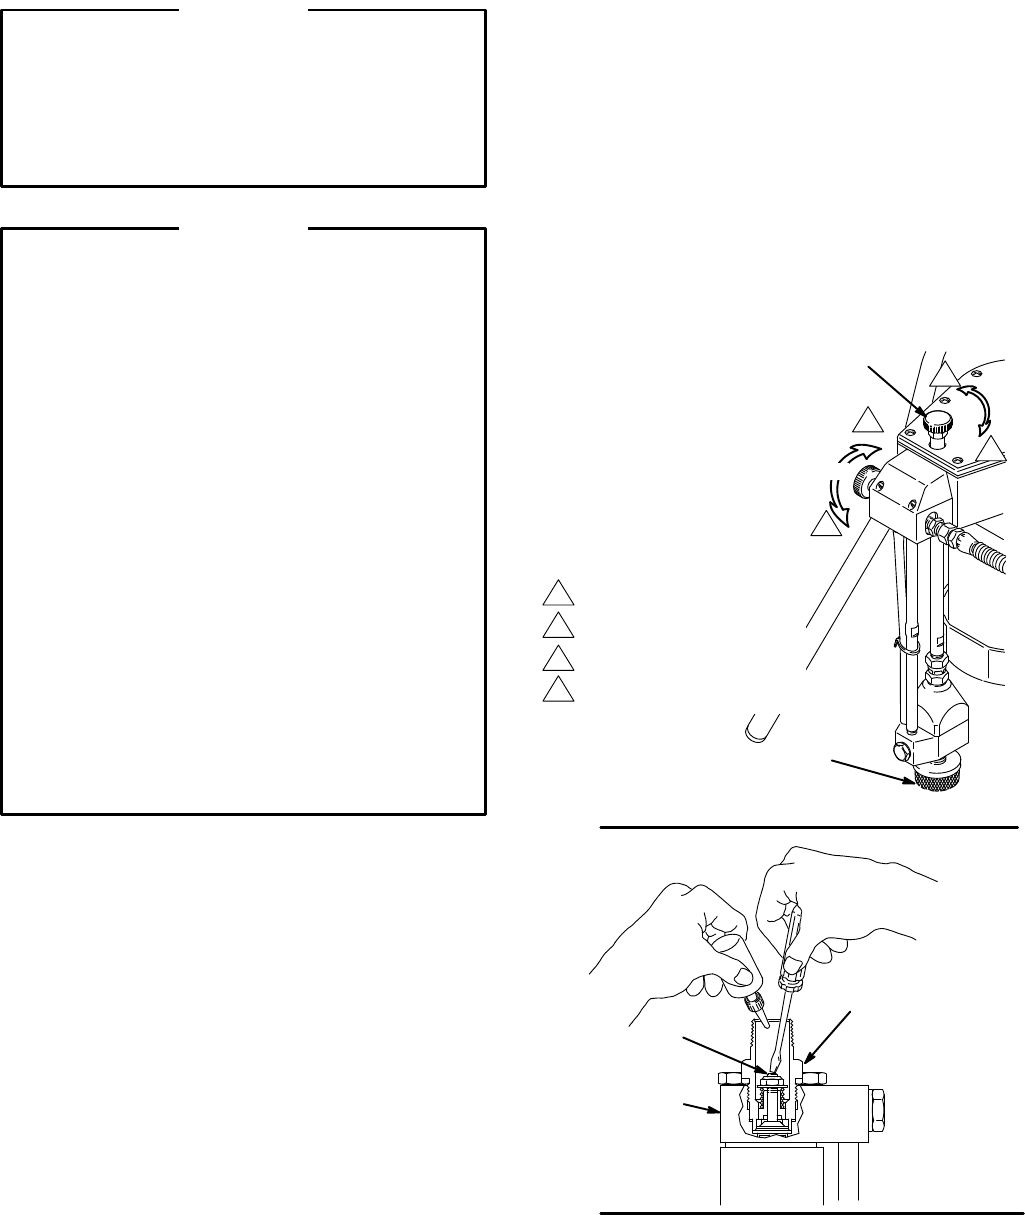
1. Open the bypass valve (66) ONE turn counter-
clockwise.
Do not place the pump intake in the
pail
yet.
See Fig. 3.
2. Turn the pressure control fully (4) clockwise to in-
crease
pressure. See Fig. 3.
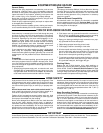
3. Remove the inlet strainer (27) and place your hand
over
the inlet valve to be sure it is
drawing a vacuum.
NOTE: If the inlet valve (26) is not drawing a vacuum,
turn
the sprayer OFF
. T
urn the sprayer over
. Press down
on the stem (A) inside the inlet
valve lightly with a small
screwdriver,
and pour about a teaspoon of mineral spirits
or solvent into the valve. See Fig. 4. Release the valve
and
turn the sprayer upright. With the pressure turned
up,
turn
on the sprayer
. This should free any
sticking parts in
the pump. Now check again for a vacuum. Shut off the
sprayer
and install the inlet strainer (27).
4. Place the paint pump assembly into a properly pre-
pared
5 gallon pail of paint.
5. Turn
the sprayer ON and
allow the paint to circulate
through
the bypass valve (4) for one or two minutes.
NOTE: If the paint does not circulate back into the
pail,
turn
down the pressure and turn the motor on
and of
f sev
-
eral
times to help prime the sprayer
.
6. Turn the bypass valve (66) clockwise (finger tight)
to
close it; this allows the pump to build up pressure.
Fig.
3
Fig. 4
0271
0272
27
66
4
1
3
4
2
Decrease
pressure
(counterclockwise).
Increase pressure (clockwise).
Open (counterclockwise).
Close (clockwise).
1
3
4
2
22
26
A
startup procedure continued on page 12