Service
313516G 25
Reassembly
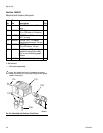
1. Non-circulating guns only: Lubricate the
backup ring (20†) and o-ring (21†) and
install them on the fluid outlet port plug
(19). Install the plug in the fluid outlet port
of the fluid housing (2). See FIG. 21.
2. All guns: Reinstall the gasket (22) in the
fluid housing (2).
3. Install the o-rings (8*, 9*) on the piston (3).
Install the two o-rings (10*, 11*) on each of
the piston stems (T). Lubricate all the
o-rings, the piston, and the piston stems.
4. Remove the protective paper from the
sticky side of the gasket (12*) and adhere
the gasket to the bottom of the piston hous-
ing (1), making sure the three holes in the
gasket are properly aligned with the match-
ing holes in the housing.
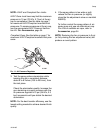
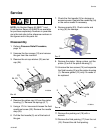
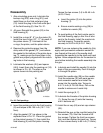
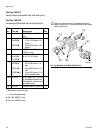
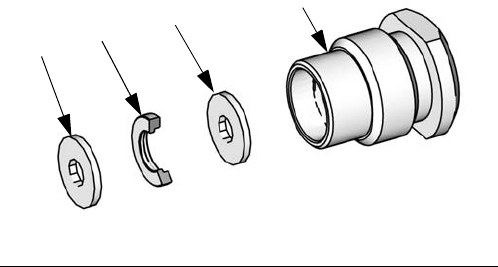
5. Lubricate the washers (45†) and spacer
(46†). Insert them into the packing nut (16)
as shown in FIG. 20, The step on the
spacer faces into the packing nut.
6. Insert the packing nut into the fluid housing
(2) and torque to 95-105 in-lb (10.7-11.8
N•m).
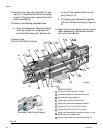
7. Align the gasket (15*) as shown in the
exploded view in FIG. 21. Place the gasket
on the piston housing (1), then install the
fluid housing (2) onto the piston housing.
Torque the two screws (14) to 35-45 in-lb
(4.0-5.1 N•m).
a. Insert the piston (3) into the piston
housing (1).
b. Ensure nozzle sealing o-ring (36) is
installed on nozzle (23).
8. To avoid galling of the fluid nozzle seat in
the fluid housing, apply a thin film of lubri-
cant to the threads. Install the nozzle into
the fluid housing. Torque the nozzle
securely to 35-45 in-lb (4.0-5.1 N•m).
NOTE: If you are replacing the needle tip (5a),
apply semi-permanent anaerobic sealant to
two threads at the end of the needle shaft.
Assemble the needle tip to the shaft and hand
tighten. Allow adequate time for the sealant to
cure before installing the needle assembly into
the gun.
9. Lubricate and install the needle (5) into the
back of the gun assembly. Push it straight
in through the piston.
10.Install the needle stop (29) on the needle.
Coat the setscrew (30) with semi-perma-
nent anaerobic sealant and install the
screw into the needle stop. Torque to
6.5-7.5 in-lb (0.73-0.85 N•m). Pull on the
needle to make sure it seats fully.
11.Install the springs (6, 7).
12.Lubricate the threads of the piston housing
(1). Screw the cap (4) onto the housing
until it bottoms out.
13.Install the air cap (24) and air cap retainer
(25).
14.Reinstall the gun on the manifold using the
four screws (13). Start the threads of all
four screws. Tighten the front two screws
first, and then tighten the back two. Torque
all four screws evenly to 65 in-lb (7.3 N•m).
FIG. 20. Fluid packings
45
46
45
16
ti17603a


