


Operation
311001G 11
How the Air-Assisted Spray Gun
Operates
The air-assisted spray gun combines airless and air
spraying concepts. The spray tip shapes the fluid into a
fan pattern, as does a conventional airless spray tip. Air
from the air cap further atomizes the fluid and completes
the atomization of the paint tails into the pattern to pro-
duce a more uniform pattern. The width of the pattern
can be adjusted by the pattern adjustment valve.
The air-assisted spray gun differs from an air spray gun
in that increasing the pattern air reduces the pattern
width. To increase the pattern width, use less pattern air
or a larger size tip.
The spray gun has a built-in lead and lag operation.
When triggered, the gun begins emitting air before the
fluid is discharged. When the trigger is released, the
fluid stops before the air flow stops. This helps assure
the spray is atomized and prevents fluid buildup on the
air cap.
Spray Pattern Adjustment
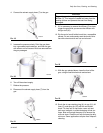
1. Do not turn on the gun air supply yet. Set the fluid
pressure at a low starting pressure. If a fluid pres-
sure regulator is installed, use it to make adjust-
ments.
If your system does not have a fluid regulator, the
fluid pressure is controlled by the air regulator sup-
plying the pump, per the formula below:
2. Trigger the gun to check the atomization; do not be
concerned about the pattern shape yet.
3. Slowly increase the fluid pressure, just to the point
where a further increase in fluid pressure does not
significantly improve fluid atomization.
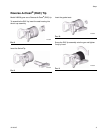
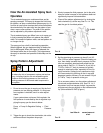
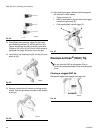
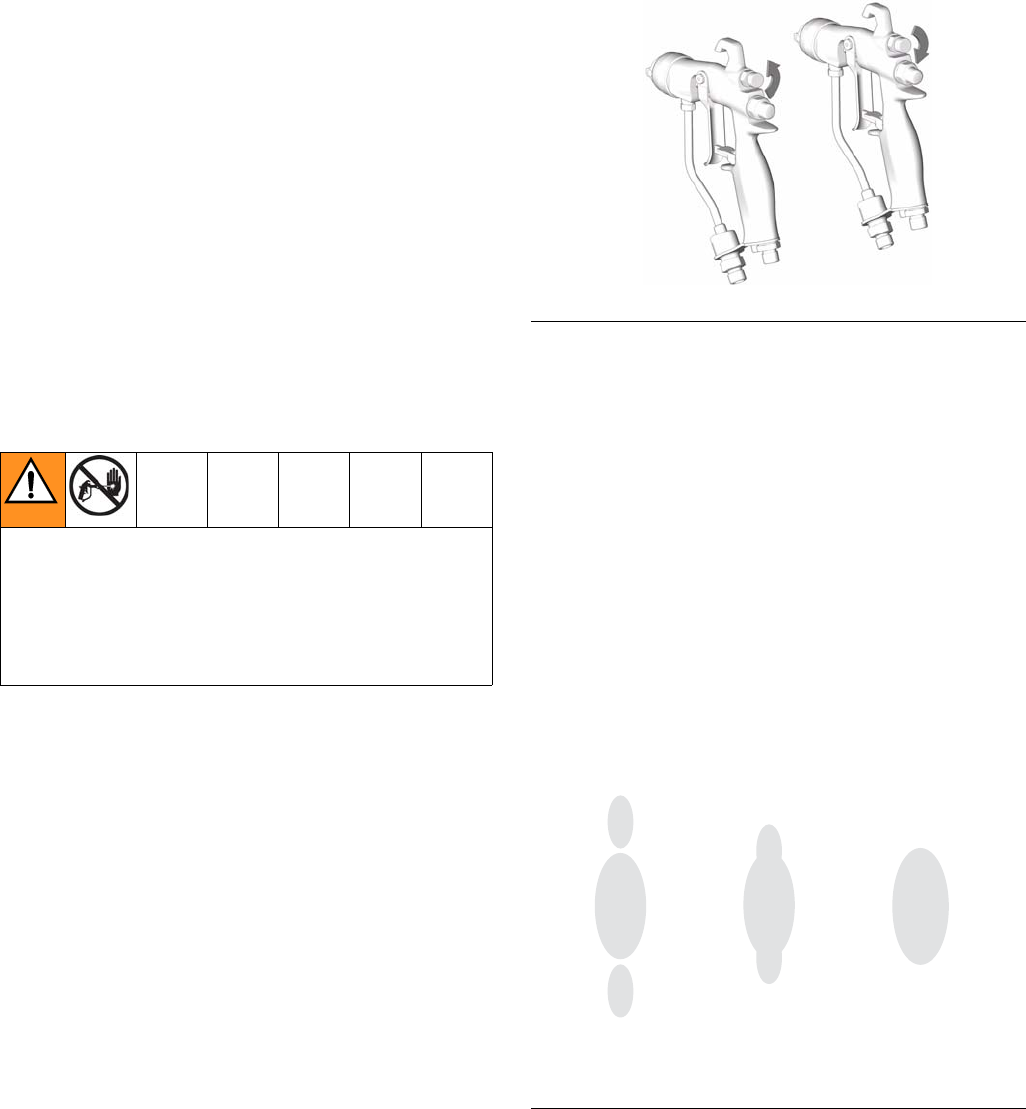
4. Close off the pattern adjustment air by turning the
knob clockwise (in) all the way. See F
IG. 14. This
sets the gun for its widest pattern.
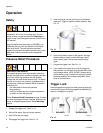
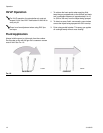
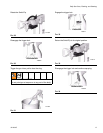
5. Set the atomizing air pressure at about 5 psi (3.5
kPa, 0.35 bar) when triggered. Check the spray pat-
tern, then slowly increase the air pressure until the
tails are completely atomized and pulled into the
spray pattern. See F
IG. 15. Seven to 10 psi (4.9 to
7.0 kPa, 0.49 to 0.7 bar) air pressure is typically
enough to atomize the tails, especially for low vis-
cosity materials. Setting the air pressure too high
will cause material to build up on the air cap and
decrease transfer efficiency. Do not exceed 100 psi
(0.7 MPa, 7 bar) air pressure to the gun.
For a narrower pattern, turn the pattern adjustment
valve knob counterclockwise (out). See F
IG. 14. If
the pattern is still not narrow enough, increase the
air pressure to the gun slightly or use a different size
tip. (Not available for RAC tip guns.)
SKIN INJECTION HAZARD
To reduce the risk of component rupture and serious
injury, including injection, do not exceed the gun’s
maximum fluid working pressure or the maximum
working pressure of the lowest rated component in
the system.
Pump
Ratio
x Pump Air Regulator Setting = Fluid
Pressure
FIG. 14
F
IG. 15
TI6559A
OPEN
CLOSE
no air
too little air correct amount
of air
TI0792A