


Tools Needed: Qty
Page 30
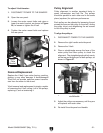
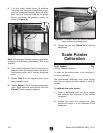
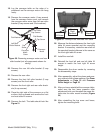
Factory Setting:
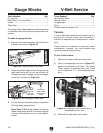
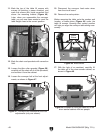
Figure 34
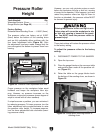
Pressure Roller
Height
Figure 35.
Figure 34.
Raising the pressure rollers too high to min-
imize snipe will cause the workpiece to slip
or kick out, causing a hazard to the opera-
tor. You MUST lower the pressure rollers to
prevent injury!
To adjust the pressure rollers to the factory
setting:
1.
2.
3.
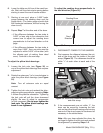
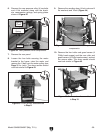
Figure 31
4.
Figure 35