-26-
G0513X/G0514X/G0514X3 Extreme Series Bandsaw
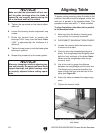
7. Tighten the lock handle.
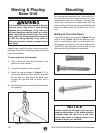
8. Pull the fence handle up and place the fence
assembly on the fixed rail as shown in
Figure
26.
Figure 26. Correctly installed fence.
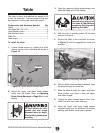
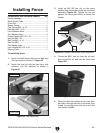
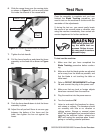
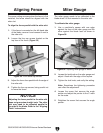
6. Slide the resaw fence over the moving plate,
as shown in
Figure 25, so the moving plate
fits inside the channel of the resaw fence.
Figure 25. Attaching resaw fence to standard
fence.
9. Push the fence handle down to lock the fence
assembly in place.
10. Adjust the rail pad until there is an even gap
between the bottom of the fence and the
table, then tighten the hex nut against the
fence.
Moving
Plate
Lock Handle
To test run the machine:
1. Make sure that you have completed the
Blade Tracking procedure before continu
-
ing.
2. Make sure that the blade guides are adjusted
as far away from the blade as possible, and
that the blade is not touching the table or
table insert.
3. Refer to CIRCUIT REQUIREMENTS on Page
14, and connect the plug to the power cord.
4. Make sure that any tools or foreign objects
have been removed from the machine.
5. Plug the machine into the power source.
6. Turn the bandsaw ON.
7. Listen to and watch the bandsaw for abnor-
mal noises or actions. The bandsaw should
run smoothly with little or no vibration or
rubbing noises. Strange or unusual noises
MUST be investigated and corrected before
operating the machine further—always turn
OFF and unplug the machine when investi-
gating or correcting potential problems.
Once the assembly is complete and you have
finished the Blade Tracking procedure, you
need to test run the machine to continue with the
remainder of the adjustments.
If, during the test run, you cannot easily locate
the source of an unusual noise or vibration, stop
using the machine immediately, then contact our
service department for further assistance.
Test Run
Wear safety glasses dur-
ing the entire test run
process. Failure to com
-
ply may result in serious
personal injury.
Resaw Fence


