G8220 Wet/Dry Bench Grinder -9-
SECTION 4: ASSEMBLY
Tool Rest/Eye Shield
To assemble the Eye Shield:
1. Take the L-shaped bracket and position it
so the holes line up and the bracket is on
the underside of the plastic shield.
2. Use the two (2) combination head screws,
washers and nuts to secure the L-bracket
in place.
3. Attach the assembled Eye Shield to the
right side of the wheel guard using the
short hex head bolt and washer.
Water Reservoir
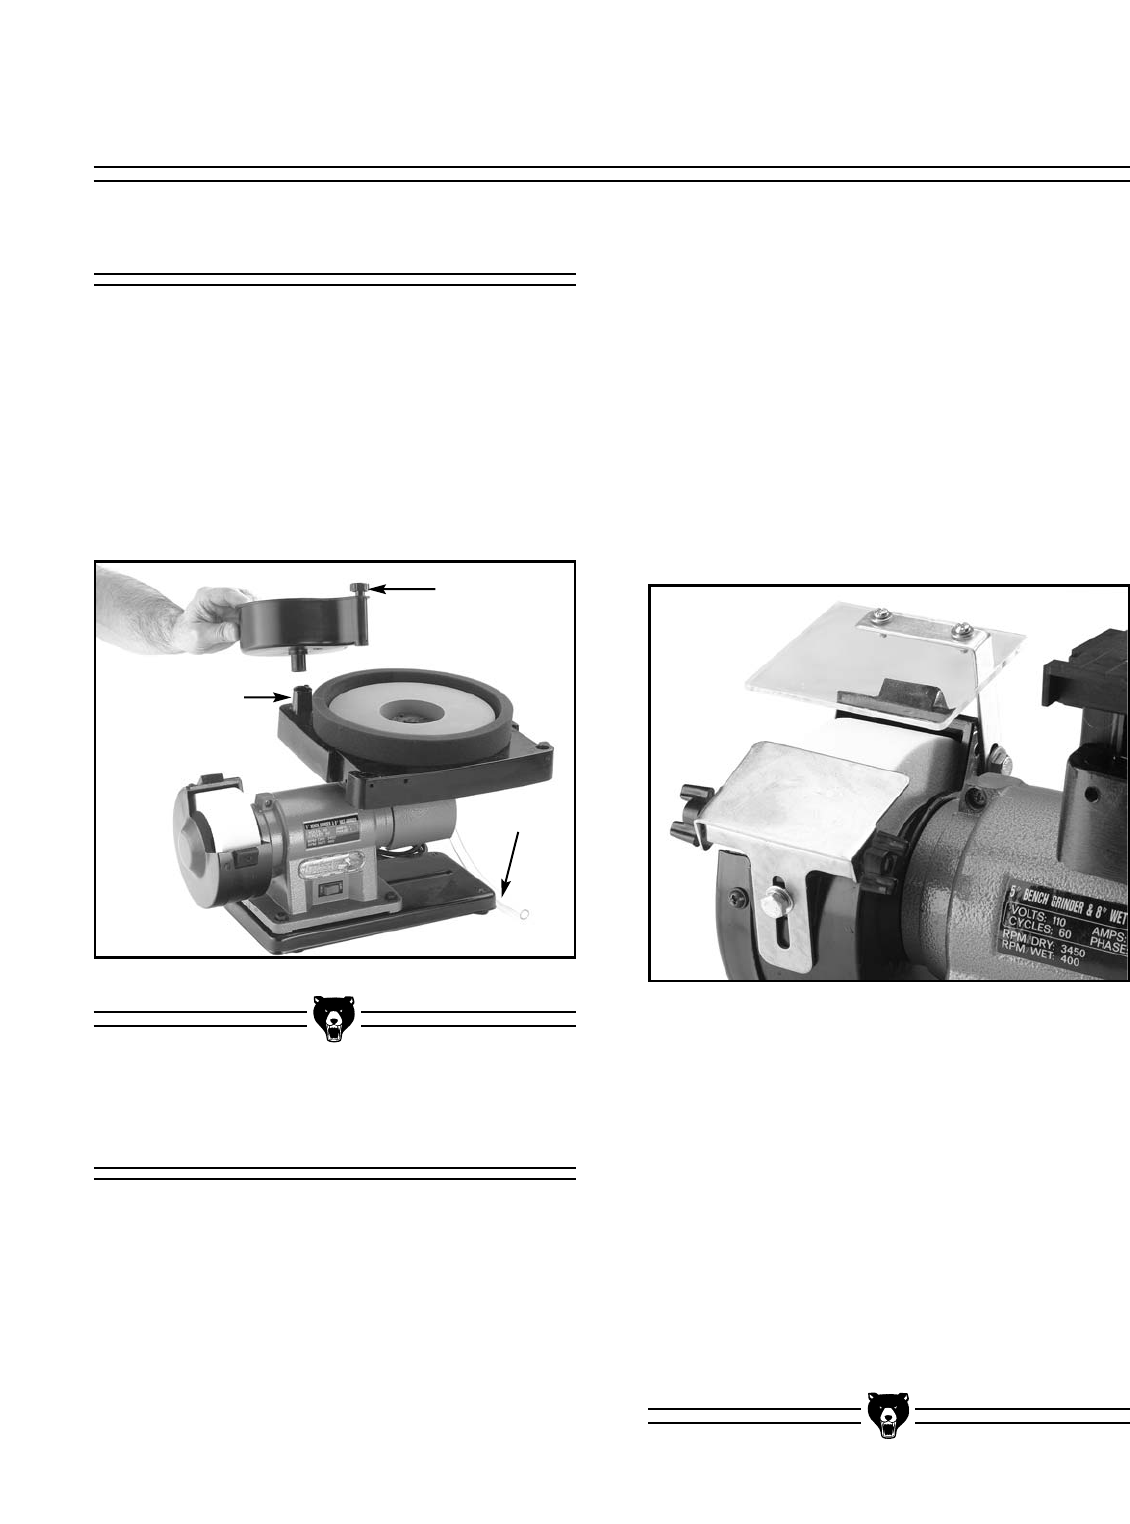
Insert the water valve into the hole in the Water
Reservoir. Attach the Water Reservoir to the
post behind the wet grinding wheel. Position the
water drip over the center of the grinding surface.
Attach the clear plastic drain pipe to the fitting
which in on the underside of the wet wheel hous-
ing.
Figure 2. Mounting water reservoir.
The Tool Rest attaches to the front of the dry
grinding wheel. It is adjustable for height and for
angle to provide a steady platform for a variety of
grinding angles and sizes. Refer to Figure 3 for
general orientation of the Tool Rest and Eye
Shield.
Figure 3. Dry wheel guard and rest positioning.
To assemble the Tool Rest:
1. Take the T-shaped bracket and position it
between the tabs on the underside of the
Tool Rest.
2. Secure the bracket to the rest with two (2)
hex head bolts and the wing nuts which
have a plastic knob.
3. Attach the assembled Tool Rest to the
Wheel Guard using a hex head bolt and
washer.
Water Valve
Mounting Post
Drain Pipe


